This article was co-authored by Katya Gudaeva and by wikiHow staff writer, Hannah Madden. Katya Gudaeva is a Professional Makeup Artist and the Founder of Bridal Beauty Agency based in Seattle, Washington. She has worked in the beauty industry for over 10 years and worked with companies such as Patagonia, Tommy Bahama, and Barneys New York and with clients such as Amy Schumer, Macklemore, and Train.
There are 19 references cited in this article, which can be found at the bottom of the page.
This article has been viewed 19,823 times.
When you think of the The Great Gatsby, you probably think of the classic 1920s flapper makeup that the women characters famously wore. Smokey eyes, bold lips, and smooth skin define the style of this era. If you’d like to copy the characters’ looks from this classic tale, you can use makeup items you probably already own to put together a Gatsby-inspired makeup look. You'll look like you just walked out of a party in the 1920s!
Steps
Applying Foundation, Concealer, and Blush
-
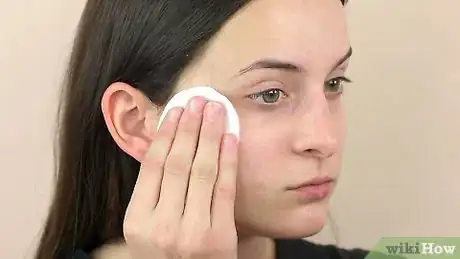
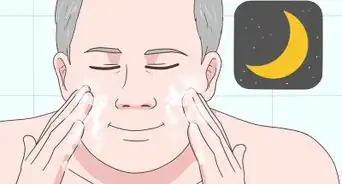
1Wash and moisturize your face to prep your skin for makeup. Wet your face with warm water and apply a gentle cleanser to remove any oil and dirt. Rinse it off and pat your face dry with a towel, then apply a thin layer of moisturizer all over your face. Wait about 10 minutes for your moisturizer to soak in before you start your makeup.[1]
- Moisturizing your face will make your skin less oily so your foundation has a matte finish.
-
2Apply primer so your foundation goes on well and stays in place.[2] Dab a pea-sized amount of skin primer onto your fingers and then rub it onto your skin. Pay special attention to the areas of your face that get oily, like your nose, cheeks, and forehead.[3]
- Primer helps to close up your pores and creates a solid base for your makeup to sit on top of.[4]
Advertisement -
3Use a sponge to pat and blend matte foundation into your skin. Be sure to use a matte foundation that matches your skin tone. Dab a few dots of foundation onto your cheeks, chin, and forehead. Use a blending sponge or brush to pat the foundation onto your skin in small, circular motions until your entire face is blended.[5]
- Matte skin creates a neutral base so your eyes and lips can stand out.
-
4Dab concealer under your eyes and on blemishes and blend it well.[6] Pat on a few swipes of concealer to brighten up your under eyes. Add concealer over any blemishes on your skin to create an even base for the rest of your makeup.[7]
Tip: Don’t use the concealer to contour your face at all, since that style wasn’t popular in the 1920s.
-
5Dust your face with translucent powder to set and mattify your look. Pick up some translucent powder with a stiff makeup brush or sponge. Pat it all over your face to set your foundation, paying special attention to your forehead, nose, cheeks, and chin.[8]
- A matte finish is super important for a Gatsby makeup look, since that was the style in the 1920s.
-
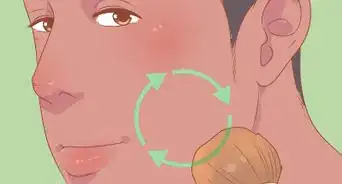
6Pat on some pink blush to highlight your cheekbones. Rub a blush brush over some light pink blush and then pat it onto the tops of your cheekbones. Blend it out a little bit so the blush doesn’t look super harsh.[9]
- You can add a little shimmery highlighter on top of your cheekbones, right above the blush, if you want to make them stand out more. Avoid applying shimmer on other areas of your face, though! You want to look as matte as possible.
Creating a Smokey Eye
-
1Fill in your brows with a matching pencil so they look thin and elongated. Use an eyebrow pencil to fill in your eyebrows with your natural eyebrow color. Instead of accentuating the arch of your brows, try to keep them in a semi-straight line with the tails pointed out, not downwards.[10]
- This style of eyebrow was popular in the 1920s when The Great Gatsby was written.
-
2Dab an eyeshadow primer over your eyelids. Put a pea-sized amount of eyeshadow primer onto your lids and blend it in with your fingertips. Wait for about 2 minutes to give the primer a chance to dry.[11]
- Primer will keep your eyeshadow from creasing and make it last longer.
-
3Dust a dark mauve eyeshadow onto your eyelids with a makeup brush. Pick out a pinky-brown color, like dark mauve, to use on your eyelids. Swipe it over your lids with an eyeshadow brush to blend it well up into your crease.[12]
- If you don’t have mauve, you can also use green or brown eyeshadow as a base instead.
-
4Smudge a thick line of black eyeliner pencil at the outer edges of your lids. Make a small V shape on the outside of your eyelids with a chunky eyeliner pencil. Smudge the charcoal color around a little bit to create a smokey eye effect on the outer edges of your lids.[13]
- The V shape doesn’t have to be perfect since you’ll be adding more eyeshadow on top of it.
-
5Outline and define your crease with black eyeshadow. Dip a small eyeshadow brush into some dark black eyeshadow. Then, swipe it over the entire crease of your eyelid from the outer edge to the inner corner.[14]
- You may have to go over your crease a few times to make it stand out.
Variation: You can also use a dark purple eyeshadow for a less harsh look.
-
6Drag a little black eyeshadow underneath your eyes for a sultry look. Use a small eyeshadow brush to gently add some black eyeshadow underneath your waterline just below your eye. Smudge this eyeshadow out a little bit with your fingers to create more of a smokey effect.[15]
- Don’t put the black eyeshadow directly onto your waterline, or you could irritate your eye.
-
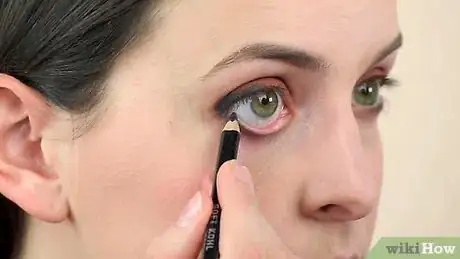
7Outline your waterline with black eyeliner, if desired. Take a black eyeliner pencil and rub it gently onto your lower waterline. If you want to, you can also rub it onto your upper waterline to outline your entire eye.[16]
- Putting eyeliner on your waterline can be irritating for some people. If you don’t want to put eyeliner on your waterline, you don’t have to.
-
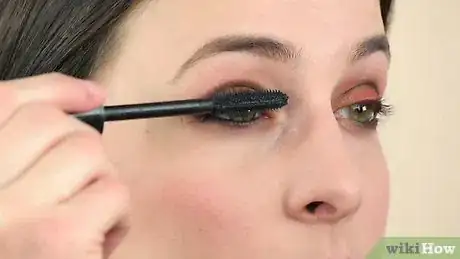
8Curl your eyelashes and apply waterproof mascara. Use an eyelash curling wand to clamp down on your eyelashes and hold them in a curl for about 10 seconds. Then, apply 3 to 4 coats of waterproof mascara to your upper and lower lashes to hold the curl.[17]
- If you want to add fake eyelashes, use natural-looking ones that don’t add a ton of volume or length.
Finishing with Lipstick
-
1Outline your lips with concealer to disguise your lip's natural contours. Think about your cupid’s bow being the point of a heart. Dip a thin, stiff makeup brush into a liquid concealer and outline your lips so that your cupid’s bow is pointy, not curved. Pat it into your skin and blend well.[18]
- Concealer will also stop your lip color from bleeding or smudging.
-
2Line your lips with pink or red liner and emphasize the cupid's bow. You can choose between deep red, plum, or wine-colored lip liner, which were popular in the '20s. Line your top lip by following the lines of concealer you made with your brush. Line the rest of your top lip by following its natural lines.[19]
- A slightly pointed upper lip was popular in the 1920s.
-
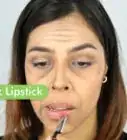
3Fill in your lips with bright pink or red lipstick. Match your lip liner to a cream lipstick color and fill in the rest of your lips with color. Choose a lipstick that won’t dry into a matte finish so that your lips look shiny.[20]
-
4Add some lip gloss to make your lip color more shiny, if you want. If you are using a matte lipstick or your lip color isn’t standing out enough, apply a thin layer of clear gloss to accentuate your lip shape.[21] Keep your lip gloss with you throughout the night in case you need to reapply it.[22]
Did You Know? In the 1920s, women stopped running to the bathroom to apply their lipstick or powder their nose. They would touch up their makeup right at the restaurant table, which was considered pretty rude at the time!
Things You’ll Need
- Primer
- Foundation
- Concealer
- Blending brush or sponge
- Mauve eyeshadow
- Black eyeshadow
- Charcoal eyeliner
- Black eyeliner
- Eyelash curler
- Mascara
- Eyeshadow brush
- Blush
- Blush brush
- Lip liner
- Lipstick
- Lip gloss (optional)
References
- ↑ https://www.empire.edu/blog/cosmetology-how-tos/skin-care-essential-is-it-important-to-moisturize-daily
- ↑ Katya Gudaeva. Professional Makeup Artist. Expert Interview. 11 April 2019.
- ↑ https://www.youtube.com/watch?v=ndtlyCWiS34&feature=youtu.be&t=40
- ↑ Katya Gudaeva. Professional Makeup Artist. Expert Interview. 11 April 2019.
- ↑ https://www.youtube.com/watch?v=JgwvvH3CzXc&feature=youtu.be&t=23
- ↑ Katya Gudaeva. Professional Makeup Artist. Expert Interview. 11 April 2019.
- ↑ https://www.youtube.com/watch?v=ndtlyCWiS34&feature=youtu.be&t=52
- ↑ https://www.youtube.com/watch?v=JgwvvH3CzXc&feature=youtu.be&t=72
- ↑ https://www.youtube.com/watch?v=ndtlyCWiS34&feature=youtu.be&t=277
- ↑ https://www.youtube.com/watch?v=JgwvvH3CzXc&feature=youtu.be&t=89
- ↑ https://www.youtube.com/watch?v=DC49tpn4pno&feature=youtu.be&t=176
- ↑ https://www.youtube.com/watch?v=ndtlyCWiS34&feature=youtu.be&t=128
- ↑ https://www.youtube.com/watch?v=ndtlyCWiS34&feature=youtu.be&t=157
- ↑ https://www.youtube.com/watch?v=JgwvvH3CzXc&feature=youtu.be&t=149
- ↑ https://www.youtube.com/watch?v=ndtlyCWiS34&feature=youtu.be&t=193
- ↑ https://www.youtube.com/watch?v=DC49tpn4pno&feature=youtu.be&t=278
- ↑ https://www.youtube.com/watch?v=JgwvvH3CzXc&feature=youtu.be&t=224
- ↑ https://www.youtube.com/watch?v=JgwvvH3CzXc&feature=youtu.be&t=245
- ↑ https://www.youtube.com/watch?v=JgwvvH3CzXc&feature=youtu.be&t=270
- ↑ https://www.youtube.com/watch?v=ndtlyCWiS34&feature=youtu.be&t=351
- ↑ Katya Gudaeva. Professional Makeup Artist. Expert Interview. 11 April 2019.
- ↑ https://www.youtube.com/watch?v=JgwvvH3CzXc&feature=youtu.be&t=315
About This Article
To do the perfect Gatsby makeup, start with a matte foundation topped with translucent powder. A matte finish was the style in the 1920s. Highlight your cheekbones with some pink blush. Then, fill in your brows, keeping them thin and elongating them at the tails. Go with a dark mauve eyeshadow, then outline your eyelid crease and underneath your lower waterline with black eyeshadow. Curl your lashes and apply mascara. To finish off your look, use a pink or red liner to accentuate your cupid's bow, then apply bright red or pink lipstick. For tips on how to prep your skin and apply matte foundation, keep reading!
