This article was co-authored by Scott St Gelais. Scott St Gelais is an IT Consultant and the Owner of Geeks in Phoenix, Arizona. With over two decades of experience, Scott specializes in computer service and repair, development, computer graphics, and website authoring. Scott received his Technical Associates Degree from High Tech Institute and completed the IT Support Professional Certificate by Google. Geeks in Phoenix is a member of the Microsoft Partner Network and an Intel Technology Provider Gold Partner.
The wikiHow Tech Team also followed the article's instructions and verified that they work.
This article has been viewed 60,378 times.
This wikiHow teaches you how to find and delete "Thumbs.db" files on your computer, using a Windows PC. Thumbs.db files are database files to store image thumbnails on Windows systems. These files are saved in the same folder as your original image files, but they're usually hidden files, and you have to change your folder options to see them. Once you enable hidden files, you can delete Thumbs.db files just like any other file on your computer.
Steps
-
1Open the folder containing your image files. Find and double-click on the folder containing your image files to open it in a new File Explorer window.
-
2Click the View tab at the top. This button is at the top of the File Explorer window, above the folder directory. It will open your file and folder viewing options on a toolbar at the top.Advertisement
-
3Check the Hidden items option on the View toolbar. You can find this option in the "Show/hide" section of the View toolbar.
- When this option is checked, you'll be able to see regular hidden files on your computer.
- To show hidden files, you can change the view inside File Explorer.
- The view can show or hide hidden files, file extensions, and things like that.
- If you want to change the permissions of a file, right-click on the file or folder. Then go down to properties at the bottom of the context menu. Inside properties, you can go to the security tab.
-
4Click the Options button on the View toolbar. This button is on the right-end of the toolbar. It will open a drop-down menu.
-
5Click Change folder and search options in the drop-down. This will open your Folder Options menu in a new dialogue box.
-
6Click the View tab in the "Folder Options" window. This button is at the top of the dialogue box. You can manually change all your file and folder viewing options here.
-
7Click and uncheck the Hide protected operating system files option. You can find this option under the "Hidden files and folders" heading in the Advanced Settings box here.
-
8Click Yes in the confirmation pop-up. This will confirm your action, and uncheck the option.
-
9Click OK or Apply in the Folder Options window. This will apply your new folder settings. You can now see your "Thumbs.db" files in the folder containing your images.
-
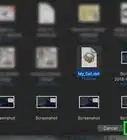
10Right-click the "Thumbs.db" file you want to delete. You can find this file in the same folder as your image files.
-
11Select Delete on the right-click menu. It's towards the bottom between "Create shortcut" and "Rename."
-
12Click Yes in the confirmation window. This will confirm your action, and move the selected Thumbs.db file to your computer's Trash or Recycle Bin.


About This Article

1. Open the folder containing your images.
2. Click the View tab at the top.
3. Check the Hidden items box.
4. Click Options, and select Change folder and search options.
5. Click the View tab in the "Folder Options" window.
6. Uncheck the Hide protected operating system files box, and confirm.
7. Click OK in Folder Options.
8. Right-click the Thumbs.db file.
9. Select Delete.