This article was co-authored by wikiHow Staff. Our trained team of editors and researchers validate articles for accuracy and comprehensiveness. wikiHow's Content Management Team carefully monitors the work from our editorial staff to ensure that each article is backed by trusted research and meets our high quality standards.
This article has been viewed 118,369 times.
Learn more...
Footwear can make or break an outfit. And while purchasing the perfect pair of shoes can be satisfying, it’s rewarding in an even deeper way to customize your own kicks. You can exercise your crafty side to look stylish on a budget. Transform basic white canvas shoes using markers to add original designs and vibrant colors. You can also add texture to your shoes using a variety of fabrics and accessories.
Steps
Preparing Your Shoes and Workspace
-
1Decorate a pair of white or off-white canvas shoes. Any brand of shoes will do. Just make sure they are canvas and not another material like suede, leather, or even synthetic leather. If you'll need to stretch the shoes, do that before you decorate. If you are less than confident in your design or coloring skills and have concerns about messing up, you can opt for a cheaper pair of shoes from a thrift or other discount store.
-
2Gather decorating materials. In addition to your shoes, you’ll need the tools to decorate them with precision, personality, and style.
- A pencil will help you plan your design beforehand and offer you many chances at revision before moving on to coloring.
- Get a set of permanent, fabric, chalk ink, or acrylic markers in a variety of colors. That way, you’ll have lots of options when deciding on a color palette.
- Thin-tip markers will lend maximum precision to your designs without much bleeding.
- Black markers are useful in tracing designs.
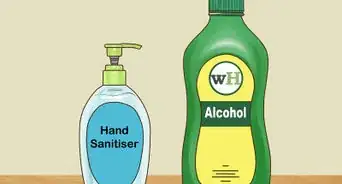
- Rubbing alcohol can create a smudged effect after you’re done coloring.
Advertisement -
3Set up shop in a well-ventilated area. These materials can give off fumes. Once you’ve gathered them, find a workspace where fumes can disperse so you avoid getting dizzy.
-
4Protect your shoes with tape. Be aware of the parts you don't want colored. Remove the laces so you don't get stray marks on them. If you would like to keep marker off the soles, tape over them up with painters or masking tape. You can also use tape to protect the other parts of a shoe when you’re decorating a specific area.


Sketching Your Design
-
1Spark your imagination by asking yourself questions to guide your design. Is there a picture or pattern you particularly like? Do you have a color palette in mind? What passions or interests of yours can you represent visually? Remember that your designs will be permanent, so make sure to choose something you will be comfortable wearing over time.
-
2Color along seams or around eyelets to create accents. This will create a look that is tasteful yet distinct.
-
3Draw patterns made from geometric shapes or create your own. Artists and designers combine and repeat visual elements in regular arrangements to convey meaning, represent ideas symbolically, and delight viewers. When decorating with patterns, think in advance whether you want your shoes to be identical, symmetrical, complementary, or clashing, so you know how to apply your patterns to your shoes. Think about what colors you need or want in order to make your patterns.[1]
-
4Take a free-form approach by drawing doodles. If you don’t want the uniformity of a pattern, doodles can bring a sense of funky playfulness to your design.
-
5Cover one or both shoes with a single picture. This approach requires extra planning and can be more labor-intensive than the others, but it is highly rewarding. There are many tutorials and templates available if you’re afraid your artistic skills don’t measure up to the task.
- Pay special attention to where the shoes meet if you are drawing a large picture. For example, many artists use the toes of both shoes to create contiguous scenes.
- Use tongues, toes, and heels to draw faces. These larger or more regularly shaped areas provide a nice backdrop for detailed and irregular drawings.
- Save the inner and outer sides for complementary flourishes. These areas naturally accommodate smaller and less intricate designs.
-
6Sketch your design with pencil, if necessary. This way, you will have a template to work from and can easily edit any mistakes you might make. Pencil will also wash out in the washing machine if you've drawn too much to erase by hand.


Finishing Your Decoration
-
1Color in your designs or create doodles or accents. Be as precise or as free with your markers as you want. Choose a color palette. Then pick one place to start coloring and move along the shoe from there. You can color from front to back or vice versa.
- A warm color palette includes reds, oranges, yellows, creams, and browns. A cool color palette features muted blues, greens, and grays. A mixed color palette can combine these colors and include bolder colors like pink, turquoise, and purple.
- Work on your shoes concurrently if you want them to match or look identical. For instance, if you color a blue diamond on one shoe, immediately do the same on the other in a corresponding spot.
- Use lighter-colored markers first. That way, you can easily color over any mistakes.
- Add deeper colors for extra vibrancy. Colors will naturally fade with wear. Making colors deeper from the start combats fading over time.
-
2Use a black marker to distinguish your designs. This finishing touch can make your designs really pop. Trace the outlines around and inside your design to distinguish different colors, pattern elements, and images from each other.
- Shade elements of your picture and draw shadows to give your design depth.
-
3Decorate your laces to match your shoes. This is another small touch that can add personality to your look. You can choose from a variety of methods for decorating your laces.
- Use a paint pen to draw dots or other small shapes on your laces.
- Color your laces with markers or fabric paint in ways that complement your overall shoe design.
- Dip your laces in a dye mixture or Kool-Aid to give them a consistent color.
-
4Smudge the colors on your shoes with rubbing alcohol. This will give your shoes a tie-dye effect. Apply the alcohol with a paintbrush, spray bottle, or dropper, enough to cover the parts of the shoe you want to smudge.
-
5Place the shoes in a dry place away from anything that could spill on them. Allow your shoes to cure for at least 24 hours so the ink sinks into the fabric.
-
6Set your designs and protect them against weather-related wear using waterproof acrylic sprays. You can also use beeswax to create this seal. [2]


Adding Accessories
-
1Decorate with textural elements. Measure the area on your shoe where you want to apply the material. Use a tape measure to find the length and width, or trace the exact shape. Cut the amount of material that matches your measurements.
- Almost any material can work for this purpose, including studs, spikes, glitter, buttons, beads, embroidery, fur, fringe, and lace.
- Apply your material using a strong craft adhesive like hot glue or E6000.
-
2Use stencils to create uniform patterns. These premade patterns will make your shoes look professionally made.
- You can use Mod Podge and glitter to apply stenciled patterns. Mix Mod Podge and glitter in a bowl until you get a mixture with the amount of glitter you want for your stencil pattern. Lay a rubber stencil flat and smooth out any places where the stencil is not totally flat on your shoe. Dip a sponge pouncer in your Mod Podge and glitter mixture, and gently press the pouncer onto your shoe through the stencil. Lift up the stencil, wash it, and reapply the mixture until the stencil pattern covers your shoe.[3]
- Stuffing your shoes with paper can make it easier for the stencil to lay flat so you can paint each shoe evenly.
-
3Print your own patterns for a fashionable, all-over-print look. You can transfer any pattern you can print. All you need is iron-on paper. Find a pattern you like, print it onto the iron-on paper, and cut out the pattern as you would like it to appear on your shoes. Iron the cutouts onto your shoes according to the directions on the iron-on paper.[4]
- Let iron-on paper cool before peeling the paper from your shoes.
-
4Create free-form patterns with foam or sponge stamps. Cut the stamp patterns you want from a larger piece of foam or sponge. Pour acrylic paint into containers for you to dip your stamps. Dip the stamps in the colors you want. Apply your stamps where you want them on your shoe.
- You can cut stars, circles, or chevrons that extend the length of your shoes. Chevrons and long lines on the sides of shoes give them a racing-stripe look.
- Dip toothbrushes in acrylic paint for an even greater variety of unique patterns.
-
5Dye your shoes with fabric dye or Kool-Aid. Mix dye powder or Kool-Aid with hot water until the mixture is about 2.5” deep in a baking dish of your choosing. Hold the part of the shoe you want to dye in the dye bath for 3 minutes each, and repeat with each new part of the shoe you want to dye.
- Use rubber cement to protect the soles and a damp paper towel to clean up excess dye.[5]
-
6Expand your color and pattern combinations with fabric paint and paint pens. Use a paint pen to add polka dots, or use fabric paint to color entire sections of your shoes.[6]
-
7Add a splash of old-fashioned paint. Scour your house for leftover paint cans, and tap into your inner Jackson Pollock. Remember, there’s no wrong way to decorate your shoes. The point is to have fun making something you’ll enjoy.
- Use a paintbrush to apply strokes, streaks, or gobs of paint.
- Drip paint directly from the bucket or tube for a splatter effect.
-
8Finished.


Community Q&A
-
QuestionI painted shoes for my granddaughter and the color ran. Is there some preparation I should do before I paint?
 Community AnswerYou do not need to prepare them in any way, but after you're done painting them, apply a spray that protects shoes. Spray on a couple of coats or follow the instructions on the container.
 -
QuestionWill water ruin them?
 Community AnswerIt depends on the type of marker that you use. You should make sure that you use waterproof markers.
 -
QuestionWhat type of paint can be used to decorate canvas shoes?
 Community AnswerFabric paint works well, but acrylic may work, too. Avoid watercolors and tempera paint, as they run easily.
Things You'll Need
- A pair of canvas shoes
- A variety of colored permanent, fabric, chalk ink, or acrylic markers
- A pencil
- Waterproof acrylic spray or beeswax
- Fabric paint (optional)
- Dye or Kool-Aid (optional)
- Rubber cement (optional)
- Paper towels (optional)
- Rubbing alcohol (optional)
- Craft adhesive (optional)
- Accessories like stencils, fabrics, glitter, iron-on paper, foam or sponge stamps, or paint pens (optional)


References
- ↑ https://www.sophia.org/tutorials/design-in-art-repetition-pattern-and-rhythm
- ↑ https://lifehacker.com/5959735/waterproof-canvas-shoes-with-beeswax
- ↑ https://www.trinketsinbloom.com/diy-sneakers/#more-10012
- ↑ http://www.alwaysrooney.com/2014/07/floral-vans-restyle-diy.html
- ↑ http://designformankind.com/2012/06/makekind-14/
- ↑ https://abeautifulmess.com/2013/03/diy-sneakers-for-spring.html
About This Article

If you want to customize your shoes to your outfit or mood, transform basic white canvas shoes using markers. Use permanent, fabric, chalk ink, or acrylic markers to make sure your design doesn’t bleed or wash off in the rain. Cover any parts of your shoes that you don’t want to decorate, like the soles, with tape. You can also remove the laces to keep them out of the way. Play with some design ideas on paper, or get right to work on your shoes by doing things like coloring along the seams or around eyelets to create accents. Another way to decorate your shoes is to use geometric patterns or sketch out a cartoon character. Once you have your basic design down, color it in. To set your design and protect it against the weather, use a waterproof acrylic spray on your sneakers. To learn how to add accessories to your sneakers, keep reading!