This article was co-authored by wikiHow staff writer, Nicole Levine, MFA. Nicole Levine is a Technology Writer and Editor for wikiHow. She has more than 20 years of experience creating technical documentation and leading support teams at major web hosting and software companies. Nicole also holds an MFA in Creative Writing from Portland State University and teaches composition, fiction-writing, and zine-making at various institutions.
The wikiHow Tech Team also followed the article's instructions and verified that they work.
This article has been viewed 593,478 times.
Learn more...
This wikiHow teaches you how to create a disc image file (ISO) from a folder, CD, or DVD on your Mac or Windows PC. ISOs can be mounted and run like a CD or DVD without having to actually insert a disc into your computer. You can also burn an ISO file to a disc if you want to create your own running CD or DVD. You'll only be able to create an ISO from a CD or DVD if it isn't copyright-protected.
Steps
Using a Windows PC
-
1Install WinCDEmu. This is a free, open-source app that makes it easy to create ISOs on Windows.
- Go to https://wincdemu.sysprogs.org/download in a web browser.
- Click the green Download button and save the file to your computer.
- Double-click the downloaded file and click Yes to give it permission to run.
- Click the Install button.
- Click OK when the installation is complete.
-
2Insert the disc you want to copy (optional). If you want to duplicate a CD or DVD by creating an ISO, insert that disc now.Advertisement
-
3Press ⊞ Win+E. This opens the Windows File Explorer.
-
4Add the files you want in the ISO to a single folder. Skip this step if you're starting with a CD/DVD or have already added your files to a single folder. Otherwise, here's how to create a new folder:
- Right-click a blank area of the right panel and select New > Folder.
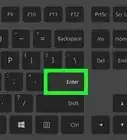
- Type a name for the folder and press Enter.
- Drag all of the files you want to include inside the folder. Alternatively, you can select individual files (hold down the Ctrl key as you click each file name), press Ctrl + C, and then right-click the new folder and select Paste.
-
5Right-click the folder or drive. A context menu will expand.[1]
-
6Select Create ISO Image or Build ISO Image. The option you see depends on whether you're copying from an optical drive or using files on your computer.
-
7Enter a name for the ISO. The "ISO" file type is already selected from the drop-down menu at the bottom, so you'll just need to enter a name (e.g., MyISO) into the File Name field.
- If you want to choose a different location to save the ISO to, navigate to that folder now.
-
8Click Save. WinCDEmu will begin building the ISO from the selected files. A progress bar will keep you updated on how much time remains in the process.
- When the process is complete, you can click Close on the window, and the ISO will be available at the selected location.


Using a Mac
-
1Add the files you want to include in your ISO to a folder. If the files are already in a folder, or if you're creating an ISO from a CD or DVD that's inserted in your optical drive, you can skip this step. Here's how you can create a new folder:
- Open Finder by clicking the two-toned smiley face icon on the Dock.
- Click the Desktop folder in the left panel, or choose another location if you want to create your new folder somewhere else.
- Click the File menu and select New Folder.
- Type a name for your folder—use something that will reflect the content of the ISO you're creating.
- Press Return.
- Drag the files you want to include into the new folder.
-
2Open Disk Utility. An easy way to do this is to click the magnifying glass at the top-right corner to open Spotlight, type disk utility, and then click Disk Utility in the search results.
- You can also open Disk Utility in Finder by clicking the Go menu and selecting Utilities > Disk Utility.
-
3Click the File menu and select New Image. A menu will expand.
-
4Select Image from Folder or Image from (disc). If you're creating an ISO from a folder, choose the Folder option. If creating one from a CD or DVD in your optical drive, select Image from (disc), where "(disc)" is the name of the disc in your optical drive.
-
5Select the folder with the ISO files and click Open. You can skip this step if you selected an optical drive in the last step.
-
6Enter a name for your ISO. Type the name that you want to use into the "Name" field at the top of the window.
-
7Select Desktop as the "Where" location. Choose this option as it'll make the steps you'll need to do later a bit more straightforward.
-
8Select DVD/CD master from the "Format" drop-down menu. This option ensures you'll be able to use the ISO with third-party applications on different platforms.
-
9Click the Save button. It's at the bottom of the window. This saves the selected folder or CD/DVD as a disk image. The image will initially be created as a CDR file, which is identical to an ISO image on a Mac, but requires additional conversion to become an ISO that will work on PCs. Continue with this method to convert the file to an ISO.
-
10Convert the completed file into an ISO file. While unnecessary if you're going to use this file on your Mac, the created CDR file won't work on a PC. Here's how you can convert it to the proper format:
- Open a Terminal window. You can do this by opening Finder, selecting the Go menu, choosing Utilities, and then clicking Terminal.
- Type cd ~/Desktop and press the Return key.
- Type in hdiutil makehybrid -iso -joliet -o [filename].iso [filenamename].cdr, making sure to replace both [filename] sections with the CDR file's name.
- Press Return to convert the CDR file to the ISO format. The ISO is now on your Mac's desktop.


Community Q&A
-
QuestionHow can I download a video from the internet onto a flash drive?
 Community AnswerDownload the video to your computer and then copy the file onto your flash drive.
 -
QuestionI don't see any option in the winrar method to save as ISO. The only options are RAR, RAR5 and ZIP. What should I do?
 Community AnswerWInrar is a compression tool and not a file. You can use winrar to open RAR and ZIP files.
 -
QuestionWhere can I find the option of saving files in an ISO format in Winrar?Community AnswerYou can't. Its not for making ISO files, it's for saving compressed files . See above for how to make an ISO.
Warnings
- You cannot create an ISO for most video games or movies, as these are usually copyright-protected.⧼thumbs_response⧽


References
About This Article

1. Install WinCDEmu, a free, open-source tool.
2. Add all files to a single folder or insert a CD/DVD to copy.
3. Right-click the folder or drive and select Create/Build ISO Image.
4. Enter a name and choose a saving location.
5. Click Save.