This article was co-authored by Luigi Oppido. Luigi Oppido is the Owner and Operator of Pleasure Point Computers in Santa Cruz, California. Luigi has over 25 years of experience in general computer repair, data recovery, virus removal, and upgrades. He is also the host of the Computer Man Show! broadcasted on KSQD covering central California for over two years.
The wikiHow Tech Team also followed the article's instructions and verified that they work.
This article has been viewed 271,222 times.
ISO files are exact copies of a DVD or CD. They're great for archiving and sharing discs without worrying about scratches or other damage. You can create ISO images using any operating system, though Windows users will need to download an additional program.
Things You Should Know
- Use [infrarecorder.org InfraRecorder] on Windows. Insert the CD, launch the program, and select "Read Disc". Follow the prompts to begin conversion.
- Open Disk Utility on Mac. Insert your disc and go to File > New > Disk Image from <Device> where <Device> is the drive that contains the CD or DVD. Follow the prompts to begin conversion.
- On Ubuntu, insert your disc and open Brasero. Select "Disc Copy" and choose your disc. Click "Select a disc to write to" > "Image File" > "Create Image." Follow the prompts to begin conversion.
Steps
Windows
-
1Download and install a disc imaging utility, such as InfraRecorder or ISO burner. Windows does not come with the ability to create ISO files, so you'll need to use a separate program. There are many programs out there that can do this, but many of them also come with adware and other junkware. InfraRecorder is a free, open-source imaging program that does not contain any adware. No one profits from you downloading and installing it.
- You can download InfraRecorder for free from infrarecorder.org. Download the installer and then run it to install the program. By default, a shortcut will be created on your desktop and in the Start menu.
-
2Insert the disc that you want to copy. You can create an ISO image from any CD or DVD. The resulting image file will be the same size as the data on the disc (up to 800 MB for a CD, or 4.7 GB for a DVD).Advertisement
-
3Launch InfraRecorder. A small InfraRecorder window will appear.
-
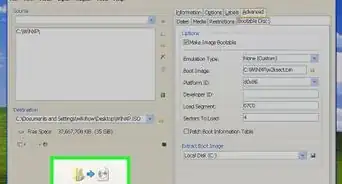
4Select "Read Disc." This will open the "Copy to Disc Image" window.
-
5Select your disc drive from the drop-down menu. Choose the drive that you have inserted the disc into.
-
6Click the "..." button next to the "Image file" field. This will allow you to choose where you want to save your new ISO file, and what you want to label it.
- By default, it will save to your Documents folder.
-
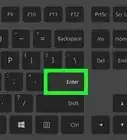
7Click "OK" to begin creating the ISO file. The time this takes will depend on the size of the disc and the speed of your drive. Once the process is complete, you'll find the ISO file in the location you set in the previous step.[1]


Mac OS X
-
1Open Disk Utility. You can use the Disk Utility program to create image files from any of your CDs or DVDs. You can find this in the Utilities folder in your Applications folder. You can also press ⌘ Command+Space and type "disk utility" to search for it.[2]
-
2Insert the disc you want to copy. Insert the CD or DVD that you want to create a disc image from.
-
3Click the File menu and select the "New" option. This will open a submenu.
-
4Select "Disk Image from <Device>." "<Device>" will be the drive that contains the CD or DVD.
-
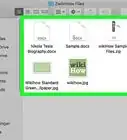
5Give the image file a name and location. Saving it to your Desktop will make it easy to find later.
-
6Ensure that "DVD/CD master" is selected for "Image Format." This will create a correct copy of the disc.
-
7Click "Save" to begin creating the image file. The time this takes will depend on the size of the disc and the speed of your drive.
-
8Find the finished CDR file. Your Mac will create the image file in CDR format. This is fine if you only plan on using it on a Mac, but you can convert it to an ISO file if you'd like.
-
9Open the Terminal. You can convert the CDR file to an ISO file using a simple Terminal command. You can find the Terminal in your Utilities folder.
-
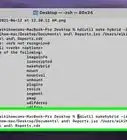
10Convert the CDR file to an ISO file. Enter the following command to convert the file, replacing the path with your own file's path:
- hdiutil convert ~/Desktop/original.cdr -format UDTO -o ~/Desktop/converted.iso


Ubuntu/Linux
-
1Insert the disc you want to copy. You can use the tools that come with Ubuntu to create ISO files without any additional software.
-
2Open Brasero. This program comes preinstalled with Ubuntu, and can quickly create ISO files from discs.
- You can find Brasero by pressing ⊞ Win and then typing "brasero."
-
3Select the "Disc Copy" option. The "Copy CD/DVD" window will appear.
-
4Select your disc drive from the first menu. If you only have one disc drive, it will be selected by default.
-
5Select "Image File" from the "Select a disc to write to" option. This will create an image file from the original disc instead of copying it to a blank one.
-
6Click "Create Image." You'll be prompted to give the image file a name and select the location you want to save it to. After that, Ubuntu will begin creating the ISO file from the disc inserted in the computer.
-
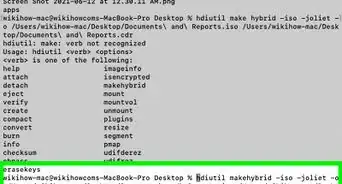
7Use the Terminal to create an ISO file. if you'd rather use the Terminal, you can create an ISO file using a single command. Open the Terminal by pressing Ctrl+Alt+T and enter the following:[3]
- sudo dd if=/dev/cdrom of=/home/username/image.iso
- Replace /dev/cdrom with the path to your disc drive. Replace the path for the ISO file with whatever path you'd like to save it to.


Community Q&A
-
QuestionCan I create an ISO from a file on the computer?
 Community AnswerTo create an ISO file from your own physical disc, you’ll need to get a third-party program that can do so. There are many tools for this and many of them are packed with junkware. Beware! InfraRecorder does a fine job of this and is free, open-source software that doesn’t include junkware. Insert a disc, click the “Read Disc” button, and select a source drive to read from and destination ISO file to create. As simple as that!
 -
QuestionHow do I convert a PS2 disc in an ISO file?
 Aditya TelangCommunity AnswerYes. You need to use an image burning software. Some good one's are IMGBurn or MagicISO. Use the "Image File From Disk" setting. Insert the desired PS2 game disc into your computer’s CD/DVD drive. Locate your CD/DVD-Rom Drive then choose a location on your computer where you would like to save the completed ISO file.


References
About This Article

1. Install InfraRecorder.
2. Insert the disc you want to copy.
3. Open InfraRecorder.
4. Click Read Disc.
5. Select your disc drive.
6. Select a saving location.
7. Click OK.