X
wikiHow is a “wiki,” similar to Wikipedia, which means that many of our articles are co-written by multiple authors. To create this article, 14 people, some anonymous, worked to edit and improve it over time.
This article has been viewed 146,205 times.
Learn more...
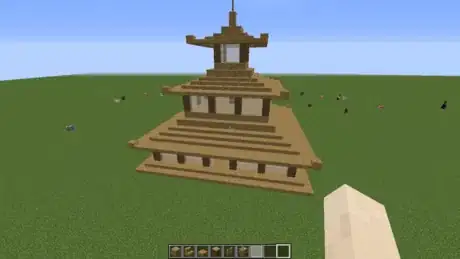
Most buildings in Minecraft are done to the same (or at least, similar) style, which is largely based on Western-style buildings. Japanese-style buildings can provide a challenge, a different feel to your world, and if you're playing on a server, something to stand out against what other Minecrafters are building.
Steps
Method 1
Method 1 of 4:
Building a House
-
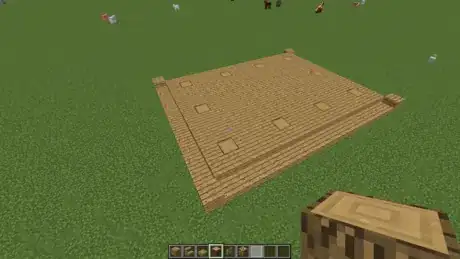
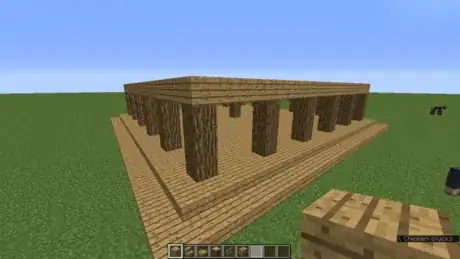
1Start by building a foundation for your house.
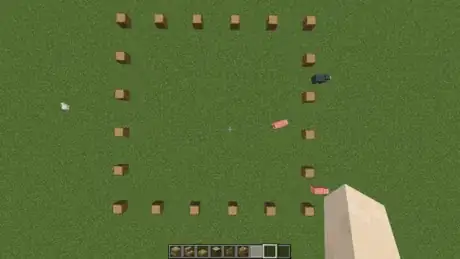
- Place a 3x4 rectangle of oak logs. There should be a three-block gap between each log.
- Fill in the rectangle with oak wood planks.
- Place a ring of oak wood planks around the outside of the rectangle.
- Place a ring of oak wood slabs around the outside. Replace the corners with full blocks.
-
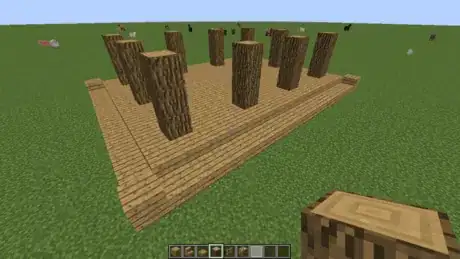
2Place 3 oak wood logs on top of each log in the foundation. These pillars will form the basics of the walls.Advertisement
-
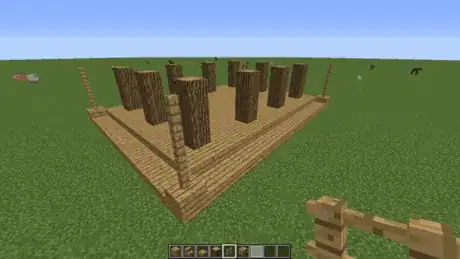
3Place three oak fence posts on the corners. These will act as roof supports.
-
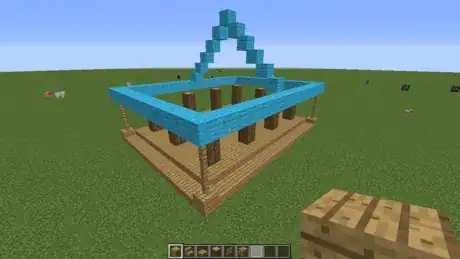
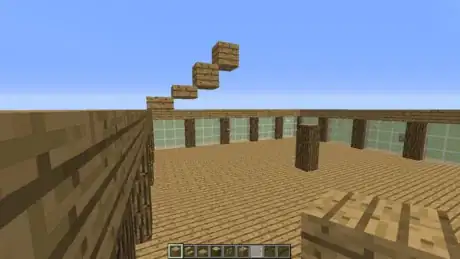
4Use wool to create an outline of where your roof will go. The roof is one of the hardest parts, and can make or break a build. Once you've practiced a bit, you can do this without the outline.
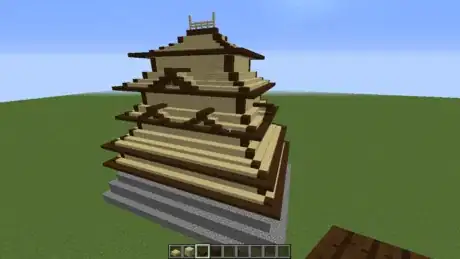
-
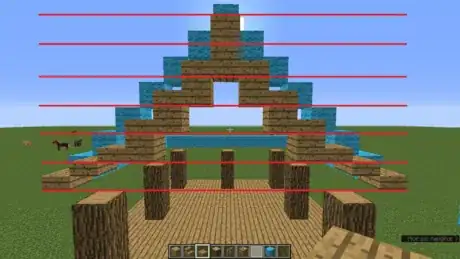
5Create a plan of how your roof will be formed. Try to curve it towards the top. The red lines are at one-block gaps, so you can see how to place the blocks.
-
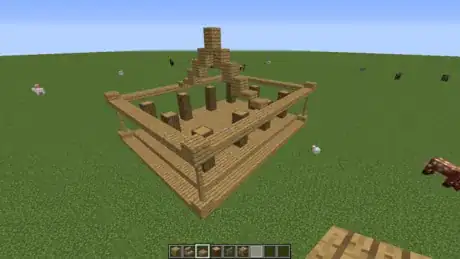
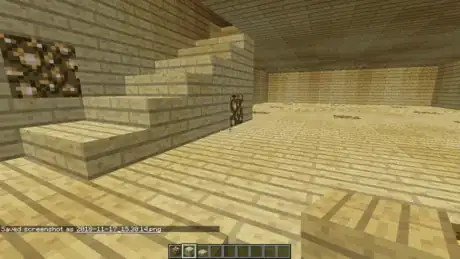
6Extend the bottom layer of the roof plan into a rectangle. Swap the four corner slabs for full blocks.
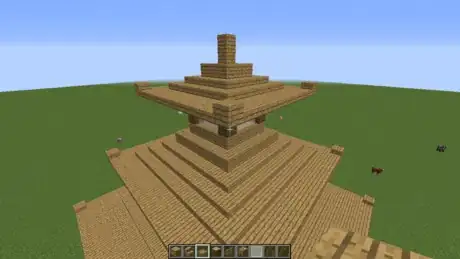
-
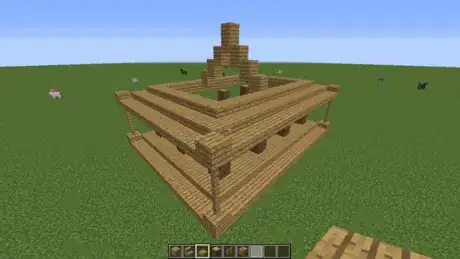
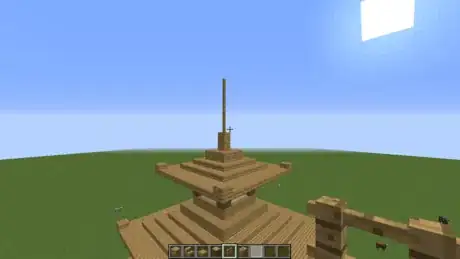
7Build the next layer of the plan into a rectangle. Make sure that it is nested inside the first layer.
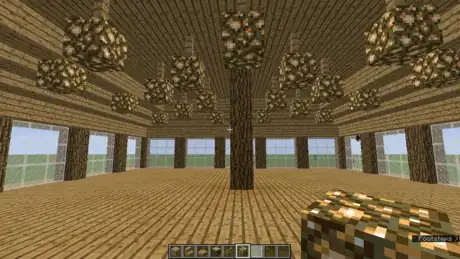
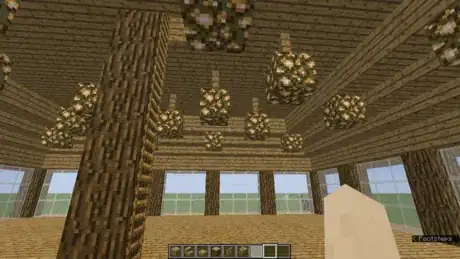
-
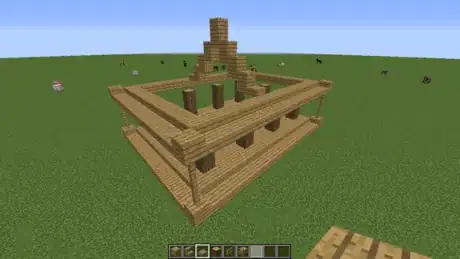
8Extend the third layer into a rectangle.
-
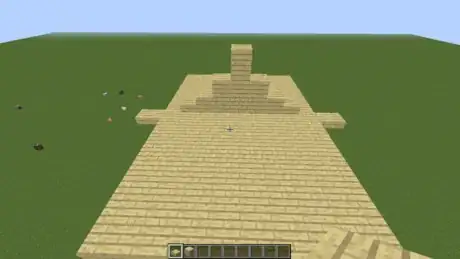
9Add the fourth layer. For this layer, just build the long sides of the rectangle, and not the short sides. Note that they extend out onto the third layer.
-
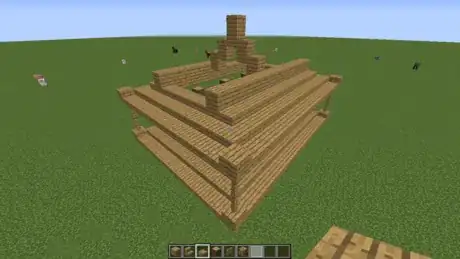
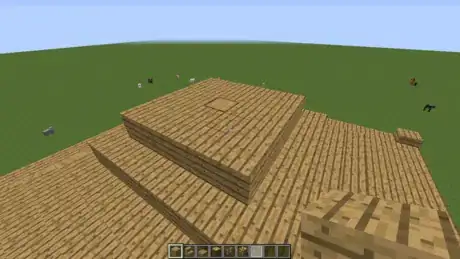
10Extend the remaining layers out into strips, like the fourth layer.
-
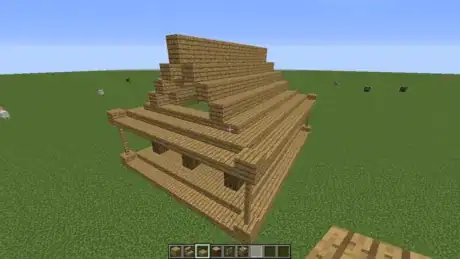
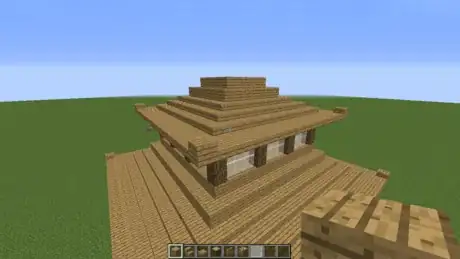
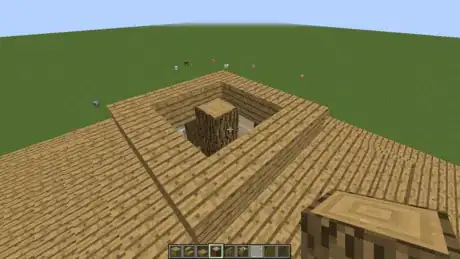
11Fill in the space in between the top layers of the roof, to create an alcove. Repeat at the opposite end of the roof.
-
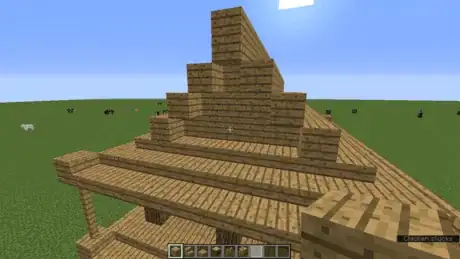
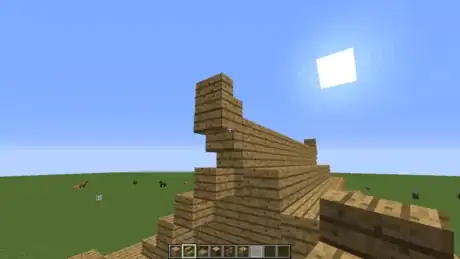
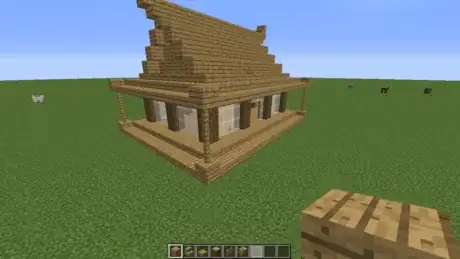
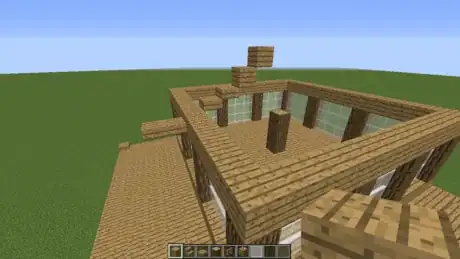
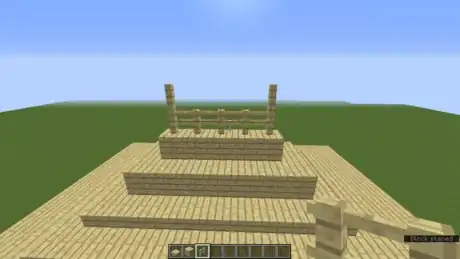
12Add a couple of oak wood steps to each end of the top of the roof. This improves the appearance.
-
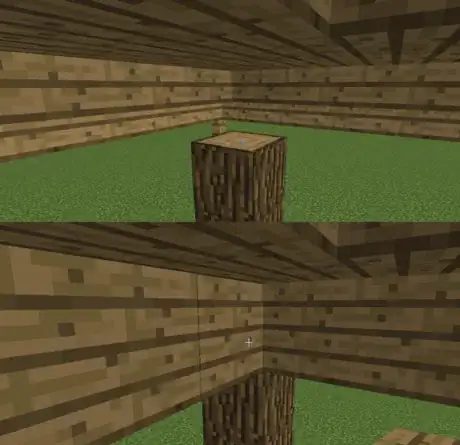
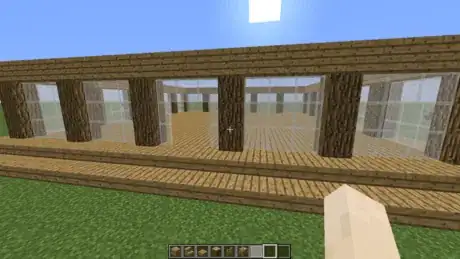
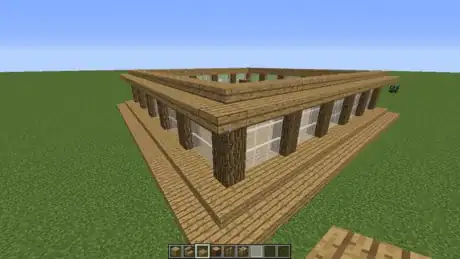
13Go underneath the roof, and fill in the gap between the roof and the pillars with oak wood planks.
-
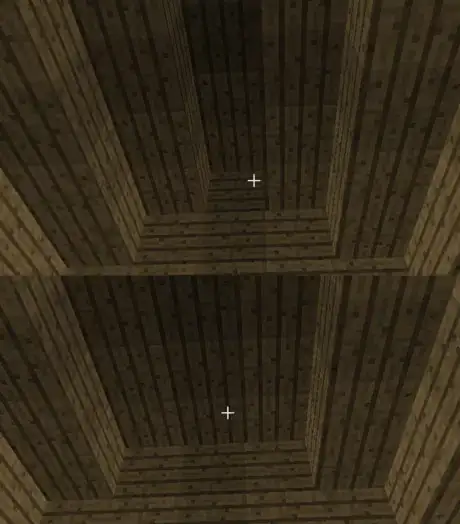
14Fill in the inside ridge of the roof. This creates a flatter ceiling inside your building.
-
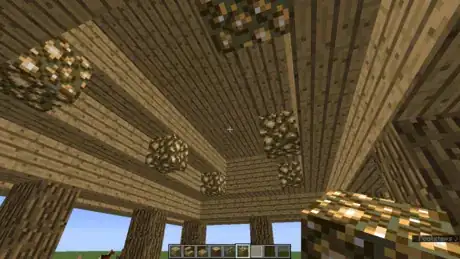
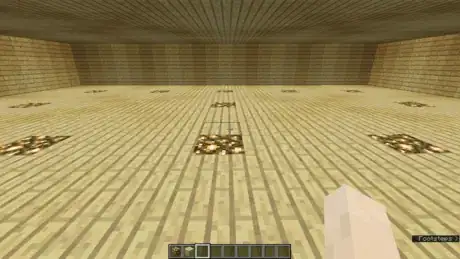
15Use glowstone to light it up. Don't want mobs spawning inside!
-
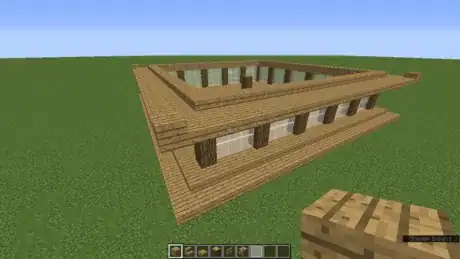
16Fill in the spaces between the pillars with white stained glass panes. Remember to leave a gap in one of them for the door.
-
17Use white stained glass panes to partition the inside of the building, if desired.
Advertisement
Method 2
Method 2 of 4:
Building a Pagoda
-
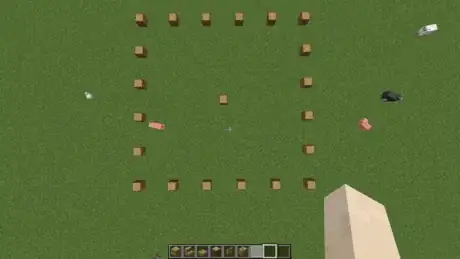
1Create the framework of the foundation. Place a six by six square of oak wood logs, with a 3 block gap in between each one.
-
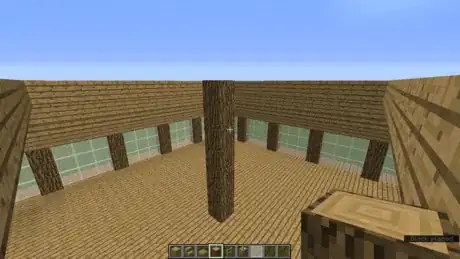
2Place an oak wood log in the center of the square. this will form the central pillar of the building.
-
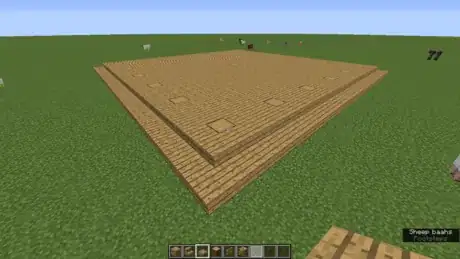
3Fill in the space between the logs with oak wood planks. Also, place a ring of oak wood planks, then a ring of oak wood slabs, around the outside of the square of logs.
-
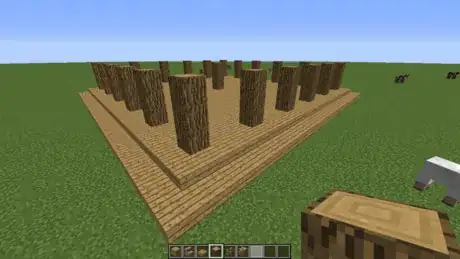
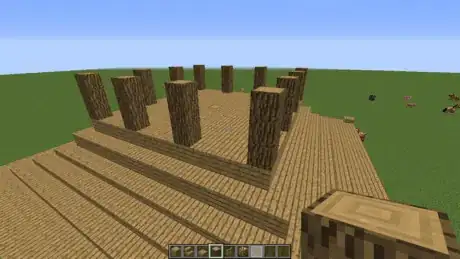
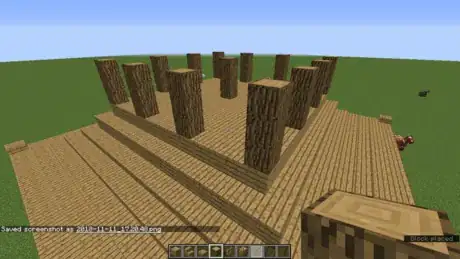
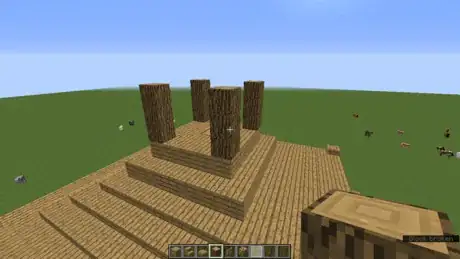
4Place three oak wood logs on top of each log in the foundation.
-
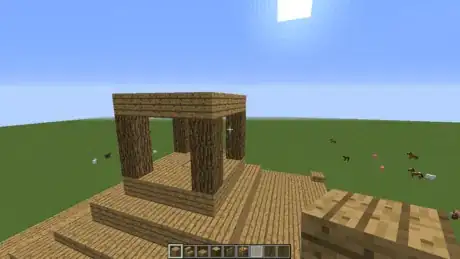
5Place a ring of oak wood planks around the top of the pillars.
-
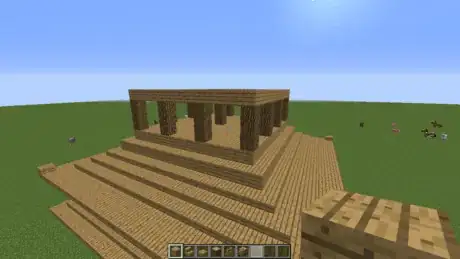
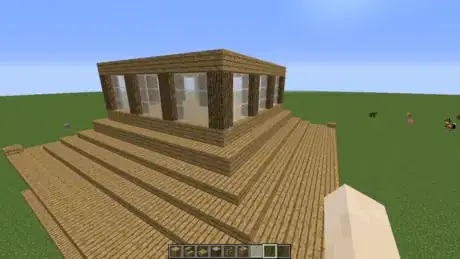
6Place white stained glass panes between the logs. Leave a hole in one for the doorway.
-
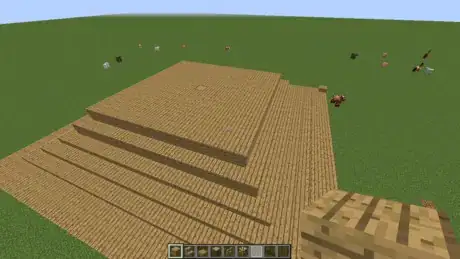
7Place a ring of oak wood slabs around the ring on top of the pillars.
-
8Place a second ring of oak wood slabs around the one you just made. Swap out the corners for full blocks.
-
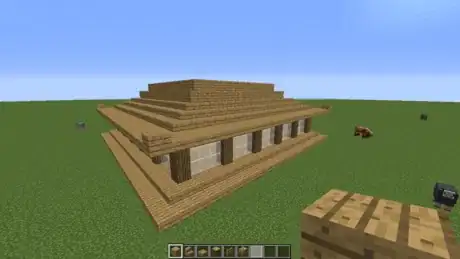
9Create a guide as to where the next layers of the roof will go.
-
10Expand each of the blocks in the guide to a full square. Each square should be nested inside the others.
-
11Build up the central pillar so that it is level with the roof.
-
12Fill in the roof with oak wood planks. This will form the floor of the next layer.
-
13Place a ring of pillars of oak wood logs on the floor that you just filled in.
-
14Build up the central pillar.
-
15Place a ring of oak wood planks around the tops of the pillars.
-
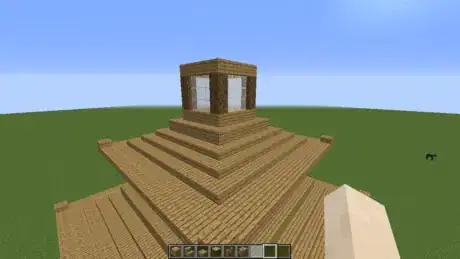
16Fill in the spaces between the pillars with white stained glass panes.
-
17Create a guide for where the next roof will go.
-
18Expand each layer of the guide into a square. Swap out the corners for full blocks.
-
19Build up the central pillar.
-
20Fill in the floor.
-
21Build a three-block high pillar of oak wood logs at each corner of the new layer.
-
22Create a circle of planks around the top.
-
23Fill in the sides with white stained glass panes.
-
24Build a guide for where the roof will go. This is the final roof, so it is a bit steeper than the others.
-
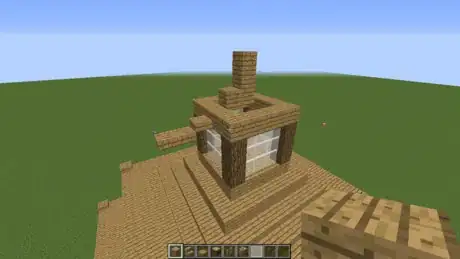
25Turn the guide into a full roof. You know the drill by now...
-
26Use oak wood fence posts to create a finial on the top.
-
27Light up the inside with glowstone.
-
28Build a ladder up the central pillar to reach the other floors.
-
29Done!
Advertisement
Method 3
Method 3 of 4:
Building a Castle
-
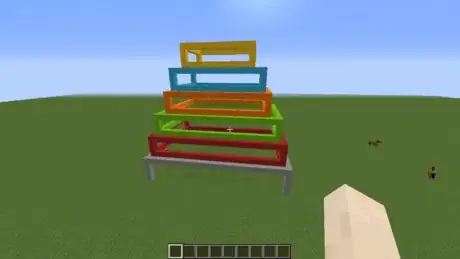
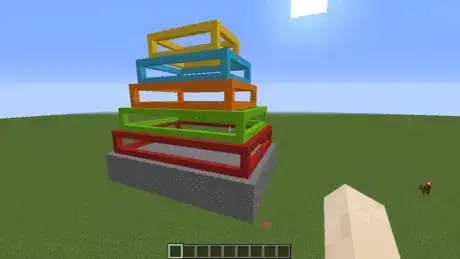
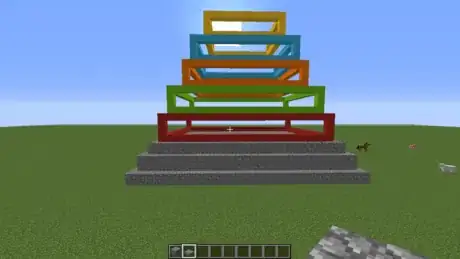
1Use wool to build a guide to where each layer will go.
- The bottom layer should be five blocks high, and the other five layers should be four high.
- Each layer should shrink inwards by one block on the long side, and one or two blocks on the short side.
-
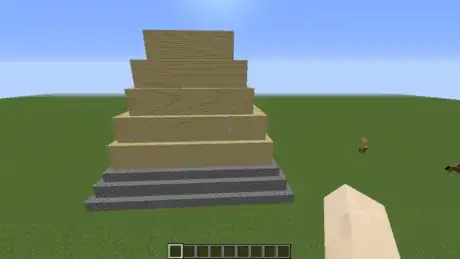
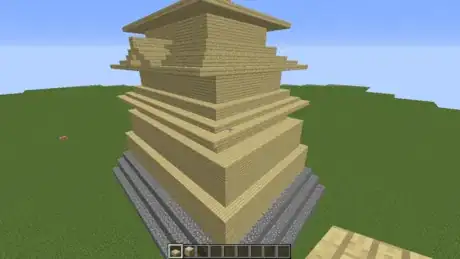
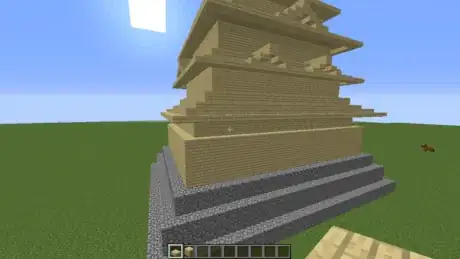
2Fill in the bottom layer with cobblestone. This forms the foundation of your castle.
-
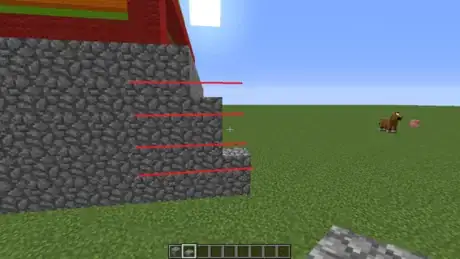
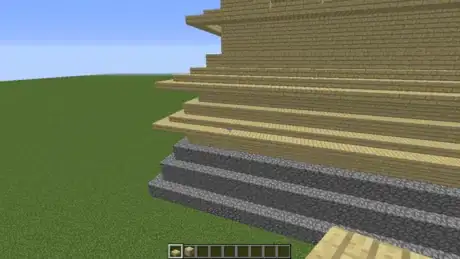
3Build a guide as to where the foundation will be extended outwards. The inner layer should be 3.5 blocks high, and the outer should be 1.5 blocks.
-
4Extend the guide outwards to increase the width of the foundation.
-
5Build the roof and walls for each layer. The floor will be made of the roof of the layer below.
-
6Go to the top of the building, and create a guide as to where the roof will go.
-
7Build the guide out into a roof.
-
8Build a ring around the base of the top level.
-
9Add two lines of blocks to the top of the long sides of the next level down.
-
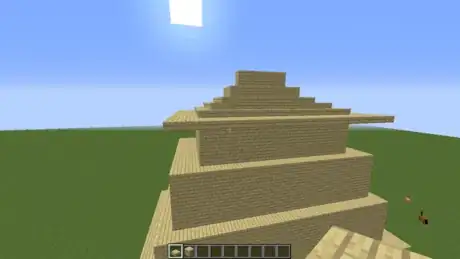
10Add two rings of slabs to finish the roof of the second level.
-
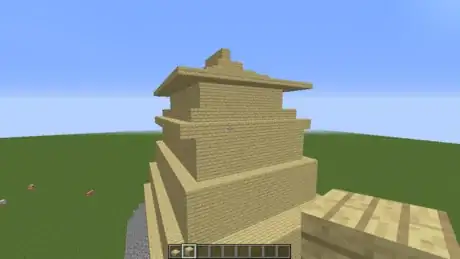
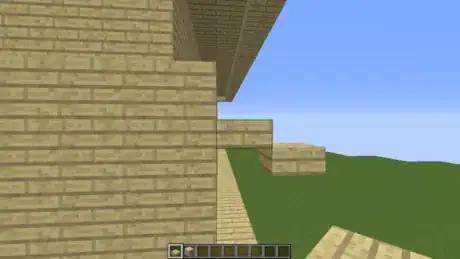
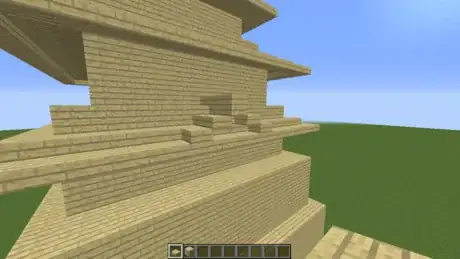
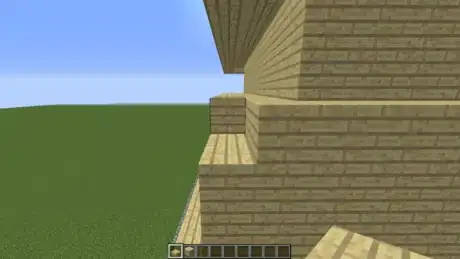
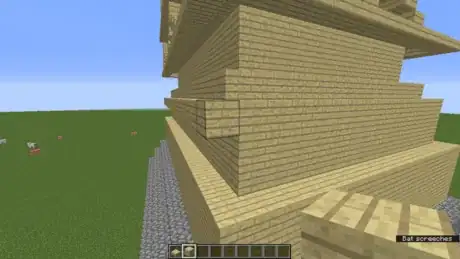
11Add a small rooflet to each side of the second level. This step is optional and purely cosmetic, but it does enhance how your building looks.
-
12Place two slabs on the third level. These will be a guide to where the roof will be built.
-
13Build two rings of slabs around the third level.
-
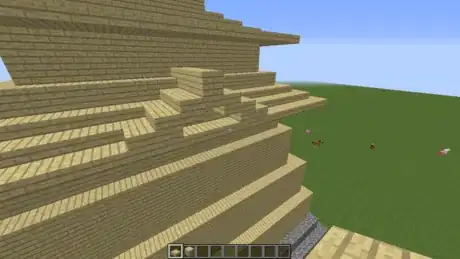
14Build a rooflet on the short sides of the third level roof, if desired.
-
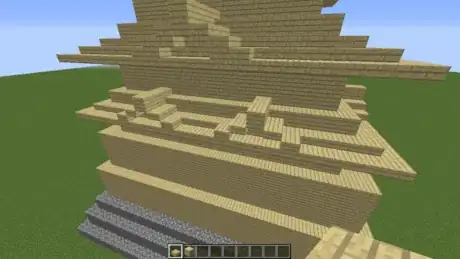
15Build two rooflets if desired. Add them on the long sides of the third level, beneath and to the side of the rooflet on the second level.
-
16Remove a row of blocks at the top of each of the short sides on the fourth level.
-
17Place a row of blocks just below the cut-out on the long sides of the fourth level.
-
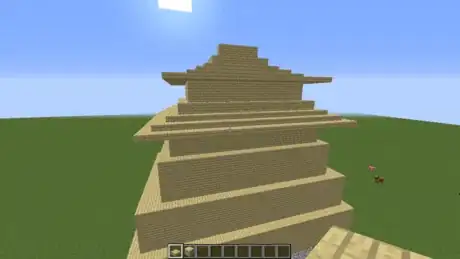
18Build two rings of slabs to finish off the roof of the fourth level.
-
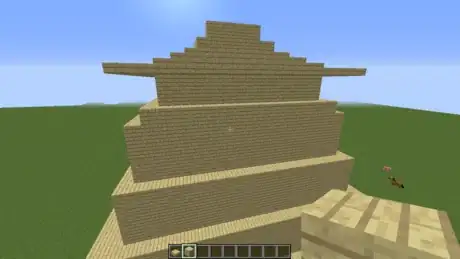
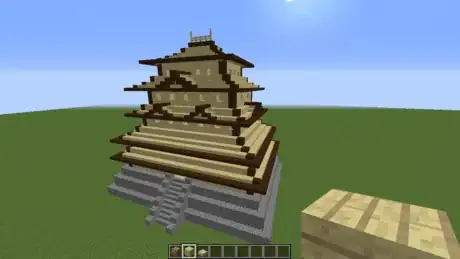
19Build two rings of slabs around the bottom level to complete the roofing of the castle.
-
20Go to the top of the roof and build a row of fence posts, if desired.
-
21Add an optional edging. Replace the edges of the roof with a different-coloured block, such as spruce or dark oak. This helps the features of the building to stand out.
-
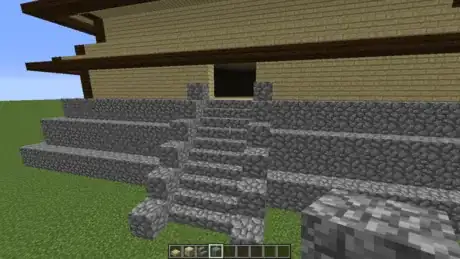
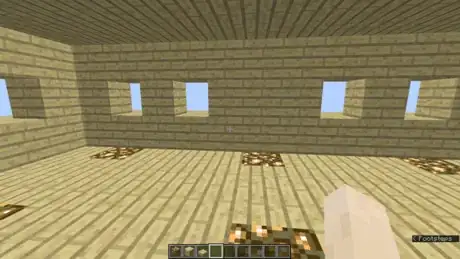
22Make a hole in the front as a door, and build a staircase leading up to it.
-
23Light up the inside of the building.
-
24Build a staircase between every level. Make sure that you replace any lights that the staircase covers up, to prevent mobs from spawning.
-
25Place holes in the walls as windows and arrow slits.
-
26Finished!
Advertisement
Method 4
Method 4 of 4:
Accenting Your Builds
-
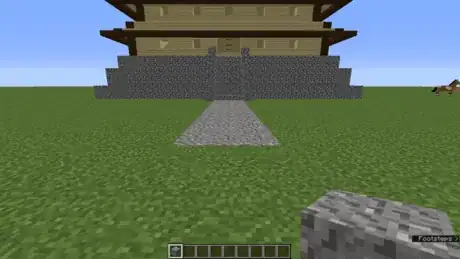
1Build gravel paths between your buildings. A simple step, but it does help.
-
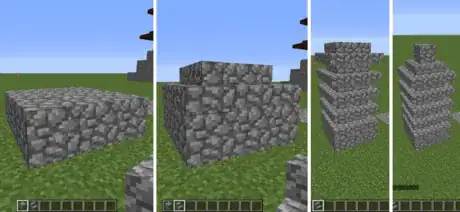
2Build a stone pagoda. Stone pagodas are much more compact than wooden pagodas. Building one with five layers looks good, but in real life they can have as many as sixteen layers. A stone pagoda works well as a focal point, for example at a crossroads.
-
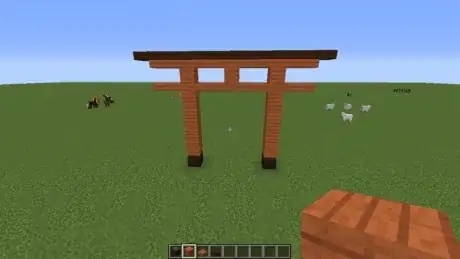
3Build a torii gate. In real life, these are usually found at the entrances to Shinto shrines. They can serve to draw your attention towards a particular path or building.
-
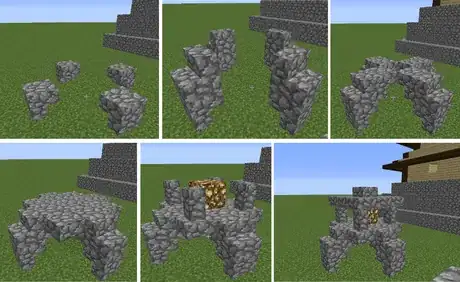
4Build toro lanterns along the pathways. Like torii, toro are usually found in Shinto shrines. They serve to illuminate the pathways, and in Minecraft, keep the mobs away.
-
5Plant oak trees around your buildings. Swap the leaves for white or pink wool to create cherry trees, and for yellow/orange terracotta and red/brown wool to create autumn trees.
Advertisement
Community Q&A
-
QuestionI am very impressed by your work and I want to recreate it; however, I'm stuck at the point where you first lay out wool. Any ideas?
 TomPNTop AnswererThe wool just serves as a guide for where the building will go. For the castle, the wool just forms a series of boxes. The bottom box is five blocks high, and the others are four blocks high, and each one is a bit shorter than the one below it. For the house, the wool forms a line to plan out where the roof goes.
 -
QuestionHow do I make the inside look good?
 TomPNTop AnswererDepends on what style you want! Try looking up some Japanese interior architecture and basing it on that.
 -
QuestionHow does the guide for the roof work?
 TomPNTop AnswererIt's just some wool blocks to provide an outline to give you an idea of how to build things.
Advertisement
Warnings
- On a server, your building can get griefed, so be prepared.⧼thumbs_response⧽
Advertisement
About This Article
Advertisement



.webp)
