This article was co-authored by wikiHow staff writer, Travis Boylls. Travis Boylls is a Technology Writer and Editor for wikiHow. Travis has experience writing technology-related articles, providing software customer service, and in graphic design. He specializes in Windows, macOS, Android, iOS, and Linux platforms. He studied graphic design at Pikes Peak Community College.
This article has been viewed 179,104 times.
Learn more...
A Media Access Control address (MAC) is the address given to every device that has access to the internet. One way to ensure your privacy and security is to change your MAC address. If you have a rooted Android device, you can change your MAC address permanently. If you have an older, unrooted device, you may be able to temporarily change your MAC address until your phone is rebooted. However, most newer Android phones and Samsung Galaxy devices will not allow you to temporarily change the MAC address without rooting the device. This wikiHow teaches you how to change your MAC address on a rooted device, and temporarily change your MAC address on an unrooted device.
Steps
Using Terminal Emulator on a Rooted Android (Permanent)
-
1Check if your phone has root access. Some Android phone models (like the Samsung Galaxy S10e and other modern phones) can't be rooted. You need to root access to install BusyBox and permanently change your MAC address. It's a good idea to use the following steps to check and make sure you have root access before continuing:
- Open the Google Play Store.
- Type Root Checker in the search bar.
- Tap Root Checker in the search results.
- Tap Install next to Root Checker.
- Tap Open once Root Checker is installed.
- Tap Agree to agree to the disclaimer.
- Tap Get Started at the bottom of the screen.
- Tap Verify Root on screen.
-
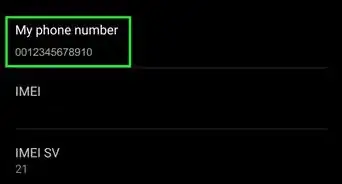
2Write down your current MAC address. You'll want this address in case the new one doesn't work. You can use the following steps to check your MAC address on most Android phones:[1]
- Open the Settings app.
- Tap Network & Internet/Connections.
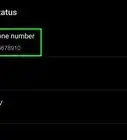
- Tap the Wi-Fi network you are connected to (not the toggle switch). In some menus, you may need to tap the gear icon next to the network's name and tap Advanced to see your MAC address.
- Note your MAC address below "Network Details."
Advertisement -
3Download and install BusyBox. BusyBox is a software suite that contains a variety of Unix tools in a single file. This allows you to use a variety of Linux and Unix commands in Terminal Emulator. Use the following steps to download and install BusyBox:
- Open the Google Play Store.
- Type BusyBox in the search bar.
- Tap BusyBox in the search results.
- Tap Install next to BusyBox.
- Tap Open once BusyBox is installed.
- Tap Install at the bottom.
-
4Download and install Terminal Emulator. Terminal Emulator is a program that gives you access to Linux and Unix Terminal commands on your Android device. Use the following steps to download and install Terminal Emulator:
- Open the Google Play Store.
- Type Terminal Emulator in the search bar at the top.
- Tap Terminal Emulator in the search results.
- Tap Install below Terminal Emulator.
-
5Open Terminal Emulator for Android. This app icon looks like a green Android robot over a blue terminal screen. You can find it on your home screens or in the Apps menu. Alternatively, you can tap Open in the Google Play Store once it finishes installing.
-
6Type su and tap Enter on the keyboard. The command "su" stands for "super user."
- If the app asks for permission to use root access, tap Allow.
-
7Type IP link show and tap Enter. This will display the interface name of your current network, and you'll want to write this down for later use.
-
8Type busybox ip link [interface name]. You'll use the full network interface name that you found in the previous step in place of "[interface name]".
- This command will display the MAC address.
-
9Type busybox config [interface name] hw ether XX:XX:XX:YY:YY:YY to change your MAC address. You'll want to change "XX:XX:XX:YY:YY:YY" to a 12-character MAC address you want.
- If you get an error that the MAC address isn't correct or is unavailable, you can either try entering another MAC address or typing in your original address.
- This change will persist even after you restart your Android.


Using Terminal Emulator on an Unrooted Android (Temporary)
-
1Write down your real MAC address. You'll want this address in case the new one doesn't work. You can use the following steps to check your MAC address on most Android phones:[2]
- Open the Settings app.
- Tap Network & Internet.
- Tap the Wi-Fi network you are connected to (not the toggle switch). In some menus, you may need to tap the gear icon next to the network's name and tap Advanced to see your MAC address.
- Note your MAC address below "Network Details."
-
2Download Terminal Emulator for Android. If you have an older Android device, you may be able to temporarily change the MAC address using Terminal Emulator. Your MAC address will revert back to the default MAC address when the device is restarted. This will not work on most newer Android devices and most Samsung Galaxy devices. Use the following steps to download Terminal Emulator:
- Open the Google Play Store.
- Type Terminal Emulator in the search bar at the top.
- Tap Terminal Emulator in the search results.
- Tap Install below Terminal Emulator.
-
3Open Terminal Emulator for Android. This app icon looks like a green Android robot over a blue terminal screen. You can find it on your home screens or in the Apps menu. Alternatively, you can tap Open in the Google Play Store once it finishes installing.
-
4Type IP link show and tap Enter. This will display the interface name of your current network, and you'll want to write this down for later use.
-
5Type ip link set [interface name] XX:XX:XX:YY:YY:YY and tap Enter. You'll want to change "XX:XX:XX:YY:YY:YY" to a 12-character MAC address you want and change "[interface name]" to the interface name that was displayed when you typed "IP link show." After you enter this, your MAC address will change temporarily. [3]
- If you get an error, you can always enter the original MAC address to revert any changes.


Using ChameleMAC on a Rooted Android (Permanent)
-
1Find out if your phone has a MediaTek chipset. The ChameleMAC app only works with phones that use a MediaTek chipset (like the Xiaomi Redmi Note 9T, Realme X7 Pro Ultra, Samsung Galaxy A32 5G, Nokia 2.4, and Oppo Reno 5 Z). You can find out what kind of chipset your phone uses by installing an app called "Droid Hardware Info" from the Google Play Store. Use the following steps to download and install Droid Info and check if your phone has a MediaTek chipset:[4]
- Open the Google Play Store.
- Type Droid Hardware Info in the search bar.
- Tap Droid Hardware Info in the search results.
- Tap Install below Droid Hardware Info.
- Tap Open once Droid Hardware Info is installed.
- Tap the System tab at the top.
- Check that you have a MediaTek chipset next to "Chipset" near the top.
-
2Check if your phone has root access. Some Android phone models (like the Samsung Galaxy S10e and other modern phones) can't be rooted. You need to root access to install BusyBox and permanently change your MAC address. It's a good idea to use the following steps to check and make sure you have root access before continuing:
- Open the Google Play Store.
- Type Root Checker in the search bar.
- Tap Root Checker in the search results.
- Tap Install next to Root Checker.
- Tap Open once Root Checker is installed.
- Tap Agree to agree to the disclaimer.
- Tap Get Started at the bottom of the screen.
- Tap Verify Root on screen.
-
3Write down your current MAC address. You'll want this address in case the new one doesn't work. You can use the following steps to check your MAC address on most Android phones:
- Open the Settings app.
- Tap Network & Internet/Connections.
- Tap the Wi-Fi network you are connected to (not the toggle switch). In some menus, you may need to tap the gear icon next to the network's name and tap Advanced to see your MAC address.
- Note your MAC address below "Network Details."
-
4Download and install ChemeleMAC. ChameleMAC is not available from the Google Play Store, so you will need to download and install the APK file. Make sure you allow apps from unknown sources in order to install the APK file first, then use the following steps to download and install ChameleMAC:
- Go to https://apkpure.com/chamelemac-change-wi-fi-mac/com.cryptotel.chamelemac in a web browser on your phone.
- Tap Download APK.
- Tap Ok to confirm that you want to keep the file.
- Tap Open to open the APK file.
- Tap Install.
-
5Open ChameleMAC. It has an icon that resembles a green eye with lines and circles attached to it. Tap the icon in your Apps menu to open ChameleMAC. Alternatively, you can tap Open once the app finishes installing.
-
6Tap Allow when asked to grant root access. When the app starts up, it will ask if you want to grant root access. Tap Allow to grant the app root access.
-
7Tap Generate random MAC. It's the first button below the "MAC" text field. Alternatively, you can tap the text field and manually input your own MAC address.
-
8Tap Apply new Mac. This displays a confirmation that asks if you want to change the MAC address.
-
9Tap Change. It's in the confirmation pop-up that displays when you tap Apply new MAC. This confirms that you want to change the MAC address and applies the change.


References
About This Article

1. Make sure your phone has root access.
2. Find your MAC address.
3. Download BusyBox and Terminal Emulator for Android from the Google Play Store.
4. Open Terminal Emulator for Android.
5. Type "SU".
6. Type "IP link show".
7. Type "busybox ip link [interface name]".
8. Type "busybox config [interface name] hw ether XX:XX:XX:YY:YY:YY".