This article was co-authored by Ollie George Cigliano. Ollie George Cigliano is a Private Chef, Food Educator, and Owner of Ollie George Cooks, based in Long Beach, California. With over 20 years of experience, she specializes in utilizing fresh, fun ingredients and mixing traditional and innovative cooking techniques. Ollie George holds a BA in Comparative Literature from The University of California, Berkeley, and a Nutrition and Healthy Living Certificate from eCornell University.
There are 8 references cited in this article, which can be found at the bottom of the page.
This article has been viewed 45,634 times.
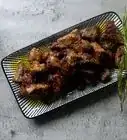
A standing rib roast, also called a prime rib roast, is a big piece of beef made up of several steaks and ribs. Despite its size, it’s actually much easier to carve than poultry and many other types of meat. The simplest way to carve a rib roast is by trimming and cooking it first. After that, use a sharpened carving knife to remove the bones and slice up the meat. Carve up the roast evenly to enjoy tender, juicy steaks.
Steps
Trimming and Cooking the Roast
-
1Trim the fat down to 1⁄4 in (0.64 cm) or less before cooking. Set the roast down on a flat surface such as a cutting board. Using a carving knife or another sharp tool, make an incision in the white fat cap along the edge of the roast. Hold the roast down with your hand as you cut horizontally across it, removing most of the fat in one cut. Peel back the layer of fat as you go to help you keep track of your knife.[1]
- Leave at least a 1⁄8 in (0.32 cm) layer of fat in place to keep the roast moist. You can also leave this layer on after the roast cooks, or you can remove it if you wish.
- Consider purchasing a carving cutting board if you don't have one already. It is a good surface for carving on because this type of board has a set of raised miniature pyramids in the center of it, which help stabilize the roast while carving. It also has a juice groove for guiding liquid runoff during carving and a stainless steel tray beneath for capturing juice and scraps of meat, which you can easily gather and use for making gravy sauces and soups.
-
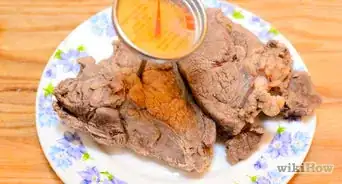
2Cook the roast with the bones in for easier carving. Put the roast in a roasting pan with the fat side up. For a simple recipe, try rubbing it with salt and pepper. You can also add garlic, herbs, and spices to the rub or put potatoes and vegetables in the pan as a side. Cook the roast in an oven heated to about 350 °F (177 °C) until the roast reaches 125 °F (52 °C), which takes about 2 hours on average.[2]
- If you wish to remove the bones in advance, turn the roast over so bones are face up. Pin the roast in place with your hand, then cut along the bones. Follow the bones as closely as possible from one end of the roast to the other.
Advertisement -
3Rest a cooked roast for 20 to 30 minutes before attempting to carve it. Leave the roast out on a tray in your kitchen. Let it cool down before you begin working on it. Not only is this easier on your hands, but it leads to juicier cuts of meat.[3]
- Keep the roast in a room temperature location. You don’t need to cover it while it cools.


Removing the Bones
-
1Place the cooked roast bone-side down on a cutting board. The bones run along one of the outer edges of the roast. The ends of the bones stick out of the meat. They won’t rest flat against the cutting board, so take advantage of them for leverage while you cut.[4]
- Keep the roast on a flat surface that you don’t mind getting a little messy. The more stable the surface, the easier the roast is to carve.
-
2Cut vertically along the bones using a carving knife. Hold onto the ends of the bones with your free hand. While holding the roast still, cut into the meat, following the curve of the bones as closely as possible. The bones end about halfway through the roast.[5]
- To get a clean cut, use a sharp knife that is longer than the roast’s width. A good carving knife allows you to remove all of the bones in one go.
- When you get close to the bottom of the roast, lift the bones up in the air. Standing the roast up on its end makes following the bones easier.
-
3Fold the bones back to finish removing them. Turn the roast over, laying it flat on the cutting board. Pull the bones up toward you, almost like you’re opening a door. Find the visible ends of the bones, then slice through the meat there to remove them all at once. The bones aren’t edible, so throw them away when you’re done with them.[6]
- The bones usually have a little meat left on them. Pick off the meat if you wish or consider saving the bones for another use, such as for making a stock.

Carving the Meat
-
1Carve off the remaining fat if you wish to remove it. Turn the roast over so the fat side is face up. The fat looks white and a little browned after cooking the roast. To remove the fat cap, pin the roast in place with a carving fork or the palm of your hand. Then, slide your knife underneath the fat and cut horizontally across the roast to remove it.[7]
- Position the carving knife so it reaches all the way across the fat. Remove as much as possible in one go. If you notice any remaining fat, carefully go back for it with another pass of the knife.
- You do not have to remove the fat if you don’t want to. Some people prefer leaving the fat on. If you have guests, leaving the fat on gives them the choice to eat it or remove it as they please.
-
2Identify the direction of the grain to cut across it. Look closely at the roast to see the muscle fibers in it, which look like little lines. Turn the roast so you can cut across the fibers. Cutting against the grain shortens the fibers, leading to a better quality steak.[8]
- If you cut along the grain, the roast becomes chewier than usual. Always look for the grain before cutting into a standing rib roast.
-
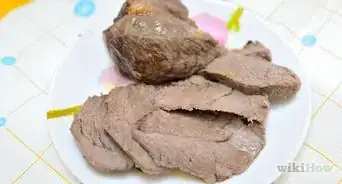
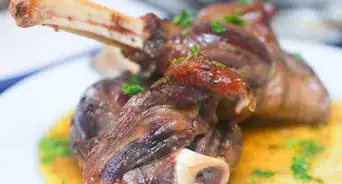
3Cut the roast end to end into slices less than 1 in (2.5 cm) thick. Starting at the end of the roast, cut vertically to divide up the meat. To keep your cuts nice and clean, place the roast underneath the middle part of your carving knife. Cut through the meat by moving your knife as little as possible. The key is to avoid using a sawing motion, which you can do with a sharpened knife and 2 or 3 long strokes per slice.[9]
- The minimum size for standing roast slices is 1⁄2 in (1.3 cm). Thicker slices are chewier than thinner ones, but some people prefer getting more meat with each bite.
Things You’ll Need
- Cutting board
- Carving knife
- Meat fork

References
- ↑ https://www.cookinglight.com/cooking-101/techniques/how-to-cook-standing-rib-roast#prime-rib-primer-trim-temper
- ↑ https://cooking.nytimes.com/recipes/1016893-standing-rib-roast
- ↑ https://www.cookinglight.com/cooking-101/techniques/how-to-cook-standing-rib-roast#prime-rib-primer-rest-carve
- ↑ https://www.myrecipes.com/how-to/video/preparing-standing-rib-roast
- ↑ https://www.finecooking.com/article/how-to-carve-a-rib-roast
- ↑ https://www.seriouseats.com/2012/12/how-to-carve-a-prime-rib-slideshow.html
- ↑ https://www.myrecipes.com/how-to/video/preparing-standing-rib-roast
- ↑ https://www.thekitchn.com/heres-exactly-how-to-slice-meat-against-the-grain-and-why-you-should-be-doing-it-meat-basics-215798
- ↑ https://www.seriouseats.com/2012/12/how-to-carve-a-prime-rib-slideshow.html
About This Article