X
wikiHow is a “wiki,” similar to Wikipedia, which means that many of our articles are co-written by multiple authors. To create this article, 13 people, some anonymous, worked to edit and improve it over time.
This article has been viewed 58,166 times.
Learn more...
Polishing boots is an art form. To get the best results, take your time and apply small layers. This is a week long process, not a last minute thing, especially if you want to get a mirror finish that will last and not fall off the first time you come to attention.
Steps
Part 1
Part 1 of 2:
Preparing for Bull Polishing
-
1Wear your boots. Getting your brand new boots out of the stores and then spending hours bulling them is just going to ruin them. Wear them in for a few weeks if possible.
- If you don't have time to wear them in, put them on and submerge them in hot water for 20 minutes or so. Then walk around; this will help speed up the process. Note they will take time to dry.
-
2Build up normal polish on the boot by brush polishing the boot for a few days, building up layers. Again wear them whilst doing this but try not to scruff the toe or chip the boot; this will affect the end out come, so don't take them on the assault course.Advertisement
-
3Once a few layers of polish is applied, buy your self a good quality duster. Selvyt cloths are a good choice. Wash it a few times, and brush it with a nail brush and washing up liquid will make it softer and less likely to scratch your boot. Note that this can be done whilst doing first steps.
-
4Buy a new tin of Black Kiwi boot polish (or use one that you have not used for brush polishing). Get some black polish, but for a deeper shine, also buy a tin of dark brown to top the look off with.


Advertisement
Part 2
Part 2 of 2:
Bull Polishing
-
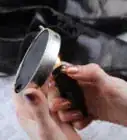
1Get ready to polish. You'll need a small bowl of water, your black and brown polish, Silver, and the boots.
-
2Wrap one or two fingers with your cloth. Make sure it is flat on your fingers; twisting the access can help to tighten on fingers.
-
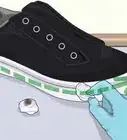
3Apply a layer of black polish to your whole boot. Wipe it until it's covered, using a circular motion of an inch diameter. Rub in until you think the polish is drying.
-
4Remove any excess polish. Do this by dipping your cloth on water and repeating the last step.
-
5Repeat the layering, polishing, and removing process 3 times. Each time, use less and less new black polish.
-
6Finish up with a very thin brown layer. Do as you have done for the black layers; again stop when you think it's drying and removing any left over polish with water. Brown polish seems to be softer than black, so it fills the tiny holes you want to get rid off to make the best shine.
-
7Stop at this point and maybe wear them in again for a day. You don't want your hard work to crack and fall off.
-
8Continue the polishing process after a few hours of wear or the next night after work. Repeat daily until you get the results you want. This normally takes a week of around an hour a night to see good long lasting results.


Advertisement
Community Q&A
-
QuestionDoes this work for brown boots as well?
 vani samallaCommunity AnswerYes, it will. Bull polishing, bulling, spit polishing, or spit shining refers to a method for polishing leather products, even brown, in such a way as to give them an extremely high shine effect.
Advertisement
Warnings
- If melting polish, realize it is highly flammable and you need to be in a ventilated room.⧼thumbs_response⧽
- Over-polishing when polish has dried will scratch your boot, lessening the shine. Apply a little more polish or water to lubricate your bulling action.⧼thumbs_response⧽
Advertisement


About This Article
Advertisement