This article was co-authored by wikiHow staff writer, Hunter Rising. Hunter Rising is a wikiHow Staff Writer based in Los Angeles. He has more than three years of experience writing for and working with wikiHow. Hunter holds a BFA in Entertainment Design from the University of Wisconsin - Stout and a Minor in English Writing.
This article has been viewed 263,356 times.
Learn more...
Learning how to use your brakes is an important factor when you’re riding a motorcycle. When you are on a bike, always apply the front and rear brakes to come to a controlled stop. During a turn, only apply the brakes at the start if you’re going too fast. As long as you practice using the brakes and stay aware of the road conditions, you can ride your motorcycle safely!
Steps
Coming to a Controlled Stop
-
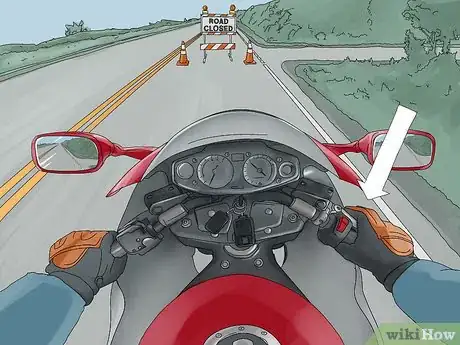
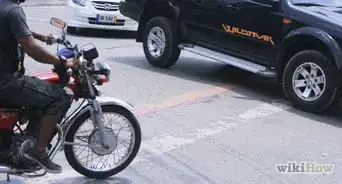
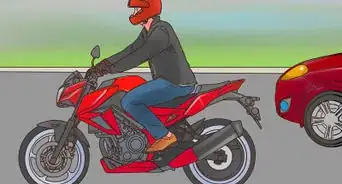
1Start braking at the proper time depending on your speed. Your average reaction time before you apply the brakes is around 0.62 seconds. When you use your brakes, it will take more time to come to a complete stop if you’re going faster. If you’re going 30 mph (48 km/h), it will take approximately 2.39 seconds to stop but the distance you travel equals about 66 ft (20 m). Always apply your brakes to maintain a safe distance between you and any vehicles in front of you.
- Always stay aware of your surroundings and other traffic so you can brake when you need to.
- If your bike has an anti-lock braking system (ABS brakes), then your stopping time and distance may be slightly shorter.
- Your braking distance can also be affected by road conditions. Slippery roads, like those made from gravel or covered in rain, will increase the distance it takes to stop.
-
2Ease off the throttle. The throttle is located on the right handlebar and twists toward you to accelerate. Slowly turn the throttle toward the front of the bike when you want to decelerate or come to a stop. When you disengage the throttle, your bike will start to slow down naturally since you aren’t giving the engine any gas.[1]
- If you keep your throttle twisted toward you while you brake, it will cause stress on your transmission and brake pads.
Advertisement -
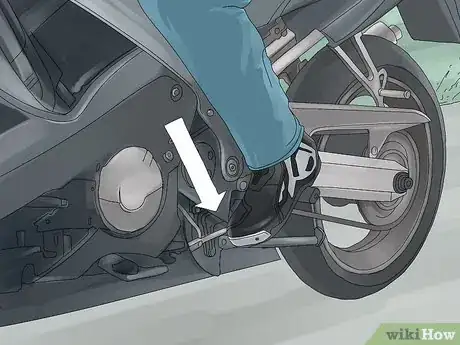
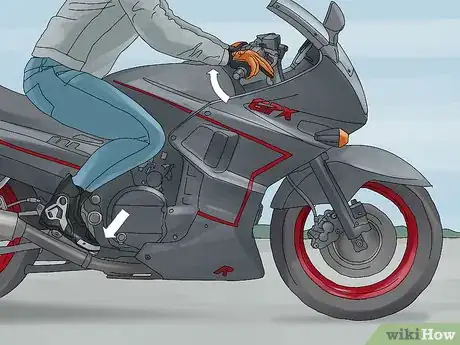
3Press down on the rear brake with your right foot. The rear brake lever is located in front of your right foot on your motorcycle. When you want to reduce your speed, use your toe to gently press the rear brake lever. Don’t apply too much force or your rear tire will lock up and could cause you to lose control.[2]
- Avoid only using your rear brakes since it can cause your bike to skid and increase your stopping distance.
-
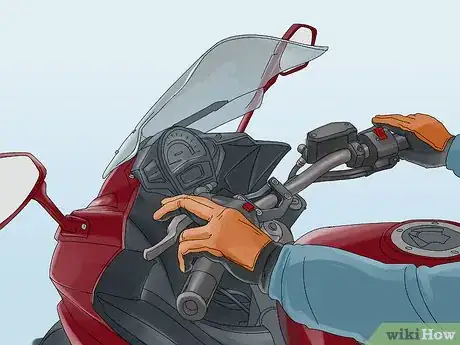
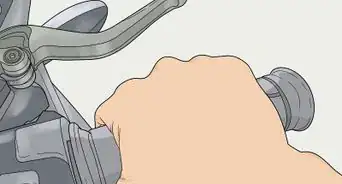
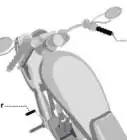
4Squeeze the front brakes at the same time with 2 fingers to ease into the stop. The front brake control is the handle directly above the throttle on the right handlebar of your motorcycle. As you press down on the rear brake lever, use your index and middle finger to slowly squeeze the front brake controls.[3]
- Your front brake controls about 75% of your stopping power and will be the most effective when braking.
- Avoid squeezing the front brake with all 4 fingers since you might lock the tire and cause you to lose control.
Tip: If your front tire locks up while you’re braking, let go of the lever and reapply it firmly.[4]
-
5Hold the clutch to help slow down. The clutch is the lever on the left handlebar on your motorcycle. As you decelerate, squeeze on your clutch. This will help slow you down even more and allows you to shift into lower gears.[5]
- Even though holding the clutch in will help you slow down, it will not activate your brake lights. Make sure to always apply your brakes when slowing down so other drivers are aware.
-
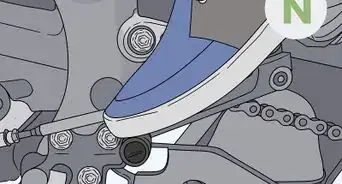
6Shift into first gear before you get to your stop. As you slow down, use the shifter lever near your left foot to downshift to first gear. Putting your bike into its lowest gear helps you get a smooth start and stop while you’re riding.[6]
- If you were already in first gear before slowing down, you don’t need to make any changes.
-
7Plant your left foot when your bike stops moving. Once your bike comes to a complete stop, take your left foot and put it firmly on the ground. This will help you keep your balance and prevents the bike from falling over. When you want to start moving again, begin slightly accelerating before putting your foot back in its place.[7]
Slowing Down for a Turn
-
1Ease off of the throttle before you start your turn. As you approach your turn, slowly twist the throttle away from you to decelerate. Reduce your speed so you’re still able to make your turn, but not so you come to a complete stop.[8]
- If you’re going too fast into your turn, you may cross into a different lane or into oncoming traffic.
- If you’re going slow enough to make your turn and you don’t need to use your brakes, slightly press on the rear brake to flash your brake lights. This lets other traffic know that you’re going to slow down more.
-
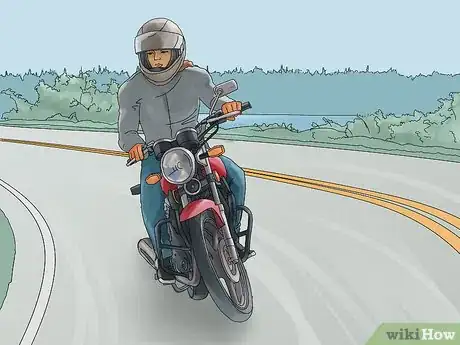
2Apply the brakes before your turn if you need to slow down more. Easing off your throttle should be enough to slow you down during a turn, but you might need your brakes if it’s a tight corner. Gently press your right foot on the rear brake control and squeeze the front brake control with your right hand. Make sure the bike doesn’t come to a complete stop unless you need to make one.[9]
- If you apply either of the brakes too hard, you may lose traction and lose control.
-
3Lean into your turn. Squeeze your knees against your bike’s body to help maintain your balance. Look toward your turn and press the handlebars in that direction. As you make your turn, lean toward that side of the bike to keep your balance. Your bike will start to lean into the turn so you can maintain control.[10]
- During a regular turn, lean your body and the motorcycle at the same angle.
- During slow tight turns, keep your body as straight as you can and only lean the motorcycle to maintain your balance.
Warning: Avoid using your brakes in the middle of your turn or else you could skid.
-
4Accelerate as you come out of the turn to stay balanced. While you’re in your turn, maintain the same speed by holding onto the throttle. At the end of the turn, twist the throttle toward your body to speed up and keep your bike stable.[11]
Braking in Different Road Conditions
-
1Use both brakes when coming to a stop no matter the conditions. When you’re riding, it’s best to always use both of your brakes when you need to slow down or stop. That way, you don’t have to change anything during an emergency situation. Apply both brakes evenly to come to a controlled stop in the shortest distance.[12]
-
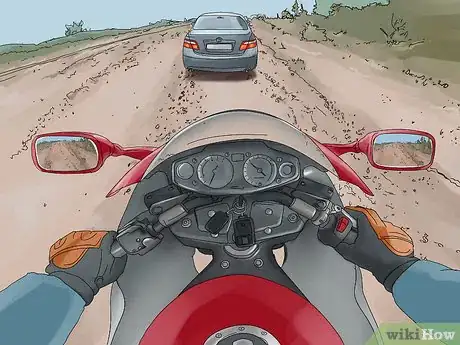
2Brake sooner than you normally would on slippery surfaces. Roads made of gravel or pavement that is wet can cause your bike to lose traction while it’s stopping. If you’re on a road that isn’t smooth, stay aware of your surroundings and other traffic on the road. Apply your brakes early to avoid any collisions.[13]
- Ride in another vehicle’s tire tracks if you can to avoid slipping.
Warning: Even things that you can normally ride over in a car, such as a manhole cover or lane marking, can cause your bike to lose control. Avoid going too fast over them when you ride.
-
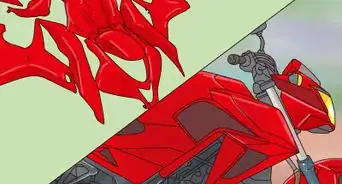
3Ease off the throttle when riding through standing water if you need to. Going fast through standing water on the road can cause you to aquaplane, where you lose tire traction on the road. If the road ahead of you looks shiny, twist the throttle away from you and keep your bike as straight as possible to slow down.[14]
- Do not apply the brakes if you lose control of your bike this way since it may make the problem even worse.
-
4Hold your brakes down if you’re stopping on a slope. If you come to a stop while you’re riding either uphill or downhill, your bike will start to roll down the slope. When you stop, keep your bike pointing as straight up the hill as possible to keep your balance. Plant your left foot on the ground and keep the front and rear brakes activated so your tires don’t slip.[15]
- You can also try to plant both feet on the ground and only use your front brake, but it may lose traction on steeper hills.
Community Q&A
-
QuestionWhen I stop, is there a specific foot I should be using to rest on the ground - like should I keep my foot on the brake, or clutch?
 Community AnswerPut your bike in first gear, hold the clutch with your left hand and you can put both feet down. Use the right hand to apply the front brake if sitting on an incline.
 -
QuestionCan we apply brakes directly on a higher gear?
 Community AnswerYes. Apply both the brakes and clutch and promptly bring the gear to the lower position. The gear may be further shifted to neutral while you are standing.
 -
QuestionWhich motorcycle brake do I have to press first?
 Community AnswerYou should apply the rear and front brakes simultaneously. Do not apply the front brake with too much force, as it could flip the motorcycle over the front wheel. Remember that the front brake, when used properly, provides upwards of 70% of your stopping power, but you should get to know your motorcycle before applying the front brakes too forcefully.
Warnings
- Never pull the front brakes hard by themselves since you could flip your bike.⧼thumbs_response⧽
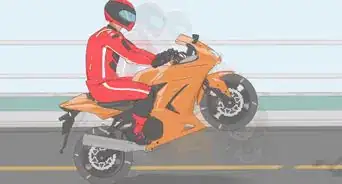
- Try to keep your bike vertical instead of falling on your side in an emergency stop. Your tires have more stopping power than the bike’s body.[16]⧼thumbs_response⧽
References
- ↑ https://www.dmv.ca.gov/portal/dmv/?1dmy&urile=wcm:path:/dmv_content_en/dmv/pubs/dl655/mcycle_htm/abilities
- ↑ https://youtu.be/TeJ1JH2ah00?t=211
- ↑ https://youtu.be/mmyrpC5DNnA?t=169
- ↑ https://www.dmv.ca.gov/portal/dmv/?1dmy&urile=wcm:path:/dmv_content_en/dmv/pubs/dl655/mcycle_htm/abilities
- ↑ https://www.dmv.ca.gov/portal/dmv/?1dmy&urile=wcm:path:/dmv_content_en/dmv/pubs/dl655/mcycle_htm/abilities
- ↑ https://www.dmv.ca.gov/portal/dmv/?1dmy&urile=wcm:path:/dmv_content_en/dmv/pubs/dl655/mcycle_htm/abilities
- ↑ https://www.dmv.ca.gov/portal/dmv/?1dmy&urile=wcm:path:/dmv_content_en/dmv/pubs/dl655/mcycle_htm/abilities
- ↑ https://www.dmv.ca.gov/portal/dmv/?1dmy&urile=wcm:path:/dmv_content_en/dmv/pubs/dl655/mcycle_htm/abilities
- ↑ https://www.dmv.ca.gov/portal/dmv/?1dmy&urile=wcm:path:/dmv_content_en/dmv/pubs/dl655/mcycle_htm/abilities
- ↑ https://www.dmv.ca.gov/portal/dmv/?1dmy&urile=wcm:path:/dmv_content_en/dmv/pubs/dl655/mcycle_htm/abilities
- ↑ https://www.dmv.ca.gov/portal/dmv/?1dmy&urile=wcm:path:/dmv_content_en/dmv/pubs/dl655/mcycle_htm/abilities
- ↑ https://www.dmv.ca.gov/portal/dmv/?1dmy&urile=wcm:path:/dmv_content_en/dmv/pubs/dl655/mcycle_htm/abilities
- ↑ https://www.dmv.ca.gov/portal/dmv/?1dmy&urile=wcm:path:/dmv_content_en/dmv/pubs/dl655/mcycle_htm/abilities
- ↑ https://www.motorcycletesttips.uk/riding-tips/motorcycle-riding-on-wet-roads/
- ↑ https://www.motorcyclistonline.com/overcome-fear-on-street-or-trail-5-tips-for-starting-on-hill
- ↑ https://youtu.be/DYr0bAn5F8k?t=252
About This Article
To brake properly on a motorcycle, make sure you give yourself plenty of time, since it takes a few seconds to come to a complete stop. If the road surface is wet, give yourself twice as much time to stop. Start by easing off the throttle, which will stop you accelerating and engage your engine braking. Then, squeeze the front brake lever with 2 fingers. At the same time, gently press the rear brake pedal. Aim for about 75 percent stopping power from your front brake and 25 percent from you rear brake, as most of the weight is at the front of your bike. For more tips, including how to brake when taking a corner on a motorcycle, read on!








-Step-13.webp)
-Step-17.webp)


-Step-13.webp)
