This article was co-authored by wikiHow staff writer, Jessica Gibson. Jessica Gibson is a Writer and Editor who's been with wikiHow since 2014. After completing a year of art studies at the Emily Carr University in Vancouver, she graduated from Columbia College with a BA in History. Jessica also completed an MA in History from The University of Oregon in 2013.
There are 11 references cited in this article, which can be found at the bottom of the page.
The wikiHow Video Team also followed the article's instructions and verified that they work.
This article has been viewed 16,416 times.
Learn more...
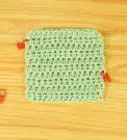
If you're crocheting a hat or sleeve, it's pretty common to see directions for a knit or ribbed cuff. This just means that you're making an edge that has vertical lines to give your project a finished look. So what's a crocheter to do? Fortunately, you don't have to have knitting skills to make ribbing for your project. If you know a handful of crochet stitches, you can add ribbing that's stretchy and worked right onto your project.
Steps
Starting a Foundation Chain
-
1Insert your hook onto the edge of your project and make chain stitches. The great thing about this ribbing is that you work it directly onto the edge of your swatch or project. You can totally customize the number of chains you make based on how long you want your ribbing to be. Keep in mind that the longer your chain, the wider the ribbing will be.[1]
- If you're following a pattern, it should tell you how many chains to make or it will tell you to chain a certain length.
- Working on a hat or sleeve cuff? If you want the garment to hug your body, use a hook in a smaller size so the stitches are smaller than the rest of the item.
- Want to make ribbing in a different color? Switch yarn colors once you've finished the last stitch of your project and before you start the ribbing.
-
2Make a single crochet (SC) stitch into the second chain from the hook. Skip the chain that's closest to your hook and push the tip of the hook into the second chain. Then, work a single crochet stitch. Need a refresher? Don't worry—to single crochet, wrap the yarn once around your hook and pull up a loop. Yarn over again and pull through both of the loops to finish the stitch.[2]Advertisement
-
3Single crochet into every stitch down the chain. Now you're going to keep crocheting down the length of chain stitches you made until you reach the bottom. Just work 1 single crochet into each chain stitch.[3]
- This makes a strip of fabric that's dangling from your project. When you join the foundation chain to your project, you'll anchor it in place.

Attaching the Chain to Your Project
-
1Insert the hook into the edge of your project. At this point, the chain is dangling, so it's important to secure it to your crocheted item. This is called joining and it just means that you push your hook into the edge of your item where it meets the base of the chain.[4]
-
2Slip stitch to attach the base of the chain to the item. To slip stitch, just wrap the yarn once around your hook and pull it through both of the loops on your hook. That's it! You've just joined the ribbing to your work.[5]
-
3Slip stitch into the next stitch of your project so the ribbing is really secure. Before you start crocheting back up the ribbing chain, make sure it's really attached to the edge of your project. Insert the hook into the next stitch of the project and slip stitch 1 more time just to be safe.[6]
-
4Make a single chain stitch and turn your work. Remember, to create a chain just wrap the yarn once around the hook and pull it through the loop on your hook. Since you'll be crocheting back up the ribbing, flip your project around so it's easier to crochet up the other side of the chain.[7]
- This finishes your first row of ribbing.
-
5Skip the chain and slip stitches and insert your hook into the ribbing chain. You don't want your ribbing to bulge in spots, so skip over the chain and slip stitches you just made at the base. Then, push your hook into the next stitch on your ribbing chain.[8]
Working the Ribbing
-
1Single crochet into the back loops of all but the last stitch of your chain. Instead of pushing your hook through the front and back loops of a stitch, you're just going to work through the back loops. Make a single crochet stitch into each chain stitch until you have 1 chain left. Don't single crochet that last chain just yet.[9]
- Can't tell where the back loops are? When you look at the crochet work you'll see that each stitch makes a V. The back loops are the back side of that V which are farther away from you.
- Does your pattern say BLSC? This is exactly what you're doing when you single crochet into the back loops.
-
2Single crochet into both loops of the last stitch. When you get to the last stitch, push your crochet hook from front to back instead of working just into the back loop. Then, make the single crochet stitch. You've just finished row 2 of the ribbing.[10]
- This might seem fussy, but this little adjustment makes the edge of your ribbing straight and even.
-
3Turn the work and single crochet through the first stitch. Flip your work around so you can crochet the rib pattern back down the chain. Since you're still working the edge of the ribbing, insert your hook through the first stitch from front to back and make a SC.[11]
-
4Single crochet into the back loops until you reach the base of the chain. You're almost done with row 3 of the ribbing. From this point on, single crochet into each back loop down the chain. You should start to see a ribbed pattern emerge.[12]
-
5Repeat the ribbing pattern until you've added all of the ribbing. Now that you've worked the ribbed pattern once, you'll see the ribbing start to take shape. Just repeat the pattern until you've worked ribbing across your project.[13]
- If this sounds tricky, it's okay. Remember that you make 2 slip stitches when you reach the base of the ribbing and chain 1 before you turn the work. For the most part, you're sticking with the SC stitch to make the ribbing.
-
6Whipstitch or slip stitch to join the edges together if you crocheted a round project. If you added ribbing to a cuff or hat, for instance, you'll end up with 2 edges that need to be joined. If you like to sew, cut the yarn tail and thread it onto a tapestry needle. Then, line up the edges and whipstitch them together. Prefer crocheting? No problem! Stack the fabric so the edges line up and slip stitch along the edge to join the pieces.[14]
- If you attached ribbing to a flat project like a blanket, just tie off the yarn when you reach the end and weave in the tails.
Things You'll Need
- Crochet hook
- Yarn
- Project
- Scissors
- Tapestry needle


References
- ↑ https://youtu.be/cYlvv03hbaE?t=44
- ↑ https://www.acrochetedsimplicity.com/how-to-add-a-knit-look-ribbed-band-or-cuff-to-your-crochet-projects/
- ↑ https://youtu.be/cYlvv03hbaE?t=60
- ↑ https://www.acrochetedsimplicity.com/how-to-add-a-knit-look-ribbed-band-or-cuff-to-your-crochet-projects/
- ↑ https://youtu.be/xsEPLeUSwmg?t=126
- ↑ https://youtu.be/xsEPLeUSwmg?t=216
- ↑ https://mycrochetory.com/how-to-crochet-ribbing/
- ↑ https://youtu.be/i5F_OMt6eFc?t=318
- ↑ https://www.acrochetedsimplicity.com/how-to-add-a-knit-look-ribbed-band-or-cuff-to-your-crochet-projects/
About This Article