This article was co-authored by wikiHow staff writer, Jessica Gibson. Jessica Gibson is a Writer and Editor who's been with wikiHow since 2014. After completing a year of art studies at the Emily Carr University in Vancouver, she graduated from Columbia College with a BA in History. Jessica also completed an MA in History from The University of Oregon in 2013.
There are 11 references cited in this article, which can be found at the bottom of the page.
The wikiHow Video Team also followed the article's instructions and verified that they work.
This article has been viewed 26,253 times.
Learn more...
Sometimes it's hard to see the beautiful detail work in a piece of furniture, especially if you've painted it with chalk paint. If you'd like carved details to stand out more or you'd like to give your item an antique look, glaze is perfect for the job! Glaze is semi-transparent and gives you more control over the style than wax does and it's easy to apply. You can also give your project an aged or distressed look by choosing a dark glaze or sanding away some of the chalk paint.
Steps
Preparation
-
1Let your chalk-painted project dry completely. Read the label on your chalk paint to find the recommended drying time. Most manufacturers recommend letting your project dry for at least 24 hours between each coat, but it's a good idea to let your project cure for 3 to 5 days before you apply a glaze.[1]
- If you're going for a faded shabby-chic look, you might only want 1 coat of chalk paint. If you want a richer, deeper color, apply at least 2 coats of paint to your project.
-
2Rub the surface with sandpaper if you want to give it a distressed look. Are you going for a worn, rough style? Instantly age the look of your project by rubbing a block of 60- to 100-grit (medium-grit) sandpaper over the surface of the chalk-paint. Rub the sandpaper back and forth to remove some of the chalk paint so you can see the original paint or wood underneath. Work your sandpaper over areas that would face everyday wear and tear, like corners, edges, or details that stick out.[2]
- If you don't have a sanding block, you can use a piece of sandpaper, but it might be a little tricky to hold. Fold the piece of sandpaper a few times to make it easier to grip.
Advertisement -
3Wipe off the dust with a damp sponge if you distressed the wood. Dip a sponge in cold water and squeeze it to remove the water. Then, wipe it over the entire piece you're glazing. This gets rid of sawdust and paint that you removed when you distressed the project.[3]
- If you didn't distress the item, you can skip this step and go straight to sealing or glazing.
-
4Brush on a topcoat like polycrylic to seal the chalk paint. Chalk paint really soaks up glaze, which can make it difficult to wipe away. To give you more control over how much glaze you leave on the project, apply a topcoat like polycrylic, which is a protective sealer. To use it, dip a synthetic paintbrush in topcoat and apply a thin layer to the entire surface. Then, let it dry completely before you actually glaze the project.[4]
- Most topcoat products dry to the touch within an hour, although you could wait overnight for the product to dry completely.
- Polycrylic dries clear so you don't have to worry that it will change the finished look of your project.
-
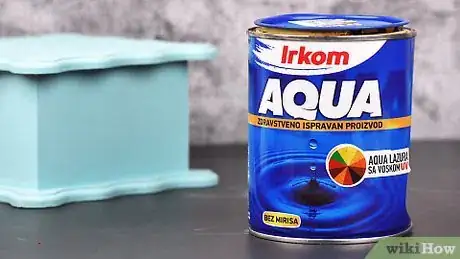
5Shop for a water-based glaze to use over the chalk paint. Chalk paint is water-based, so look for a water-based glaze to get the best finish. You'll have an easier time applying the water-based glaze and it will dry faster than an oil-based glaze.[5]
-
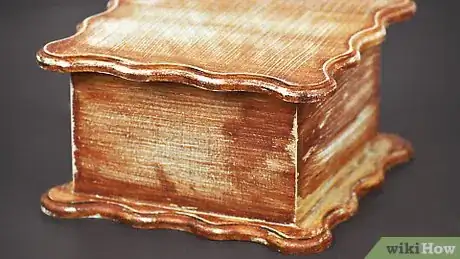
6Buy a dark glaze if you want to give the project a dramatic, antiqued look. Look for a dark brown, black, or antique glaze if you want to darken the details and shadows on a project. If you see a glaze labeled "antique" this usually means that the glaze is dark enough to age the look of the project.[6]
- You can use dark glazes on dark chalk paint to give the project a deep, rustic look or apply dark glaze over light colors so the details really stand out.
-
7Get a light-colored glaze for a faded, rustic look. Sometimes you want a chalk paint project to look slightly worn and a light glaze is perfect for this. Look for a white or pearl glaze. You can apply it to dark chalk paint if you want to lighten the color or put it over light-colored chalk paint to get a distressed or country look.[7]
- Keep in mind that a light-colored glaze on light-colored chalk paint won't bring out the carved details in your project.
-
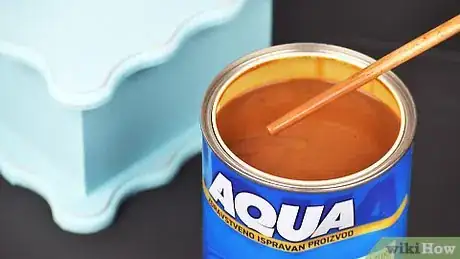
8Open the can of glaze and stir it well with a paint stirrer or chopstick. The pigment in the glaze settles as it's stored, so use a wooden paint stirrer or clean chopstick to stir it for at least 30 seconds.[8]
- Some people think that stirring vigorously introduces air bubbles, but that shouldn't be a problem since you'll be wiping off the glaze with a cloth later.
Application
-
1Dip a 2 in (5.1 cm) paintbrush into your glaze and brush it onto the project. If you don't have a synthetic paintbrush, a small foam brush works fine, too! Try to apply a thin, even layer of the glaze, working the brush in the same direction. Ensure that you work the glaze into carved details and trim work.[9]
- Work in small sections so you're not feeling rushed, especially if you're glazing a big project like a dresser or large cabinet. For example, brush glaze over just 1 drawer of a cabinet instead all of them so you're not rushing to work them all at the same time.
-
2Wipe the surface with a dry cloth to remove the excess glaze. Take a dry cotton cloth and wipe in the same direction you applied the glaze. Avoid using a paper towel or material that sheds fibers. Rub the cloth lightly over the surface to remove a thin layer of glaze or press firmly and evenly to leave glaze just in the carved details.[10]
- Keep in mind that the more you wipe, the more chalk paint you'll see. If you're going for a dark, antiqued look, you might not want to remove very much glaze.
- To give your project an even appearance, wipe off the glaze in the same direction you applied it.
-
3Use a damp cloth to wipe the project if you want to lift more of the glaze. If you applied the glaze with a heavy hand or you just want to take a lot of it off, run a clean cloth under cold water and squeeze it out. Then, wipe the project in the same direction you applied the glaze.[11]
- Removing the glaze in the same direction makes the project look more natural and even.
-
4Let the glaze dry completely overnight. Some glazes are fast-drying while others dry slowly to give you more time to work the product into your project. Read the label to see the recommended drying time for the product you're using. In general, let the glaze dry overnight.[12]
-
5Brush a topcoat of polycrylic to seal your project. You've just spent time creating a beautiful project, so protect it from damage! Dip a clean synthetic paintbrush into polycrylic and brush a thin layer onto the entire piece. Then, let it dry completely.[13]
- Don't want to seal your work? If you don't think your project will be exposed to wear and tear and you'd like it to keep its matte sheen, you can totally skip sealing it.
Warnings
- Work in a well-ventilated space when you're painting, sealing, and glazing since the fumes from the products are usually harmful if you breathe them in.⧼thumbs_response⧽
Things You'll Need
- Chalk-painted project
- Sponge
- Gloves
- Glaze
- Synthetic 2 in (5.1 cm) paintbrush
- Paint stirrers or chopsticks
- Cloths
- Sanding block or sandpaper
- Sealer like polycrylic
References
- ↑ https://paintedfurnitureideas.com/5-mistakes-people-make-chalk-paint/
- ↑ https://www.bobvila.com/articles/how-to-use-chalk-paint/#.WUBDLcbMy3U
- ↑ https://youtu.be/UFOOnASUXS8?t=375
- ↑ https://youtu.be/ah_gKsyaIF8?t=165
- ↑ https://www.bobvila.com/articles/how-to-glaze-kitchen-cabinets/
- ↑ https://www.bobvila.com/articles/how-to-glaze-kitchen-cabinets/
- ↑ https://www.bobvila.com/articles/how-to-glaze-kitchen-cabinets/
- ↑ https://youtu.be/fomx0q4GI08?t=195
- ↑ https://youtu.be/ah_gKsyaIF8?t=300


