X
wikiHow is a “wiki,” similar to Wikipedia, which means that many of our articles are co-written by multiple authors. To create this article, volunteer authors worked to edit and improve it over time.
The wikiHow Tech Team also followed the article's instructions and verified that they work.
This article has been viewed 140,885 times.
Learn more...
FireAlpaca is a very user-friendly and useful drawing tool, but you can also use it to animate. Whether one is an animator or a novice artist, anyone can create a simple or complex animation in FireAlpaca. Start at step one to make your own animation in FireAlpaca!
Steps
Part 1
Part 1 of 3:
Starting a Project
-
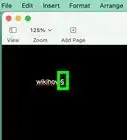
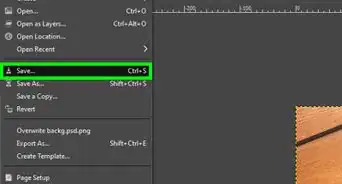
1Create a new file by clicking "File" on the top of the screen or window and clicking "New...". Alternatively, use the keyboard shortcut Ctrl/Command + N.
-
2Review the dialog box "Create New Image". Adjust the width, height, paper size, background color, and resolution to your liking. Once done, click "OK".Advertisement
-
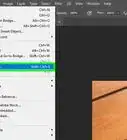
3Click "View" at the top of screen or window and click "Onion Skin Mode". This makes it possible to export the layers as frames and put them together in an animation, and also enables you to see multiple frames at once while animating.
-
4


Advertisement
Part 2
Part 2 of 3:
Creating Frames
-
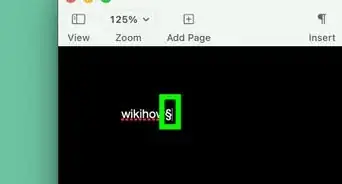
1Select a brush and color, and draw your first frame.
-
2Create a new frame by adding a new layer. Click "Layers" at the top of the screen or window and click "Add".
-
3Draw your next frame, using the last frame as a reference. This is why onion skin comes in handy—it is far easier to draw a frame when you can see the last frame right under it.
-
4Continue adding and drawing frames, and going back to frames to edit them as necessary, until you are satisfied with your progress.
- You can easily duplicate frames by clicking "Layers" and clicking "Duplicate" while in the frame you want to duplicate.
- Add more frames in between frames by adding a layer, and dragging it in between the two layers you want it in.
- If you sketched your frames, go back to draw the lines and color the frames (unless you want a simplistic animation).
-
5Click "View" and click "AutoPlay" to see your animation.
- You will see a dialog box and be able to adjust the FPS (frames per second, which determines the speed). You can go back to edit your frames if the animation does not turn out as expected, or you are not finished with it. Continue editing your animation and AutoPlaying it until you are satisfied.


Advertisement
Part 3
Part 3 of 3:
Animating the Frames
-
1Click "File" and click "Export Layers (Onion Skin Mode)...". Select the folder you made while setting up, and each layer will save itself as a PNG in that folder.
-
2Review the dialog box asking whether to open AlpacaDouga. Click "Yes" (unless you choose to put the frames together in a separate program). This part of the article shows how to put together the animation in AlpacaDouga.
-
3Wait for AlpacaDouga to open in your web browser. Then click the button that says "Select all files (.gif/.jpg/.png)". If the website opens in Japanese, the button will look similar.
- Select all the frames in the folder you exported the frames to, and scroll down the page to see your animation.
- You can change the website language to English or Japanese at the top right corner of the screen.
-
4Choose your desired FPS and completion size using the dropdowns, and click the large button that says "Create a GIF Animation".
- Make sure that "Insert FireAlpaca Logo" is unchecked, unless you want the FireAlpaca logo in your animation.
- You may not want to leave "Loop Replay" checked if you have a long animation.
-
5Wait for the large button to turn yellow and say "OK!! Download." Click it to download your animation. It will take you to a download page for the GIF.
-
6Finished. Enjoy your animation!


Advertisement
Community Q&A
-
QuestionHow can I color animations in FireAlpaca?
 HEPP THE HORRIBLECommunity AnswerTry duplicating the frame, coloring the bottom one with the bucket tool (with expand 2 or 3), or hand-coloring it. It's okay if you go over the lines. Next, merge the duplicate on top with the colored one and it looks fine!
 -
QuestionCan I do a 3-5 minute animation using FireAlpaca?
 Community AnswerYes. You can make it as long as you want. Just know the longer your animation is, the more time you'll spend on it. Animation is tough, and you'll need to spend a lot of time, even on a shorter project.
 -
QuestionMy fire alpaca doesn't have Onion skin mode, what do I do now?
 Community AnswerUpdate to the latest version by downloading it again. This should be easy, but make sure to download it from the official site.
Advertisement


About This Article
Advertisement