This article was co-authored by wikiHow staff writer, Nicole Levine, MFA. Nicole Levine is a Technology Writer and Editor for wikiHow. She has more than 20 years of experience creating technical documentation and leading support teams at major web hosting and software companies. Nicole also holds an MFA in Creative Writing from Portland State University and teaches composition, fiction-writing, and zine-making at various institutions.
This article has been viewed 275,135 times.
Learn more...
Back in the days before disco, accepting credit cards took a lot of work and planning—pricey bank products, buggy machines, convoluted software-telephone interfaces to manage, and steep fees all plagued retail environments. These days, accepting credit card payments couldn't be easier thanks to the advent of PayPal. Whether you want to accept credit cards, e-checks, or instant bank transfers, PayPal lets you do it with one simple, cost-effective solution.
Things You Should Know
- You must have a PayPal Business account to accept credit card payments in person.
- Download the PayPal Here app on your mobile device.
- Sign in to the app and select a Chip and Swipe or Chip and Tap reader.
Steps
Using PayPal Here for In-Person Payments
-
1Sign up for a PayPal Business account. If you have a PayPal business account, you can use PayPal Here to accept credit card payments in person.[1] If you already have a PayPal business account, just skip to the next step. Otherwise:
- If you don't have a PayPal account, head to https://www.paypal.com and click Sign Up to create one now. Select Business when prompted, and enter all requested information to verify.
- If you have a personal PayPal account, you can switch it to a business account. Sign in to your account at https://www.paypal.com, click Settings (the gear), and then Upgrade to a Business account.[2]
-
2Go to https://www.paypal.com/bizsignup in a web browser. You can do this on your computer, phone, or tablet. This is how you'll connect PayPal Here to your business account.Advertisement
-
3Enter your phone number and agree to the terms. To read the terms, click the PayPal Here Agreement link, which includes the fees for using PayPal Here. You'll need to check the box next to "I have read and agree to the PayPal Here Agreement" to agree to the terms.
- Click Submit after you check the box to proceed to the next page.
- There is no monthly fee to use PayPal Here. Fees are based on transactions only.
-
4Install the PayPal Here app on your phone or tablet. Now that PayPal Here is active, install the app on the phone or tablet on which you'll accept payments.
- If you're using an iPhone or iPad, tap the Download on the App Store link or search for "PayPal Here" on the app store. When you find the app, tap GET to install it.
- If you're using an Android, tap Get it on Google Play or search the Google Play Store for "PayPal Here." When you find it, tap Install to get it.
-
5Open PayPal Here on your phone or tablet. It's the blue-and-white icon of a credit card sliding into a card reader.
- If you're still in the App Store or Play Store, you could just tap OPEN to launch the app for the first time.
-
6Sign in with your business account. Tap Log in with PayPal at the bottom of the screen, and then follow the on-screen instructions to sign in to your PayPal account.
- You'll be prompted to give the app the permissions necessary for accepting cards. Follow the on-screen instructions to grant these permissions.
-
7Tap Next. It's at the top-right corner of the screen.
-
8Select a card reader option and tap Next. To get your free Bluetooth card reader that allows patrons to swipe or use their chip-based credit card, tap the photo of the card reader. If you'd rather buy one of PayPal's Chip and Tap models ($59.99 for the reader, $79.99 for a version with a charging stand), select I don't want a free card reader instead.[3]
- You can purchase a card reader later at https://us.paypal-here.com/card-readers.
- All readers require that your phone or tablet support Bluetooth except one reader that plugs into your headphone jack. That option is $19.99 and will not work for iPhones without headphone jacks.
-
9Configure your card reader settings. The next two screens prompt you to enter relevant contact information, as well as any info you want included in print and email receipts. You'll also get to choose whether to include tax, allow tips and discounts, and choose whether a signature is required at the time of purchase. Tap Next through these screens after filling them out.
-
10Tap Done to complete the setup. Once the setup is complete, your order for a free card reader (if you got one) will be sent to PayPal. If you didn't get the free reader, follow the on-screen instructions to purchase one.
- You can add products and their prices to the PayPal Here app so you can just tap them at the point of purchase. To do this, tap the menu at the top-left corner, select Item Catalog, and add products as needed.
- If you have a separate cash register/POS, you can just use that to ring up your sales and then enter the total into the PayPal Here app when accepting credit card payments.
-
11Connect the reader to your phone or tablet. When the reader arrives, follow these steps to connect it:
- Remove the reader from the packaging and charge it for at least 2 hours.[4] Use the included USB cable to do this.
- Enable Bluetooth on your phone or tablet.
- Press and hold the power/Bluetooth button left of the charging port to turn the reader on. Release the button when you see a blinking blue light next to the Bluetooth sideways-bowtie icon.
- In the PayPal Here app, tap the menu at the top-left corner and select Have a new reader? at the bottom of the menu.
- Tap Find and Connect to Reader. When the reader's name appears on the screen, tap it to connect. When the reader is connected, the blinking blue light on the reader will stay solid and a success message will appear on the phone or tablet's screen.
-
12Accept a credit card on your reader. Here's how:
- Make sure the reader is charged and connected to your phone or tablet via Bluetooth.
- In the PayPal here app, enter the amount you want to charge or select items from the built-in catalog.
- Tap CHARGE at the top and insert the chip card, leaving it inserted until the payment is processed. If the payer is not using a chip card, they can swipe the card. If the card has been demagnetized and/or has a faulty chip, you can tap Enter Card Number instead.
- If a signature is required, allow the payer to use their finger to draw their signature on the provided line.
- Tap Done to complete the transaction.
- Select a receipt option (text message, email, or no receipt).


Using PayPal Checkout on the Web
-
1Sign up for a PayPal Business account. If you have a PayPal business account, you can create PayPal checkout buttons for your website. If you already have a PayPal business account, sign in at https://www.paypal.com. If not:
- If you don't have a PayPal account, head to https://www.paypal.com in your web browser and follow the on-screen instructions to sign up. Select Business when prompted to choose an account type, and make sure to link a bank account.
- If you have a personal account, switch it to a business account. Sign in at https://www.paypal.com, click Settings (the gear icon), and then Upgrade to a Business account.
-
2Go to https://www.paypal.com/buttons in a web browser. This displays a list of payment buttons you can add to your website.
-
3Select a checkout option. The option you select varies depending on how your website works:
- To add a Buy Now button to one or more individual items (no "shopping cart" involved), click Buy Now.
- If you sell multiple items and want customers to be able to add items to a cart before paying, click Add to Cart.
- The Subscribe and Smart Subscribe buttons allow people to subscribe to a service you offer and pay via credit card on a schedule. Smart Subscribe offers more subscription features.
- Sell on Social lets you create an ad for an item or service you want to sell that you can share anywhere, including on social media sites.
- Donate lets you raise money for a cause and allow people to pay with credit cards.
-
4Create your button(s). Each button type has different customization options so the steps will vary.
- If you're selling different configurations of a product (such as different sizes of soap bars or different patterns on a shirt), check the box next to "Add drop-down menu with price/option," add each product type and price to the list, and then click Done. The buyer can now select the type of product they want from the list.
- Remember to enter your shipping rate for the product(s), tax percentage, and all other requested details.
- Some button types allow you to add your own button image. Most let you customize the button's size and look.
-
5Click Create Button to generate your button. The new button is now saved to your My Saved Buttons page so you can edit it later. You will also see the HTML code for the button that you'll need to add to your website.
- Point your browser to https://www.paypal.com/us/cgi-bin/webscr?cmd=_button-management to view your saved buttons. To edit a saved button, click the Action menu and select Edit button.
- If you made an Add to Cart button, scroll down and click Create a View Cart if you'd like people to be able to view the items in their cart (recommended). You'll only have to do this once, as you can paste the same code in multiple places on your website. Like the other buttons, it will be saved to My Saved Buttons.
-
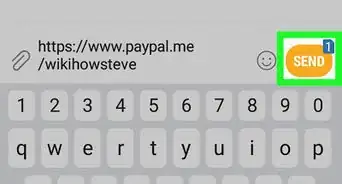
6Add the button to your HTML code. Click Select Code to highlight the button code, right-click the selected text, and then click Copy. You can then paste it anywhere you wish in your website's raw HTML code. Once you save the page with the button code on your web host, patrons can click the button(s) to make purchases.
- If you don't see your button's code on the page, go to the My Saved Buttons page, click the Action menu next to the button, and then select View code.
- Remember to add a View Cart button to each page if you created one.


Community Q&A
-
QuestionHow much does it cost to have someone send money to me through PayPal?
 Community AnswerIf they mark the money as Friends/Family, there is no cost. If you receive money for goods and services, there is a 2.9% fee plus $0.30 USD.
 -
QuestionIf I use a card through PayPal, what will appear on my statement?
 Community AnswerIt depends on the store, since it is the merchant who chooses what to display.
 -
QuestionHow do you use a credit card on PayPal?Community AnswerAdd the item you want to the cart. Press "buy" and follow the remaining prompts.


References
- ↑ https://www.paypal.com/us/webapps/mpp/credit-card-reader
- ↑ https://www.paypal.com/us/smarthelp/article/How-do-I-upgrade-my-PayPal-account-type-FAQ900
- ↑ https://www.paypal.com/merchantapps/appcenter/acceptpayments/paypalhere
- ↑ https://us.paypal-here.com/paypal-chip-and-swipe/
- ↑ https://www.paypal.com/merchantapps/appcenter/acceptpayments/paypalme
About This Article

1. Sign up for a PayPal Business account.
2. Go to https://www.paypal.com/bizsignup to set up PayPal Here.
3. Install PayPal Here on your phone or tablet.
4. Sign in to PayPal here with your business account.
5. Follow the on-screen instructions to set up your account.
6. When your card reader arrives, pair it to your phone/tablet via Bluetooth.
7. Ring up a purchase and tap Charge.
8. Swipe or insert the chip card into the reader.
9. Choose a receipt delivery option.