This article was co-authored by wikiHow staff writer, Amy Bobinger. Amy Bobinger has been a writer and editor at wikiHow since 2017. She especially enjoys writing articles that help people overcome interpersonal hurdles but frequently covers a variety of subjects, including health and wellness, spirituality, gardening, and more. Amy graduated with a B.A. in English Lit from Mississippi College in 2011 and now lives in her hometown with her husband and two young sons.
There are 8 references cited in this article, which can be found at the bottom of the page.
This article has been viewed 87,920 times.
Learn more...
Banana plugs attach to either end of a speaker wire, making it easy to plug and unplug your speaker and receiver. They're named banana plugs because they're wider in the middle of the plug, and narrower at the top and bottom, similar to the shape of a banana, and they plug into banana ports on your speaker. Without these plugs, you’d have to unwind the bare wires each time you wanted to unplug the component, and you would see the bare wire coming out of your speaker components. Even better, installing them yourself is easy!
Steps
Preparing the Wire
-
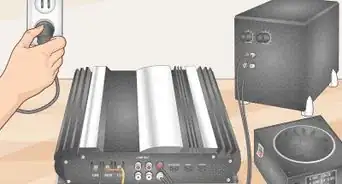
1Measure enough speaker wire to go from your receiver to your speaker. The length of the speaker wire will depend on how far apart you want your speaker components to be. When you're measuring, leave at least 1–2 ft (0.30–0.61 m) of slack in the cable. If it’s pulled tight when you plug it in, the pressure could fray the cable or damage your sound equipment.[1]
- Use wire cutters to clip the speaker wire to the length you need.
- The further apart your speaker and receiver will be, the more slack you'll need to add.
-
2Find the positive side of the wire. Speaker wire has 2 sides, but the appearance can vary. If your wire is black and red, the positive side is red. If your wire is all the same color, look closely at the 2 sides. The side with small writing along the insulation is the positive side.[2]
- This is the side you’ll attach to the banana plug with the red mark, and you’ll plug it into the red terminals on your speaker and receiver.
- It’s very important to pay attention to the polarity of the wire. Attaching the positive wire to the wrong terminal could damage your equipment, injure you, or start a fire.
Advertisement -
3Strip away 3⁄4–1 in (1.9–2.5 cm) of insulation with your wire cutters. Most wire cutters have a small notch inside of the blades for stripping away the insulation. Place your wires into this notch and apply gentle pressure. Pull upward in a twisting motion, hard enough to pull away the insulation without scoring the copper itself. Do this on both sides of your speaker wire, and on both ends, for a total of 4 times.[3]
- If your wire cutters don’t have that notch, use the blades to gently score the wire, then use your hands to pull the insulation apart.
- Do not cut into the wire itself. If you do, snip off that portion of the wire and start over.
- Only strip as much wire as you need for it to fit snugly into the plug. If you strip away too much insulation, you might see the exposed copper on the outside of your plug.
-
4Twist the ends of each wire so they don’t come apart. Use your fingers to smooth out the exposed ends of the copper wire. Make sure all of the wires are facing the same direction, then roll them a few times between your fingers to twist them securely together. Repeat this for all 4 ends.[4]
- Do not twist the cable so tightly that it kinks up. This could cause it to break.
-
5Solder the end of each wire if you want to ensure your wire will never fray. For even more staying power, you can solder the tips of each wire. Hold a piece of solder to the tip of the wire, then touch the tip of a hot soldering iron so it touches the solder and the copper at the same time. Take the soldering iron away after 1-2 seconds, and repeat if needed. Continue until you have soldered each of the 4 ends of the speaker wire.[5]
- Keep the soldering iron away from anything flammable, and do not touch it to your skin or any other part of your body.
- Only apply a small amount of solder on the very end of the wire. Don't cover up too much of the copper, since it's a better conductor than the solder.
- If you don't want to solder the wire, twisting it is fine. However, if you move your speaker components around a lot, the wire could start to unravel eventually.


Attaching the Plug
-
1Make sure you have a positive and a negative plug. A positive plug will have a red mark or ring that allows you to easily differentiate the positive wire when everything's assembled. A negative plug will have a black ring, or it might not have any markings. If you plug the positive wire into the wrong component, you could get shocked or damage your equipment, so it’s important to use the right plugs for the project.[6]
- You can buy pairs of banana plugs at any store that sells speaker components. You can also find them online.
-
2Unscrew the bottom of each banana plug. Banana plugs can come in different designs, but they should all have at least 2 parts–a prong or post with a hole where you can put the wire, and a sleeve or a screw that you tighten to secure the wire. Unscrew the first pair of plugs and set them aside, being careful to keep the pairs matched.[7]
- Set the plugs somewhere secure, like in a small dish, so they can’t roll away.
- If there are screws in the side of the plug, loosen them with a screwdriver.
-
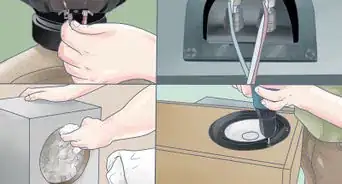
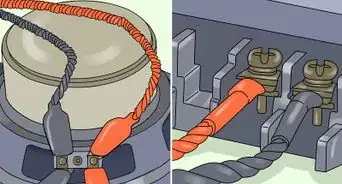
3Slide the positive wire into the hole on the red plug. Feed the twisted or soldered end of the positive wire into the plug. Keep pushing it into the hole until you feel it make a secure connection with the other side of the plug and the insulation is flush against the outside of the plug. The wire has to make contact with the inside of the plug in order for the cable to work.[8]
- The hole for the wire may be on the side or the bottom of the plug. If you’re not sure, check the packaging that came with your banana plugs
- Do not insert insulation into the hole, as this can prevent the plug from having a secure connection with the wire. If you didn’t strip away enough insulation, remove the wire from the plug and pull off a little more.
- If there is bare wire showing outside of the hole, cut the wire until it fits, or wrap the end of the plug with electrical tape.
-
4Place the screw into or onto the plug and tighten it. The exact mechanics of this will depend on your banana plug. You might have to tighten the screws on the post first with a screwdriver, then fit a larger screw into the bottom of the plug, or you might slide a sleeve over the plug and tighten it down.[9]
- Read the instructions that came with your plug if you’re not sure.
-
5Repeat for the negative side of the wire, then again for the opposite ends of each wire. Attach the negative plug to the side you're already working on, then go to the other end of the wire and install the other set of plugs. Again, be very careful to identify the positive wire and attach it to the correct plug. When you're finished, you will have a total of 4 banana plugs attached to your speaker wire.[10]
-
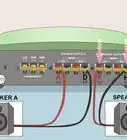
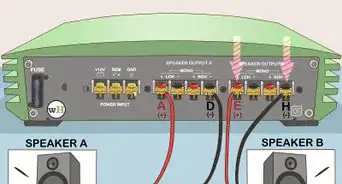
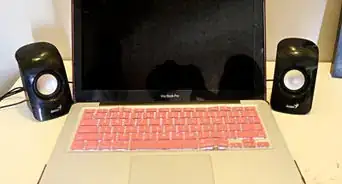
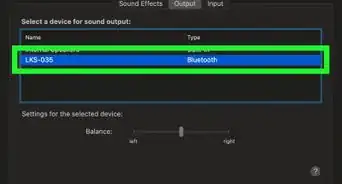
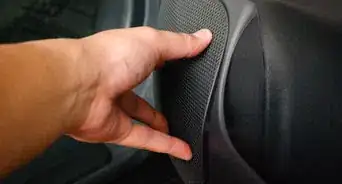
6Push the banana plugs into their respective ports. You should see red and black ports or jacks on the speaker and the receiver, making it easy to match up the polarity. Once everything is connected, turn on the power to the components. If they work properly, you’re all finished![11]
- If there are any sparks or you hear sounds like a pop or sizzle, immediately turn off the power and double-check your work.


Warnings
- Double-check to make sure your wire isn’t connected to anything when you get started! If one end is still attached to your speaker or receiver, you could get shocked.⧼thumbs_response⧽
- Always match up the positive side of the wire with the positive terminal, and vice versa.⧼thumbs_response⧽
Things You’ll Need
- 4 banana plugs (2 black, 2 red)
- Speaker cable
- Wire cutters
- Speaker
- Receiver
- Solder (optional)
- Soldering iron (optional)
- Screwdriver (optional)
- Electrical tape (optional)


References
- ↑ http://www.tomsguide.com/faq/id-2313248/installing-banana-plugs-spades-speaker-wire.html
- ↑ https://learn.sparkfun.com/tutorials/connector-basics/all
- ↑ https://youtu.be/ggySiZc3Q4c?t=9
- ↑ http://www.tomsguide.com/faq/id-2313248/installing-banana-plugs-spades-speaker-wire.html
- ↑ https://youtu.be/ggySiZc3Q4c?t=69
- ↑ https://learn.sparkfun.com/tutorials/connector-basics/all
- ↑ http://www.tech-faq.com/banana-plugs.html
- ↑ http://www.tomsguide.com/faq/id-2313248/installing-banana-plugs-spades-speaker-wire.html
- ↑ https://youtu.be/ggySiZc3Q4c?t=138
About This Article