X
This article was co-authored by wikiHow staff writer, Travis Boylls. Travis Boylls is a Technology Writer and Editor for wikiHow. Travis has experience writing technology-related articles, providing software customer service, and in graphic design. He specializes in Windows, macOS, Android, iOS, and Linux platforms. He studied graphic design at Pikes Peak Community College.
This article has been viewed 10,631 times.
Learn more...
This wikiHow teaches you how to use the AllTrails app. AllTrails is an app that allows you to find trails for hiking, running, mountain biking, off-roading, and more. The app gives you directions to the start of a trail and then allows you to keep track of your time, location, and elevation.
Steps
Method 1
Method 1 of 3:
Signing Up
-
1Download and install the AllTrails app. The AllTrails app is available for iPhone and Android devices. To download AllTrails, open the Google Play Store on Android or App Store on iPhone and iPad. Use the following steps to download and install AllTrails:
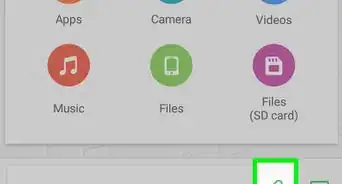
- Open the Google Play Store or App Store.
- Tap the Search tab (iPhone only).
- Enter "AllTrails" in the search bar.
- Tap GET or INSTALL next to AllTrails.
-
2Open the AllTrails app. It has a green icon with an image that resembles a mountain. Tap the AllTrails app icon to open AllTrails.Advertisement
-
3Tap Sign Up. It's the green button at the bottom of the screen.
- If you already have an AllTrails account, tap Log In at the bottom of the screen and sign in with the email address and password associated with your AllTrails account or tap "Continue with Facebook or "Continue with Google to log in with your Facebook or Google account.
-
4Enter your first and last name. Use the first two bars at the top of the screen to enter your first and last name.
-
5Enter a valid email address. Use the third line to enter a valid email address.
-
6Enter a password. Use the fourth bar to enter a password of your choice. It must be 16 characters long.
-
7Tap Sign Up. It's the green button at the bottom of the screen.
-
8Click Click to Verify. It's in the center of the screen. This takes you through a verification process.
-
9Drag the slider bar to align the puzzle piece with the missing piece of the image. The slider bar is at the bottom of the image. This verifies that you are a human signing up. Once you complete the verification process, you will continue to the app.
- If you see an ad asking you to sign up for AllTrails Pro, you can select a payment plan, or click the "x" icon in the upper-right corner to continue with the free version.


Advertisement
Method 2
Method 2 of 3:
Finding Trails
-
1Tap the Explore tab. It's the first tap at the bottom of the screen. This is where you can search for trails.
- If you have location services turned on, AllTrails will automatically search for trails near your current location.
-
2Use the search bar to search for trails. The search bar is at the top of the screen. You can use this to search for a trail name, city, or park.
-
3Tap the icon that resembles slider bars. It's right next to the search bar. This allows you to further filter your search.
-
4Filter your search. Use the following options in the Filter menu to narrow down your search for trails:
- Sort: This allows you to filter trails by "Best Match", "Most Popular", or "Closest".
- Difficulty: This allows you to filter trails by how difficult they are to hike, run, bike, or whatever. Difficulty ratings include "Easy", "Medium", or "Hard."
- Trail Length: Use the slider bar to filter trails by length. This can range from 0 miles to 100 miles.
- Elevation Gain: Use the slider bar to filter trails by elevation. This can range from 0 feet up to 10,000 feet.
- Rating: You can filter trails by popularity rating. Tap how many stars you want to filter trails by.
- Activity: Tap the activity boxes at the bottom to filter trails by activity type. Activities include hiking, mountain biking, backpacking, off-roading, scenic driving, bird watching, fishing, camping, and more.
- Attractions: Tap the attractions listed to filter trails by attraction. This includes, waterfalls, forests, lakes, rivers, wildflowers, beaches, caves, hot springs, historic sites, and more.
- Suitability: You can filter trails by suitability. This includes dog-friendly, kid-friendly, stroller-friendly, wheelchair-friendly, paved, and partially paved.
- Route Type: This allows you to filter trails by route type. Route types include "Out and back," which means you return the way you came. "Loop" means the trail circles around back to where it started. "Point to Point" means the trail ends at a different location than it starts.
- Trail Traffic: This indicates how many people use the trail at once. The options are "Light," "Medium," or "Heavy."
- Trail Completion: This allows you to filter trails that you have completed, not completed, or completions that have been verified by the app.
-
5Tap See Trails. This displays a list of trails using the filters you have set.
-
6Tap the heart icon next to a trail to add it to your favorites. The heart icon is to the right of each trail listed.
- When you heart a trail, you will be asked to select a list to add it to. You can add it to your favorites list or tap another list you created. Tap Create New List to create a new list.
-
7Tap a trail. This displays a page with information about the trail.
-
8Tap My Map. It's the fourth option at the top of the trail information page. This displays a map of the trail route as well as as graph of the trail elevation.
-
9Tap Directions. It's the first option at the top of the trail information page. This displays directions from your current location to the start of the trail in Google Maps, or Apple Maps.


Advertisement
Method 3
Method 3 of 3:
-
1Find a trail you want to complete. Use the AllTrails app to find a trail you want to complete. AllTrails will give you directions to the start of the trail on Google Maps or Apple Maps.
-
2Tap the trail in AllTrails. If you haven't already done so, open the trail information page in AllTrails. You can do so by tapping the trail in the Explore page, or in your Favorites list under "Plan."
-
3Tap the Navigate icon. It has an icon that resembles a paper airplane. It's the second option at the top of the Trail information page. This displays the location of the start of the trail and highlights the trail route in red.
- Alternatively, you can tap Navigate at the bottom of the screen and then select a trail from one of your lists. You can also tap Start without a route to start navigating without a pre-planned route.
-
4Select an activity. Many trails ask you to select an activity before you begin. Tap the activity you want to do at the bottom of the screen to select an activity. These may include hiking, running, mountain biking, backpacking, off-roading, and more.
-
5Go to the start of the trail. The start of the trail is indicated by a green and black icon on the map. Your position is indicated by a blue dot. Go to the start of the trail on the map.
-
6Tap Start. It's the green button at the bottom of the page. The app will now start tracking your time, elevation, and route.
-
7Tap and hold Pause at the bottom of the screen. When you are finished, or if you just need to stop and take a break, tap and hold the green button that says Pause to put your progress on hold.
-
8Tap Resume to continue. If you want to continue on the trail, tap Resume to continue timing your route.
-
9Tap Finish to end navigation. When you are finished with the route, tap and hold the green Pause button. Then tap the green button that says Finish to finish your route.
-
10Rate your experience. When you finish the trail, you can rate your experience between 1 star (no good at all) to 5 stars (excellent). Tap how many stars you want to rate the trail to give it a rating. Then tap Continue.
-
11Add some pictures. If you took some pictures along the trail, you can add them. Tap the box with a plus (+) sign. Then tap Gallery or Photos. Select the photos you took along the trail. Then tap Continue. Congratulations, you have completed trail. AllTrails will now display the length you navigated, the elevation you gained, moving time, average pace, and total time.
- Completed trails are displayed under the "History" tab. You can tap any completed trail to view the stats from that trail.


Advertisement


About This Article

Travis Boylls
wikiHow Technology Writer
This article was co-authored by wikiHow staff writer, Travis Boylls. Travis Boylls is a Technology Writer and Editor for wikiHow. Travis has experience writing technology-related articles, providing software customer service, and in graphic design. He specializes in Windows, macOS, Android, iOS, and Linux platforms. He studied graphic design at Pikes Peak Community College. This article has been viewed 10,631 times.
How helpful is this?
Co-authors: 6
Updated: June 21, 2021
Views: 10,631
Categories: Android
Advertisement