wikiHow is a “wiki,” similar to Wikipedia, which means that many of our articles are co-written by multiple authors. To create this article, 10 people, some anonymous, worked to edit and improve it over time.
This article has been viewed 31,645 times.
Learn more...
The Long Dark is a single-player, sandbox game, developed by Hinterland Studios and available for PC, Playstation, and Xbox. There are two main game-modes available: the scripted Story Mode and Survival Mode. However, the main survival elements are virtually identical in both game-modes, with the exception of death in survival mode being permanent. This guide is focused mainly on the Survival Mode of the game, as Story Mode (Wintermute) provides considerable guidance.
Steps
The First Day
-
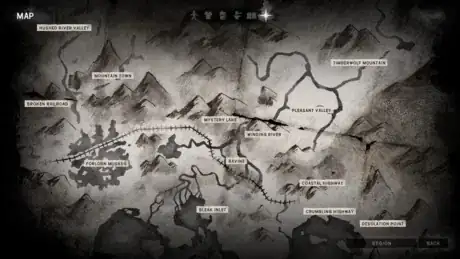
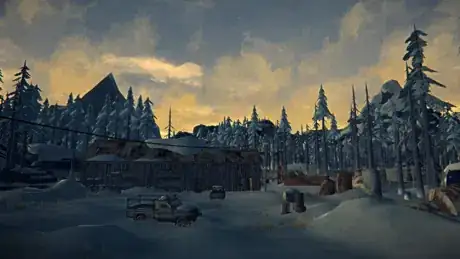
1Choose your starting location. When you start a new game of The Long Dark in any difficulty other than Interloper, you will be given a choice of regions you can start in, which will greatly affect the initial difficulty of the survival experience. For new players, it's likely best to start in one of the four regions below.
- Mountain Town has plenty of buildings to loot, but more predators than some of the other regions. It also doesn't have any fishing, eliminating one potential food source.
- Mystery Lake has a moderate number of structures and low predator density, along with lots of hunting opportunities, and is a good choice for new players.
- Coastal Highway has milder weather than either Mountain Town or Mystery Lake and plentiful looting opportunities, but parts of the map, especially near the Quonset Garage, tend to have a high population of dangerous animals.
- Pleasant Valley is very large and can be difficult to navigate, but there's lots to find in the farmhouse, the plane crash, and Thomson's crossing. If you have played Episode 3 of Wintermute and know the region, it should be survivable.
-
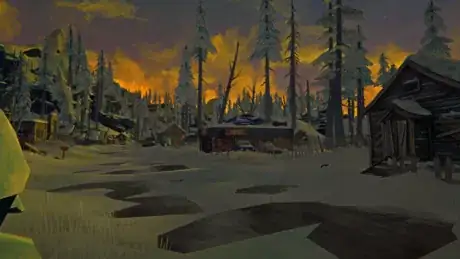
2Assess your surroundings. Do you see a building around you? Head for that. It is highly likely that it will contain some items which will prove helpful.
- At this stage you will likely have very little gear, and anything you can find will prove important.
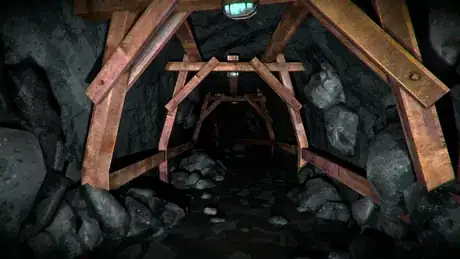
- If you see a cave, head for that. Caves often contain some loot, though less than buildings.
Advertisement -
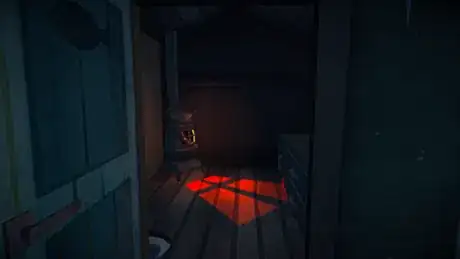
3Take everything in the building. Almost anything you find will have some use or other. Don't bother breaking down furniture yet as it takes a very long time. Make sure to search all the nooks, crannies, and containers. Sometimes useful items can be very well hidden in a dark corner.
- Clothes are not equipped by default. To put on clothes, you'll have to go into your "clothing" interface (usually by pressing F), and then selecting the appropriate article of clothing.
- In Interloper, vital resources (bedrolls, storm lanterns, hacksaws) will only spawn a set number of times in certain places. You will have an easier time finding them if you use a spreadsheet, and follow the instructions.
-
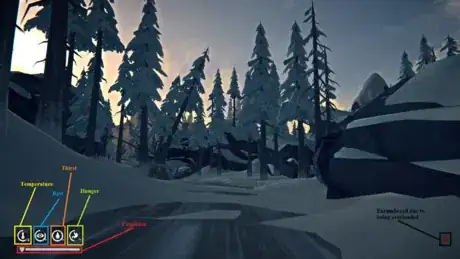
4Keep an eye on your needs. On the bottom left corner of the screen, you will find four dials. From left to right, these represent temperature, rest, drink, and food. Below this is a "Condition" bar, which represents your health. This bar will start to deplete if your character's needs meters run out. If your Condition ever reaches zero, your character will die and your saved game will be lost.
- Temperature will fall if your "feels like" temperature is below 0C. To stay warm, head indoors, get out of the wind, find better clothing, or build a campfire. Freezing will deplete 20% of your condition each hour, so staying warm is the most pressing need.
- Rest will be depleted by being awake, but walking and especially sprinting depletes it faster. To rest, you'll have to sleep, which will also restore lost Condition over time.
- Hydration can be restored by drinking various beverages.
- Hunger can be restored by eating foodstuffs. If you keep your food over zero for 72 consecutive hours, your carry weight will increase by 5 kg.
-
5Keep searching buildings and vehicles. For the rest of the first day, you will want to find as much stuff as possible. Be sure to keep your bars up as you do so. Freezing for up to an hour on the first day is fine, as the lost condition will be easily restored by a night's sleep.
- If you are getting too cold, either enter a building or start a campfire to warm up. While you're waiting, consider fixing some of the clothes you're wearing (requires cloth or leather and a sewing kit).
-
6Find a base to sleep in as night falls. The Long Dark really is dark at night, and you don't want to be outside on your first night as it will be nearly impossible to see anything. If there are few moments of daylight left, use this time to fix damaged clothing, or tear up excess clothes into cloth.
- For this first night, almost any building will do, as long as your "feels like" temperature is above freezing when you're inside. Try to avoid sleeping in a vehicle, as it is likely going to be too cold unless you found excellent clothing earlier that day.
-
7Eat and drink before going to sleep. While asleep, you'll continue burning calories, and will also become dehydrated. Falling asleep with near-empty needs can result in a nasty condition loss overnight.
- Potable water can be found in toilets, or obtained by melting snow and boiling the melted water using a fire. However, this requires a recycled can or cooking pot.
Longer Term Survival
-
1Listen and watch carefully. There are four dangerous animals in The Long Dark, namely wolves, bears, moose, and timberwolves. The first three can be found in any region, while timberwolves will only be found in Bleak Inlet. The simplest way to avoid encounters with hostile wildlife is to give them a wide berth.
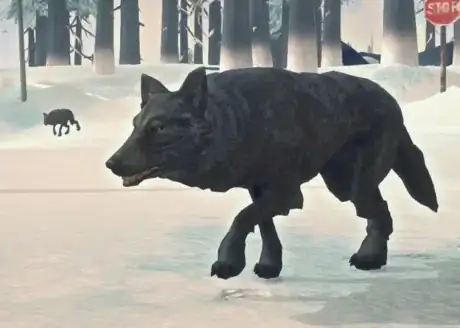
- Wolves, bears, and timberwolves will hunt you down, and are drawn by scent. Pressing [TAB] will show a HUD with your scent. Stay downwind from them to avoid being sniffed out.
- Moose won't hunt you out, but will attack if you get too close.
- Avoid sleeping/resting in caves that contain skeletons, as these are often inhabited by bears. A bear cave also won't contain any loot.
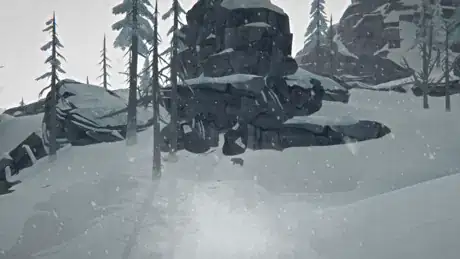
- Be particularly careful when nearing the crest of a hill. There could be a dangerous animal on the other side that you can't see and could attack on sight.
-
2Don't sprint too much. Sprinting makes you tired very quickly and consumes a lot of stamina, which takes some time to regenerate. Only sprint if your life is in danger, i.e. to escape a predator, weak ice, or a bad snowstorm. If you exhaust yourself by needless sprinting, you may be unable to sprint when you seriously need to in a dangerous situation.
-
3Find a suitable longer-term base. The base you used on your first night was likely adequate for surviving one night, but some locations in the game are better than others for long-term survival.
- Camp Office and Trapper's Homestead are popular choices in Mystery Lake. Both have a workbench and stove. Camp Office is located more centrally, however there is a slight chance of encountering a wolf when entering/exiting.
- In Mountain Town, the Milton House, Orca Gas Station, and Pleasant Valley Farmstead make good bases. The farm has an outdoor workbench nearby, but can be frequented by wolves. The Milton House is centrally located and a good starting point for looting the entire town, whereas the Orca Gas Station offers good hunting opportunities, but frequent wolf encounters.
- The Quonset Garage is a very well-stocked location for long-term survival in Coastal Highway, but is frequented by wolves, and occasionally a bear or moose. Jackrabbit Island doesn't have an interior fireplace, but has plentiful rabbit trapping and very few predators.
- Other popular locations in other regions include: the Desolation Point Lighthouse, the Farmstead and Thompson's Crossing Community Centre in Pleasant Valley, the Hunting Lodge in Broken Railroad, and the Ice Caves in the Hushed River Valley.
-
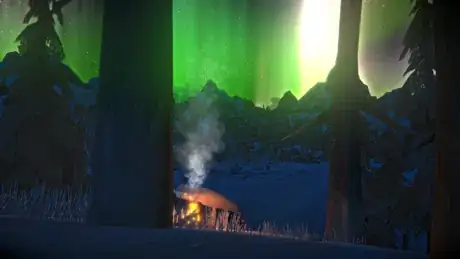
4Be extremely careful exploring outside during the Aurora. The Aurora provides plenty of light to see by, but predators become much more aggressive, with a longer aggression range than normal. Additionally, walking on live electrical wires can cause life-threatening burns.
- A flashlight can scare wolves if used on high beam. They also will not enter brightly lit areas under street lights.
-
5Do not carry too much. If you exceed your weight carry limit, you will become encumbered. Depending on how encumbered you are, this will increase your risk of sprains on sloped ground, prevent you from climbing ropes, and can even render you immobile under extreme conditions. To avoid this, don't bring along heavy items (i.e. Hunting Rifle, excess kerosene) if you won't need them and are only going for a short trip.
- If you're within carry weight, this is most desirable, but can be difficult to achieve without the Moose-hide satchel or the Well Fed benefit.
- 0-5 kg overweight: Generally OK for exploring, as long as rope climbing is not required.
- 5-10 kg overweight: You will be slowed down somewhat, but can still sprint. For longer trips, this is probably the maximum weight that's safe to carry.
- 10-15kg overweight: You will be unable to sprint, but can still walk decently. Adequate for short supply runs around your base if it's in safe, level terrain.
- 15-20kg overweight: You'll become very slow; carrying this much is only worthwhile if you've just killed an animal very close to base and are bringing it home.
- Carrying more than 20 kg over the limit makes you extremely slow and should generally be avoided, unless you're moving things around inside your base.
-
6Maintain your items. If you let the condition of your items deteriorates too much, they will become ruined and can't be fixed anymore. Stormy days are a good time to perform needed repairs.
-
7Avoid planning ahead too far. Deciding "I'm going to go from Quonset Garage to Desolation Point tomorrow, no matter what" is extremely unwise. If at all possible, do not travel, hunt, or explore unless conditions are favorable for doing so.
- Blizzards especially are very dangerous, and can result in your becoming disoriented and freezing to death just meters from your front door. Stay home when one strikes. If weather conditions start to deteriorate while you're out exploring, make finding shelter your top priority.
-
8Learn to live off the land. You will need to be able to live off the land once the loot runs out, and hunting, trapping, and fishing are three excellent ways to obtain food. You can also craft the pelts of hunted animals into clothing, if required.
- Hunting is easiest with the Rifle, though it can be done with the Revolver or Bow too. The recommended tactic is to sneak up to the animal you're trying to kill, aim, and fire at its head. Beware that bears and moose will charge and attack you if harmed and are best hunted from a safe area, such as a hunting blind.
- Rabbits can be caught using snares, which can be crafted from reclaimed wood and cured guts. Make sure to check the snares every day, or else a predator may claim your prize.
- Fish can only be caught in an ice fishing hut. You'll need something to break open the ice fishing hole (bring a prybar, hunting knife, heavy hammer, etc.) and fishing tackle to catch the fish.
-
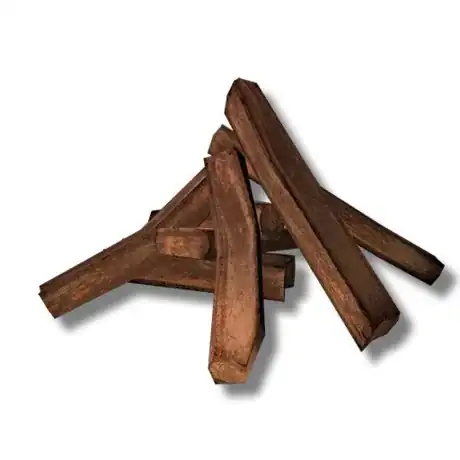
9Collect charcoal. Charcoal from burned-out campfires can be used for making gunpowder, and also for sketching maps of your local area. These maps don't show your location, but may reveal hidden resources.
- This is not available in story mode, as you are provided with a map showing your location.
-
10Have fun. There is no end-game easter egg in The Long Dark, aside from a Steam achievement for surviving 500 days. If you are getting bored, you can go ahead and take more risks, or go explore uncharted territory.
Dealing with Hostile Wildlife Encounters
Sooner or later, it is likely that you will get into a scuffle with hostile wildlife. When this happens, quick thinking along with careful planning will be necessary to survive.
-
1Don't panic. In general, wildlife will give you some warning before an attack. Wolves will bark twice and proceed to stalk you, while bears will bellow and breathe heavily. Moose will grunt and point their antlers at you, while timberwolf packs will give a loud howl in unison.
- An exception to this is when coming over a blind crest. You can come face to face with an animal and be attacked with very little to no warning. As you near the top of a hill, slow down and listen carefully.
-
2Run. If there is a safe place you can reach by sprinting, now is the time to do it. Suitable safe places include entering cars or buildings, jumping onto a mountaineering rope, climbing upstairs, or entering an area only accessible by crouching (press [CTL] to crouch).
- Hunting blinds are a good place from which to hunt dangerous animals because you can shoot from them, but animals can't enter.
- Bears are fairly slow unless charging, so you can easily outrun them most of the time.
-
3Drop a decoy. If you're carrying meat or guts, pressing the [3] key will drop one of said item. The predator will sometimes go grab the item, turn around, and walk away.
- This tactic doesn't work on timberwolves or moose.
-
4Light a fire. Wolves are afraid of fire, and can be reliably be fended off by quickly lighting a campfire and remaining close to it. Lighting a flare or torch will usually stop a charge, but not always.
- Throw a lit flare at the wolf if it is stationary and growling at you. This will scare it off.
- Timberwolves aren't afraid of torches or flares, but will avoid campfires and marine flares. Throwing a lit marine flare at aggressive timberwolves repeatedly will break their pack morale and cause them to leave you alone for a time.
- Moose are not afraid of flares or torches, but will stay away from lit campfires.
- Bears do not mind fires at all, and will walk right through them.
-
5Shoot a firearm. Wolves are afraid of shots from either the rifle or the revolver, and will run when they hear a shot fired.
- Beware that wolves will immediately charge if a firearm is aimed at them, and, once charging, will continue their charge even if shot non-fatally.
- Repeated shots at or near Timberwolves will lower their pack morale. Killing one of the pack members will lower it even more.
- Do not shoot a firearm if near a bear or moose. Bears will walk over to investigate gunshots, and will charge you if shot at. Moose will also charge if hurt. Generally, it is impossible to kill a bear or moose using firearms before it reaches you.
-
6Shoot the flare gun. Shots from this weapon will immediately scare off any hostile animal that's trying to attack you, including bears and moose. If you hit, the flare round will attach to the animal, but won't cause any significant damage.
- Flare shells are rather rare, so save this weapon for bear/moose attacks if possible.
-
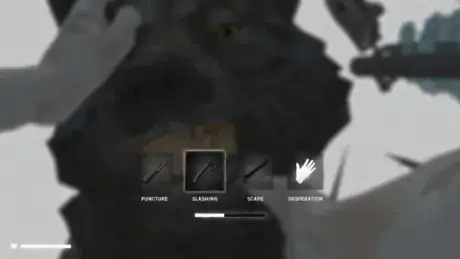
7Fight back. If a predator reaches you (with the exception of a Timberwolf, which will do a "drive-by" attack, causing some damage), you'll enter a struggle. Pick your weapon (a knife or hatchet is recommended) and start left-clicking to try to convince the wolf to flee.
- If you are successful, the wolf will flee. Bladed weapons will cause it to start bleeding and eventually die.
- If unsuccessful, you'll eventually blackout. When you come to, your clothing will have taken some damage, and you'll likely have lost a lot of health. You may have bleeding wounds or sprains, as well.
- It's impossible to fight back when attacked by a bear or moose. Instead, you'll eventually blackout. When you come back to consciousness, you'll likely have lost a lot of health, and may have bleeding wounds. If attacked by a moose, you'll also have broken ribs, which will reduce your carry weight and stamina.
- Wearing tough clothes helps reduce the damage you take in struggles.
- In Interloper, wolves deal so much damage that you will almost certainly be killed if you don't manage to scare the wolf off fairly quickly. Avoid struggles in this difficulty if at all possible.
- The heavy hammer doesn't cause wolves to bleed, but it has a 20% chance of ending the struggle per swing, and may occasionally cause an instant kill.
Forging
Forging is the only way to make new arrowheads, along with the improvised hatchet and improvised knife.
-
1Get a heavy hammer. If you don't have a heavy hammer, you won't be able to make anything other than a sore hand.
- Sometimes, heavy hammers can be found near the forge, but this isn't a guarantee.
- Having a hacksaw (to gather metal needed for making tools) is recommended, but not strictly necessary.
-
2Gather coal. Coal is the only fuel that you can use to heat a forge up to 150oC, the temperature needed for forging.
- You can't start a fire with coal, so bring at least one piece of wood along too.
-
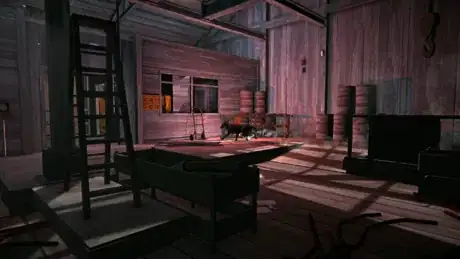
3Travel to Desolation Point, Broken Railroad, or Forlorn Muskeg if you're not already there. These are the only regions with a forge, and the locations with the forge are:
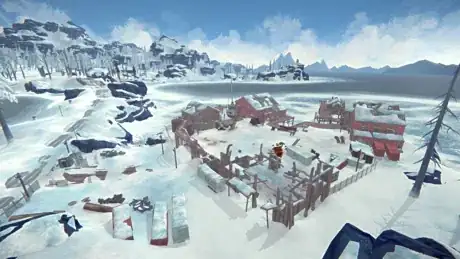
- The Riken in Desolation Point: Relatively close to Coastal Highway with an abundance of coal in the nearby mines, this stranded ship also makes a popular base location. The one downside is that the interior is very dark, making navigation inside tricky without a light source.
- Old Spence Family Homestead in Forlorn Muskeg: Although the closest forge to Mystery Lake and Mountain Town, with plenty of coal to be found in the caves nearby, this forge is relatively open to the elements, and predators can occasionally walk in and interrupt you when forging.
- Maintenance Shed in Broken Railroad: This forge is safer than Spence (except for occasional live wires during the Aurora), and abundant supplies can be found in the shed and nearby hunting lodge. Coal may be difficult to find, though, and getting here may require getting around several wolves along the way.
-
4Start your fire. Once it's lit, get the temperature up to 150oC by adding coal.
-
5Start forging. To make the improvised tools, you will need:
- One scrap metal per two arrowheads. This takes two hours.
- 5 scrap metal and one cloth for an improvised hatchet. This takes four hours.
- 3 scrap metal and one cloth for an improvised knife. This takes three hours.
Crafting ammunition
If you're playing on a difficulty other than Interloper, you will likely have a hunting rifle or revolver. Eventually, the ammunition spawned in the world will run out, and you will have to make some of your own.
-
1Pick up all your bullet casings. These will be ejected each time you shoot the rifle, or when you reload the revolver.
-
2Gather stump remover, charcoal, and sulfur. Charcoal can be obtained from burned-out fires, while the latter two will have to be found.
- Stump remover and sulfur are most often found in stores and industrial locations.
-
3Gather scrap lead. Scrap lead can be harvested from car batteries, which are found under the hood of about half the cars on Great Bear.
- Car batteries are very heavy. It's best to bring along a hacksaw, and harvest the car battery inside the vehicle you found it. This will considerably reduce the weight.
-
4Bring along your revolver. Ammunition crafting can only be done in Bleak Inlet and Blackrock. Both regions feature large Timberwolf populations, and a revolver is the best way to protect against these predators.
- It is generally advisable to choose whichever ammunition workbench is closer to you.
- Marine flares can also be helpful if you're running low on revolver ammunition.
-
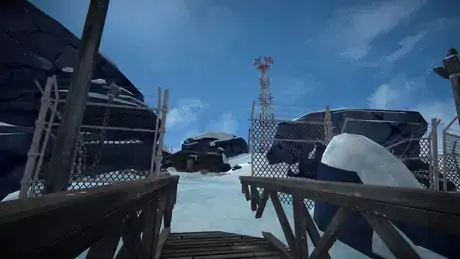
5Head for the Echo One Radio Tower (Bleak Inlet), or Last Prospect (Blackrock). These locations contain codes that you'll need to get into the ammunition crafting workshop.
- To get to the Echo One Radio Tower, the easiest way to get here is to head for the Ravine, deploy a rope down to the river, and head down the river until you get to Bleak Inlet. From there, head towards the coast until you get to the radio tower.
- Stop at Pensive Lookout if you need to take a nap.
- To get to Last Prospect, you will need to follow a long and winding mountain path to the northeast of the prison, as the Mule Bridge can't be used in Survival. From there, you need to go to the lowest level of the mine.
- To get to the Echo One Radio Tower, the easiest way to get here is to head for the Ravine, deploy a rope down to the river, and head down the river until you get to Bleak Inlet. From there, head towards the coast until you get to the radio tower.
-
6Get the code. This will allow you to enter the workshop to get to the ammunition workbench.
- If you are choosing to use the Blackrock ammunition crafting workbench, beware of poison gas in Level 3 of the mine. If you linger in the depths of the mine too long, it will kill your character, regardless of initial condition. It is wise to be unencumbered when going through the deadly gas.
- Once you get to Level 2 of the mine (where the code is), you don't have to go through the poison gas on the way out.
- If you are choosing to use the Blackrock ammunition crafting workbench, beware of poison gas in Level 3 of the mine. If you linger in the depths of the mine too long, it will kill your character, regardless of initial condition. It is wise to be unencumbered when going through the deadly gas.
-
7Head for the workshop. The exact directions you will need depend on where you're planning to do your crafting.
- In Bleak Inlet, deploy a rope near Pensive Lookout, and head for the coast. Cross a long bridge to the cannery, then follow.the obstacle course to get to the Cannery Pier.
- You will have to climb a rope, so make sure you're not encumbered before you start.
- In Blackrock, simply retrace your steps and enter the prison yard. The workshop is near the entrance to the Steam Tunnels.
- In Bleak Inlet, deploy a rope near Pensive Lookout, and head for the coast. Cross a long bridge to the cannery, then follow.the obstacle course to get to the Cannery Pier.
-
8Wait for the aurora if there isn't one present. You cannot enter either workshop without the aurora to power up the keypad locking the door.
- Once the keypad has been unlocked you can enter the workshop regardless of whether or not an aurora is present.
-
9Enter the workshop. Once you're in there, watch out, for a wolf sometimes spawns inside (Bleak Inlet only).
- It may be advisable to wait until daylight to enter, as that will make seeing the wolf (if present) much easier.
-
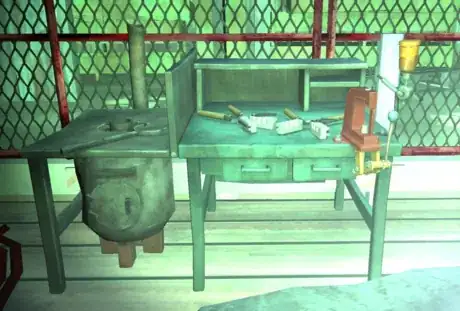
10Start crafting ammunition. You will need to have a fire in the forge to make bullets, but not for making gunpowder or filling cartridges.
- Coal is not needed for this forge.
- You can make 6 bullets per piece of lead, so 36 bullets per battery. Each batch of 6 bullets takes an hour to make.
- It is a good idea to make all the bullets and gunpowder you need first, to level up your Gunsmithing skill so you'll craft higher quality ammunition.
- Each cartridge takes 5 minutes (in game) to make.
Community Q&A
-
QuestionWhere do you spawn in Interloper?
 NSEasternShoreChemistCommunity AnswerIt's random, but not in Mystery Lake, Mountain Town, or Coastal Highway. You also won't ever spawn indoors.
Warnings
- Don't go to Bleak Inlet or Blackrock before you have a revolver, or at the very least several marine flares. You will have an extremely hard time entirely avoiding Timberwolf packs and will not likely survive without some means to defend yourself.⧼thumbs_response⧽











-Step-13.webp)
