X
This article was co-authored by wikiHow staff writer, Nicole Levine, MFA. Nicole Levine is a Technology Writer and Editor for wikiHow. She has more than 20 years of experience creating technical documentation and leading support teams at major web hosting and software companies. Nicole also holds an MFA in Creative Writing from Portland State University and teaches composition, fiction-writing, and zine-making at various institutions.
The wikiHow Tech Team also followed the article's instructions and verified that they work.
This article has been viewed 21,828 times.
Learn more...
This wikiHow teaches you how to add guide lines to your Adobe Photoshop workspace to help you place objects in your work area.
Steps
-
1Open Photoshop on your computer. If you’re using Windows, you’ll find it in the All Apps area of the Start menu. In macOS, it’ll be in the Applications folder.
-
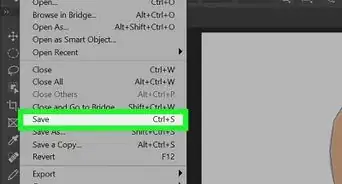
2Open the project you want to edit. You can do this by clicking the Open menu at the top-left corner of the screen, selecting the file, and then clicking Open.Advertisement
-
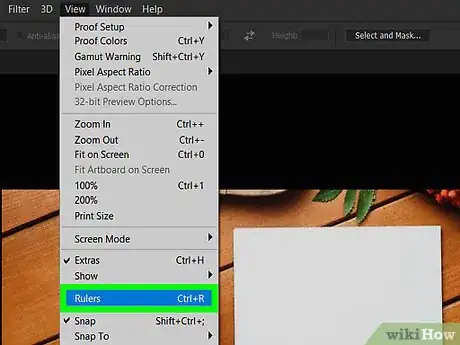
3Make the screen rulers visible. If you don’t see rulers at the top and side of the workspace, click the View menu and select Rulers to enable them. This makes it easy to place guides, as well as objects in general.
-
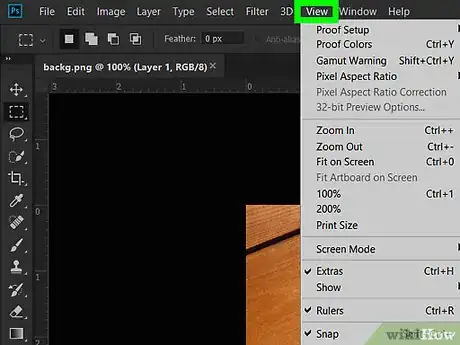
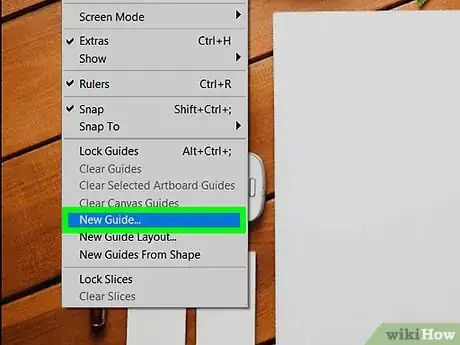
4Click the View menu. It’s at the top of the screen.
-
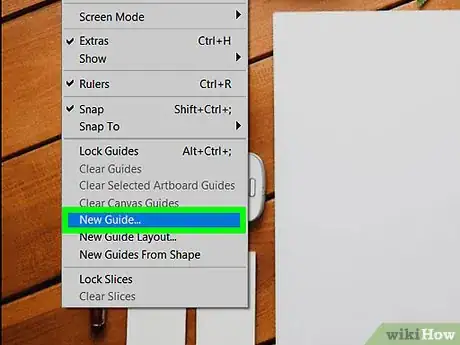
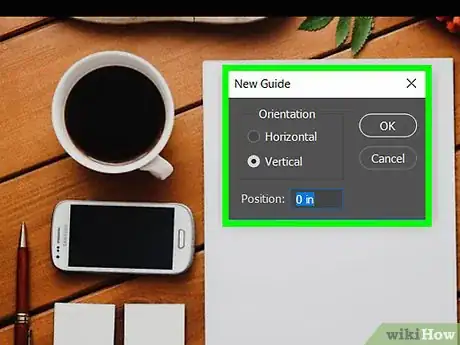
5Click New Guide…. It’s close to the bottom of the menu. A small window will appear.
-
6Select a position for the first guide line. Here’s how:
- Choose either Horizontal or Vertical in the “Orientation” section.
- Enter the ruler position (e.g. 12 cm) where you want the guide to appear. Don't worry, you can move guides around the workspace at any time.
- Click OK. The guide (a blue line) now appears over the workspace at the location you entered.
-
7Add more guides as needed. You’ll usually want to have at least one horizontal and one vertical guide to keep your objects aligned.
-
8Move a guide line to a different ruler position. If you don’t like where you placed the guide line, it’s easy to move:[1]
- Press and hold Ctrl (Windows) or ⌘ Cmd (macOS)) on the keyboard.
- Move the mouse pointer over the guide you want to move.
- Click and drag the guide to its new position.
-
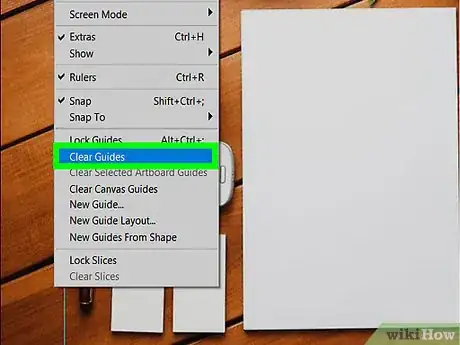
9Remove a guide that’s not needed. To remove one guide, just drag it anywhere outside of the image you’re working on.[2]
- To remove all guides at once, click the View menu and select Clear guides.
-
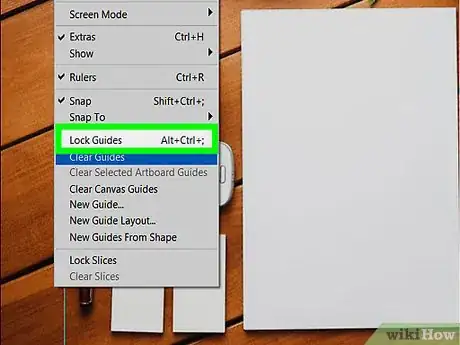
10Lock the guides into place (optional). If you don’t want to lose your guide lines, you may want to lock them into place. To do this, click the View menu and select Lock Guides.
- If you need to move or remove guides after locking them, you’ll have to unlock them first. Just select Unlock Guides from the View menu.
Advertisement
References
About This Article
Advertisement








-Step-9-Version-2.webp)


