This article was co-authored by wikiHow Staff. Our trained team of editors and researchers validate articles for accuracy and comprehensiveness. wikiHow's Content Management Team carefully monitors the work from our editorial staff to ensure that each article is backed by trusted research and meets our high quality standards.
This article has been viewed 2,736,388 times.
Learn more...
You may find yourself needing to recover your deleted internet history to determine what a previous user was browsing, to discover a lost URL, or simply to retrieve deleted information. While your internet history may be deleted on your browser, your Windows computer caches this information and it can be accessed in a variety of ways. By far the simplest method to locate your deleted history is through your Google Account. If you have a Google Account and were using it during the session you wish to access, proceed to that method. If, however, you were not using Google the process can be a little more complicated. Luckily, there are caches built into your machine from which you can access your lost history.
Steps
Using the DNS Cache
-
1Go to "Start" and select "Run." In the search bar enter “cmd” without the quotation marks. Select “OK.” While someone may be able to delete their browsing history, the DNS Cache stores this information. It should be noted that this method may be confusing because it saves history from everything connected to the internet, such as apps, and not just your browser.[1]
-
2Wait for the Command Prompt to open. This will be a black window where you can enter
ipconfig/displaydns. Hit “Enter.”Advertisement -
3Recover your deleted history. Once you have entered the command, you will be shown your internet history.


Downloading Recovery Software
-
1Search for reliable recovery software. A recommended option is Recuva or Data Recovery Wizard. Once you have downloaded the free software, start the program. In this tutorial, we will walk through using Recuva but most of the software can be navigated in similar ways.[2]
-
2Click “Next” on the Welcome to the Recuva Wizard page. If this page does not appear after you start the software, go to “Options” and then select “Show Wizard at Startup.”
-
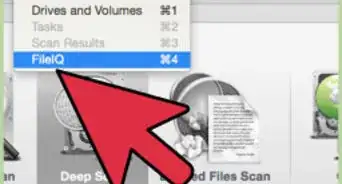
3Select the type of files you are trying to recover. In this case, deleted Internet history. Once you have done so, hit “Next.” This will prompt the File Location Page to appear.
-
4Select the location where you want the software to run its search. Click “Start” and then wait for the scan to complete. This may take a few moments.
-
5Select “Recover.” Once the scan is complete, you will have the option to recover the files and choose a destination for them on your computer. After you have chosen their location, select “OK.”[3]


Accessing Your Google History
-
1Access Google's Browser History. This is by far the easiest method but it will only work if you were signed in to your account during the browsing session you wish to access.
-
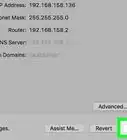
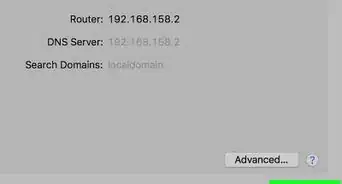
2Sign in to your Google Account. Go to www.google.com/history and enter the information for the account that you were browsing with.
-
3Review your browsing history. From this page, you will be able to see your browsing history according to time and date. If you wish to delete your history, simply click on the cog icon in the upper-right hand corner of the screen and select “Remove Items.”[4]


Community Q&A
-
QuestionHow can I find out who accessed my laptop with a Verizon air card?
 Community AnswerReverse the IP address and check out the person.
 -
QuestionA teenager used my laptop and, when I got it back, I could not use Firefox and found that it was made compatible with XP when it had been Windows 7. I'd like to find what the history of use was at the time the other person used my computer. What can I do?
 Community AnswerThere is a reset point. Find that option, save all the other stuff that you a added, or made after that data and then let your PC/laptop apply the earlier data for you. Then download Firefox and update it till you get the version that suits your needs and is for you the best option.
 -
QuestionWhere could I find a video file that was recording from Microsoft Lifecam that was interrupted?
 Mobile SenseiCommunity AnswerIt would depend on where you set Lifecam to save videos. By default, videos are saved in the LifeCam folder under "My Pictures" on the C: drive.


References
- ↑ http://www.ubergizmo.com/how-to/recover-my-internet-history/
- ↑ http://www.piriform.com/docs/recuva/using-recuva/wizard-mode/using-the-recuva-wizard-wizard-mode
- ↑ http://www.piriform.com/docs/recuva/using-recuva/wizard-mode/using-the-recuva-wizard-wizard-mode
- ↑ http://www.ubergizmo.com/how-to/recover-my-internet-history/
About This Article

1. Open the command prompt.
2. Type ipconfig /displaydns.
3. Press Enter.
4. Find the list of cached websites in the results.