X
wikiHow is a “wiki,” similar to Wikipedia, which means that many of our articles are co-written by multiple authors. To create this article, volunteer authors worked to edit and improve it over time.
This article has been viewed 27,591 times.
Learn more...
Putting a camping cot together might seem daunting at first, but after going through the process once, each consecutive time should be much easier. You'll need to open the frame, stretch out the canvas, and attach the supporting end rails. The most difficult part will be securing the final corner; once you've mastered that step, however, you should have no problem with your cot.
Steps
Part 1
Part 1 of 3:
Opening the Frame
-
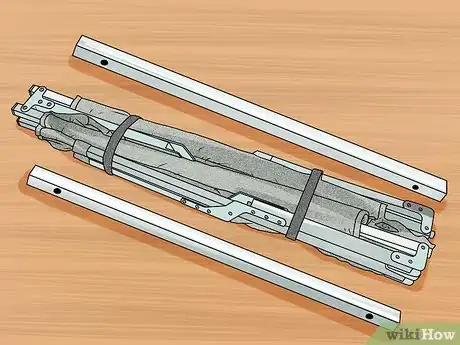
1Take an inventory. The cot should have three separate pieces: a metal frame with canvas attached to it and two separate metal rails.
- When you first get the cot, the primary metal frame will likely be folded up. You should be able to see the canvas attached to the frame as it is folded, though.
- The two separate metal rails will be used for support, and they will slide into the ends of the attached canvas once the frame has been opened up.
-
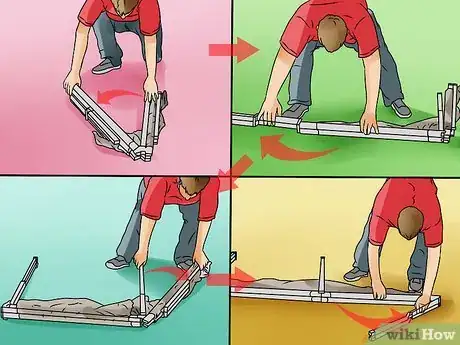
2Unfold the legs and side rails. Unfold the frame until the side rails of the cot are straight. The legs of the cot should also be unfolded and positioned on one side of the side rail bars.[1]
- Note that the side rails are the metal support bars attached to the canvas portion of the cot. The legs are the metal bars that are not attached to the canvas.
- There should be two parallel sets of side rails and three sets of legs. The legs should all be perpendicular to other side rail.
- The cot should only fold out in one direction. If you sense resistance, try folding the cot out in the opposite direction.
Advertisement -
3Separate the side rails. Open the parallel side rails, spreading them apart as far as they will go without resistance.[2]
- As you open the side rails, each set of legs will also open. The side rails will remain parallel to one another, but the legs in each set will open into an "X" position.
-
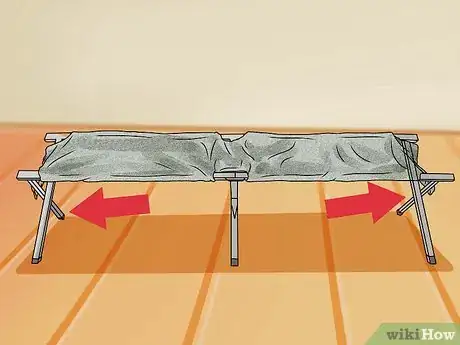
4Turn the cot over. Once you have opened the side rails and the legs, you should tip the cot over so that it now stands on its legs instead of resting on its side.[3]
- The cot should stand without any difficulty, but the canvas will not be taut. Do not attempt to use the cot at this point.
Advertisement
Part 2
Part 2 of 3:
Stretch the Fabric
-
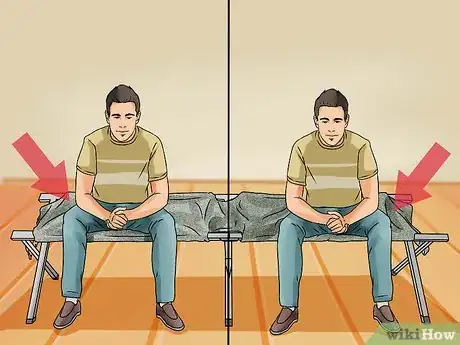
1Sit on the canvas. Firmly sit on the canvas between the first and second sets of legs, then slide down the cot and firmly sit between the second and third sets.[4]
- If you have never put the cot together before, the canvas will be difficult to maneuver. Sitting on the canvas stretches it out. It is recommended that you do this before finishing the frame to make the remaining part of the procedure easier.
- Note that you should be careful while doing this, however, since the cot can collapse at this point if too much weight is applied.
-
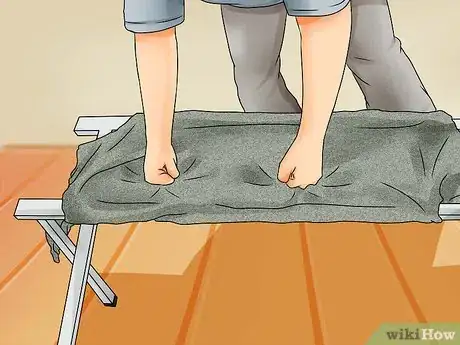
2Punch the canvas down. Walk around the perimeter of the cot while firmly pressing into the canvas with closed fists.
- Press down across the entire perimeter of the canvas. Punch the canvas down the entire lengthwise center, as well.
- You can do this instead of or in addition to sitting on the canvas. Either way, this action should help stretch the material and make it easier to maneuver.
Advertisement
Part 3
Part 3 of 3:
Part Three: Attaching the End Rails
-
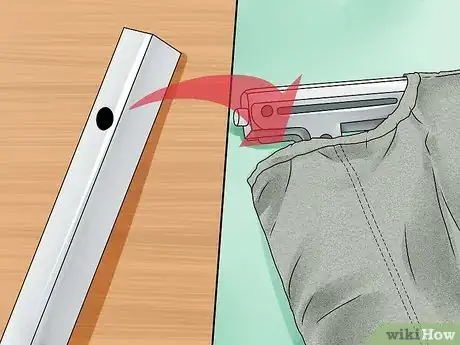
1Insert the end rails. Look for the gaps at either end of the canvas. Slide one of the metal support rails into one of these gaps, then slide the other metal support rail into the other gap.[5]
- For the time being, the long flat sides of the support rails should rest on top of the metal frame of the cot.
-
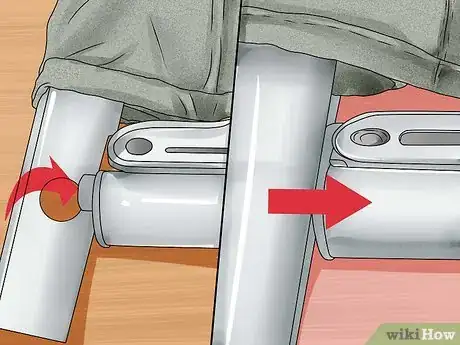
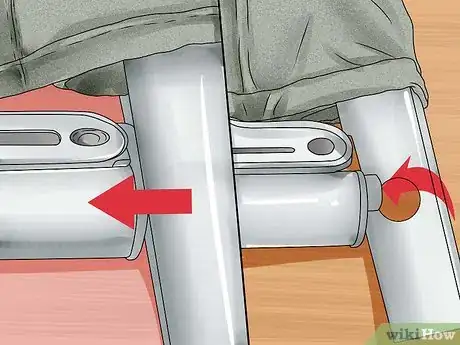
2Attach the first support rail. Snap one of supporting end rails onto the knobs of both side rails.
- There should be a plastic or metal knob at both ends of each side rail. There should also be two holes along one side of each support rail.
- Slide the support rail down past the end of the side rails. Line up the holes of the support rail so that they are directly in front of the knobs on both side rails.
- Firmly push the support rail toward the side rails until the holds snap on over the knobs. If done properly, the support rail should now be firmly fixed onto the side rails and should not wiggle or otherwise move around.
-
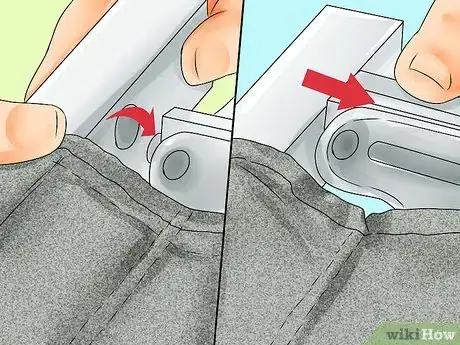
3Snap one end of the the second supporting end rail into place. Move to the second support rail and snap one of the holes into the knob of the corresponding side rail.
- You should be able to attach one side of the support rail without much difficulty, but you'll probably notice more resistance at this point than the amount you dealt with when attaching the first support rail.
-
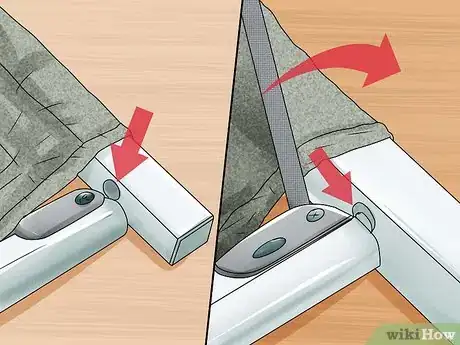
4Position the final corner. Pull the loose end of the second support rail over the side rail until it sits just beyond the end of the rail.
- The procedure used to secure the other three corners probably won't work for the fourth and final corner. Even if you stretched the canvas out before attaching the support rails, it will usually be too stiff at this point, and that stiffness will prevent you from lifting and locking the end of the support rail onto the side rail knob.
- Line up the support rail with the side rail as closely as possibly during this step. If you cannot secure it using brute strength alone, move onto the next step.
-
5Lever the final corner into place. Use a long metal bar to lift the loose end of the second support rail onto the final side rail knob. Once the hole and knob are aligned, snap the fitting together.
- An over-sized screwdriver, hammer handle, or pry bar should work for this.
- Insert the levering bar into the gap between the loose end of the support bar and side rail. The fabric should be notched in the corner, allowing you to easily pass the levering bar through it.
- Continue sliding the levering bar through this gap until it reaches the point at which the leg and side rail meet.
- Pull the long end of the lever toward you with one hand while carefully maneuvering the loose end of the support rail. The levering bar should cause the support rail to lift outward, toward you and away from the cot, making it easier for you to slide the end of the support rail into place.
- Once the support rail end is properly positioned, you should be able to snap it on as usual.
-
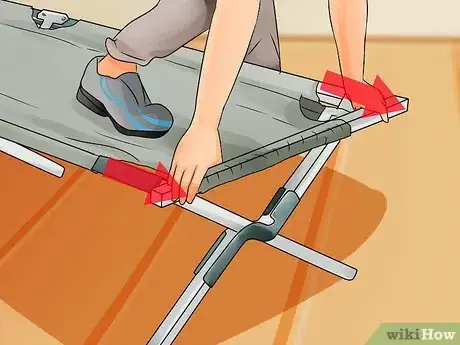
6Alternatively, lever the final end into place using your foot. If you do not have a levering bar, you can tip the cot over and use your foot to help lever the final corner into place.
- After attaching the first end bar and one side of the second end bar, stand the cot on the second, partially unattached support rail.
- Wedge your foot in between the loose end of the support rail and the corresponding side rail. Put your weight on that foot, holding the support rail down in the process.
- Carefully tip the top of the cot back, thereby lifting the loose end of the side rail over the loose end of the second support rail.
- Guide the two ends toward each other until they snap together. If there is another person nearby, you may need to ask that person to help guide the corner fittings together and snap them into place as you hold the cot.
-
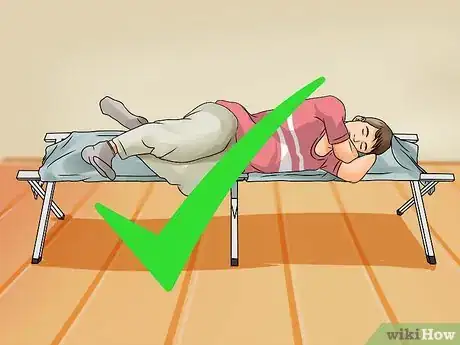
7Check the cot. The cot should be fully assembled at this point. Check it by carefully lying down over the length of the canvas.
- The canvas should remain taut when you lie down on it and none of the support rails should break free or wiggle around.
- If any of the support fittings break free, you will need to lever it back into place.
- Once the entire cot feels secure, it should be safe to use.
Advertisement
Warnings
- Most cots are made with aluminum, so you need to be careful when you apply force with a levering bar. If you apply too much force in the wrong area, you may bend the aluminum frame out of shape.⧼thumbs_response⧽
- Check the weight capacity of the cot before using it. If the cot is made with aluminum, the legs may bend over time if the cot is frequently used by someone whose weight exceeds two-thirds of the total recommended weight capacity.⧼thumbs_response⧽
Advertisement
Things You'll Need
- Military-style camping cot (main frame plus two supporting end rails)
- Levering bar (pry bar, hammer, over-sized screwdriver, etc.)
References
- ↑ https://www.youtube.com/watch?v=r6yaaKpiQwU
- ↑ https://eurekacamping.johnsonoutdoors.com/sites/johnsonoutdoors-store/files/assets/misc/EU/8/863950/EUR_ownersmanual_Compact_Cot.pdf
- ↑ https://eurekacamping.johnsonoutdoors.com/sites/johnsonoutdoors-store/files/assets/misc/EU/8/863950/EUR_ownersmanual_Compact_Cot.pdf
- ↑ https://www.campetent.com/military-cot.html
- ↑ https://www.campetent.com/military-cot.html
About This Article
Advertisement
