wikiHow is a “wiki,” similar to Wikipedia, which means that many of our articles are co-written by multiple authors. To create this article, volunteer authors worked to edit and improve it over time.
This article has been viewed 4,278 times.
Learn more...
Windows 11 has brought many new features to the operating system we know and love. There are many customisation options you can use to personalise the windows taskbar to your liking. The following steps will go through how you can do this in several parts.
Steps
Changing the Colour
-
1Open Settings. You can do this by either clicking on start (the windows logo in the taskbar) or clicking on the search icon in the taskbar, and searching for settings.
- Make sure you're opening Settings, denoted by the grey cog, not Control Panel, as these both offer different settings.
-
2Select 'Personalisation' in the menu. This is located on the left hand side of the settings menu, and is denoted by a paintbrush symbol.Advertisement
-
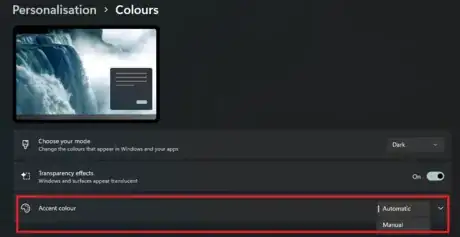
3Select 'Colours' from the list of settings. This should be the second option from the top.
-
4Click the drop-down arrow on the right of 'Accent Colour'. If the option next to this arrow says 'Automatic', switch it to 'Manual', and select a colour.
- You can pick from the displayed colours, or choose 'Customised Colours' to make your own.
-
5Turn on the setting under the colour selection, called 'Show accent colour on Start and Taskbar'
- Your computer may lag a little when you click this. Give it a few seconds and it should catch up.
Changing the Taskbar Behaviours
-
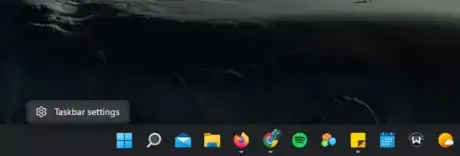
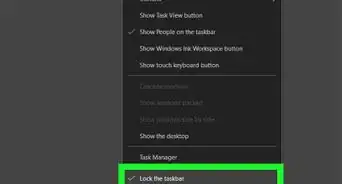
1Right-click on the taskbar. Do this in some empty space, not on an icon or button, and select the option.
- You should see a single option called 'Taskbar Settings'. If this doesn't appear, try again.
-
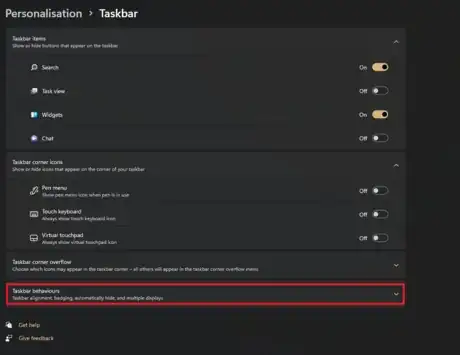
2Click on the 'Taskbar Behaviours' dropdown menu.
- This should be the last option on the page.
-
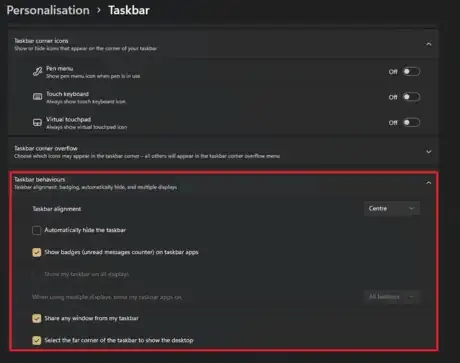
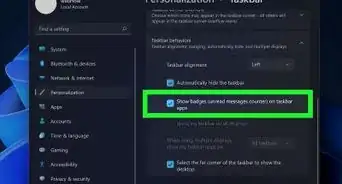
3Change settings such as taskbar alignment, hiding the taskbar, and other options listed below.
- You can choose to align your taskbar apps to the left or the centre, depending on your personal preference.
- You can choose to automatically hide your taskbar when you're not using it, to free up screen space. Check the box next to 'Automatically hide the taskbar'
- You can choose to show or hide notification badges on the taskbar.
- If you have more than one display, you can configure your taskbar's interactions with the additional screens.
- Check the box on the final option to click in the lower right corner of your screen, to minimise all apps and view the desktop.
Pinning and Unpinning Apps
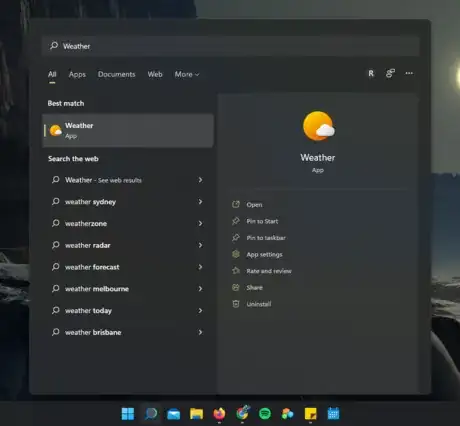
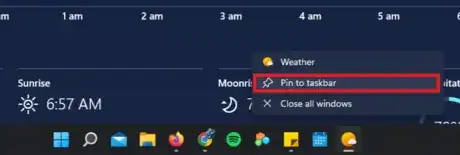
For easy access, you can pin applications you use regularly to the taskbar, so you don't have to navigate either the search or the start menu to find the software you need. Windows 11 comes with several icons already pinned (File Explorer, Microsoft Edge, and Microsoft Store). You can remove these apps if you like, and pin your own. Some apps cannot be removed through this method (Search, Task view, Chat etc.). To remove these, follow Part 4 below.
Adding and Removing Default Icons
Windows 11 comes with several default icons already showing on the taskbar, that cannot be removed through the normal method described above. These are icons such as 'Search' and 'Chat'.
-
1Right-click on the taskbar. Do this in some empty space, not on an icon or button, and select the option.
- You should see a single option called 'Taskbar Settings'. If this doesn't appear, try again.
-
2Edit the icons in the taskbar.
- You can toggle the icons for 'Search', 'Task view', 'Widgets' and 'Chat' on or off, depending on your personal preference and whether or not you use these programs.


