This article was co-authored by wikiHow staff writer, Christopher M. Osborne, PhD. Christopher Osborne has been a wikiHow Content Creator since 2015. He is also a historian who holds a PhD from The University of Notre Dame and has taught at universities in and around Pittsburgh, PA. His scholarly publications and presentations focus on his research interests in early American history, but Chris also enjoys the challenges and rewards of writing wikiHow articles on a wide range of subjects.
There are 8 references cited in this article, which can be found at the bottom of the page.
The wikiHow Culinary Team also followed the article's instructions and verified that they work.
This article has been viewed 1,211,347 times.
Learn more...
While it’s easy to go to the store and buy a bottle of vinegar, it can be very satisfying—and tasty!—to make it yourself. All you need is a clean jar, some alcohol, a “mother” (the starter for the fermentation process), and at least 2 months to allow the “mother” to work. Once you’ve mastered a general-purpose vinegar recipe that can be used with practically any type of alcoholic beverage, you can move on to more specialized recipes for wine vinegar, cider vinegar, rice vinegar, or—if you are willing to wait at least 12 years—balsamic vinegar.
Ingredients
- Vinegar starter (“mother”), either store-bought or homemade
- 12 fl oz (350 ml) of wine and 12 fl oz (350 ml) of distilled water
OR
- 24 fl oz (710 ml) of beer or hard cider (at least 5% ABV)
Steps
Adding Alcohol to the Prepared Jar
-
1Sterilize the inside of a jar with boiling water. Boil a pot of water, place the jar in the sink, and carefully fill the jar with boiling water. Pour out the water once you can safely handle the jar—it will take at least 5 minutes to cool enough to touch.[1]
- Make sure the jar isn’t cold when you pour the boiling water into it—the rapid change in temperature could cause the jar to shatter. Rinse the jar with hot tap water to warm it up, if necessary.
- This method won’t sterilize a jar to the extent required for safely canning or preserving food. It is, however, adequate sterilization for making vinegar.
-
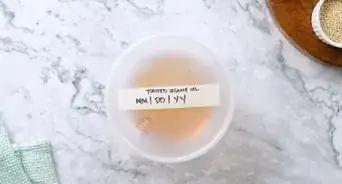
2Pour in 12 fl oz (350 ml) each of wine and water for wine vinegar. In basic terms, vinegar is created by bacteria that turn alcohol (ethanol) into acetic acid. This process is most effective if the liquid is 5%-15% alcohol by volume (ABV), although 9%-12% is ideal. Most wine has an ABV of around 12%-14%, and combining it with water at a 1:1 ratio—that is, 12 fl oz (350 ml) each—provides a nice finished flavor balance and acidity level.[2]
- Use distilled water, not tap water, to reduce the chance of developing any off-flavors.
- For less sharpness of flavor in the finished product, use 8 fl oz (240 ml) of wine and 16 fl oz (470 ml) of water. For more sharpness, add the wine in a 2:1 ratio.
- You can use white or red wine in any variety you prefer. However, use wine that does not contain sulfites (check the label).
Advertisement -
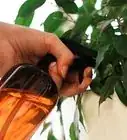
3Add 24 fl oz (710 ml) of beer or hard cider as a wine alternative. You can make vinegar out of any alcoholic beverage that has an ABV of at least 5%. Check the label on your beer or cider to make sure it meets this threshold, then add it without diluting it with water.[3]
- You could use other types of alcohol with higher ABVs as well, so long as you dilute it with water in order to reduce the ABV to 15% or less.

Adding the “Mother” and Storing the Jar
-
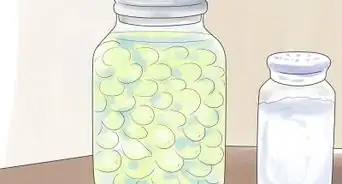
1Place or pour a store-bought “mother” into the jar. The “mother” contains the bacteria needed to begin the process of turning ethanol into acetic acid. It sometimes forms in opened bottles of wine and looks like a slimy blob floating on the surface. You can buy “mother” (sometimes marketed as “vinegar starter”) in this gelatinous form, or as a liquid—look for it in homebrew or natural foods stores, or online.[4]
- If you’re adding gelatinous “mother” from a store, follow the package instructions regarding the amount to add—you’ll just spoon it on top of the alcohol in your jar.
- For liquid vinegar starter, pour in 12 fl oz (350 ml), unless otherwise noted on the package.
-
2Use a homemade “mother” instead if you’ve saved it from prior vinegar making. The “mother” reforms every time you make a batch of vinegar. So, if you’ve made vinegar before, or have a friend who has, you can use the “mother” that formed in a previous batch. Just spoon it out and put it into your new jar.[5]
- You can repeat this process over and over again for years, if desired.
- It’s fine to use a “mother” from one type of vinegar (e.g., wine) to start another (e.g., cider).
-
3Seal the jar with a rubber band and cheesecloth or a paper towel. Simply lay the paper towel or cheesecloth over the top of the jar, then stretch a rubber band over the mouth of the jar. You need to cover the jar with a permeable material so that fresh air can circulate inside.[6]
- Don’t leave the jar uncovered. Dust or dirt may get in, and there’s a good chance you’ll end up with a bunch of drowned fruit flies floating in your vinegar!
-
4Place the jar in a dark, airy, temperate place for 2 months. Find a shelf on your pantry or similar location that’s fairly dark and gets decent air circulation. The conversion into vinegar will occur at temperatures between 59 and 94 °F (15 and 34 °C), but 80–85 °F (27–29 °C) is the ideal range—so pick out a warm spot if possible.[7]
- If you can’t find a dark spot, wrap the jar in a thick kitchen towel—but don’t cover the cheesecloth or paper towel lid.
- Don’t shake, stir, or (if possible) move the jar during the initial 2-month waiting period. This will make it easier for the “mother” to form and do its work.
- You’ll notice the scent of vinegar and possibly some more funky smells coming from the jar during the 2 months. Ignore this and leave it alone for 2 months.


Tasting and Bottling Your Vinegar
-
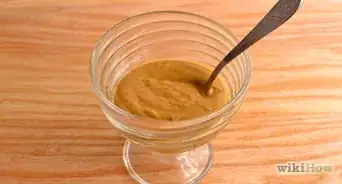
1Siphon out some vinegar with a straw after 2 months. Take off the rubber band and lid cover, then stick a straw down into the liquid without disturbing the gelatinous “mother” floating on the surface. Press your thumb against the open end of the straw to trap some vinegar inside the straw. Remove the straw from the jar, place the straw into a small glass, and let go with your thumb to discharge the vinegar into the glass.[8]
- You can use a disposable plastic straw or a reusable straw for this task.
-
2Taste the siphoned vinegar, and give the batch more time as needed. Take a small sip of the vinegar. If it is either too weak (because the fermentation process hasn’t proceeded enough) or too sharp and intense (because vinegar mellows over time), re-cover it and give it another 2 weeks to ferment.[9]
- Keep tasting the vinegar every 1-2 weeks until it meets your approval.
-
3Spoon out the “mother” if you want to reuse it in a new vinegar batch. Carefully remove the gelatinous blob floating on the surface of your finished vinegar, and transfer it to a new jar of starter liquid (for instance, equal parts of wine and water). This way, you can continuously churn out new batches of homemade vinegar![10]
- Alternatively, you can slowly pour out nearly all of the vinegar in your jar, leaving just a small amount in the bottom with the “mother” still floating in it. Then, refill the jar with more alcohol and start a new batch in this original jar.[11]
-
4Pasteurize the vinegar so it will keep indefinitely. After removing the "mother" from the fermenting jar (or leaving it behind in the jar), pour the vinegar into a medium saucepan. Place it on the stove over medium-low heat and use a probe thermometer to check the temperature. When the temperature is over 140 °F (60 °C) but less than 160 °F (71 °C), remove the pot from the heat and let the vinegar cool to room temperature.
- This process of pasteurizing the vinegar will enable it to be stored indefinitely at room temperature and low light in a glass container.[12]
- You can skip pasteurizing the vinegar if you wish, and it will still probably store for months or even possibly years without any noticeable decline in quality or flavor. But this quick step is worth the effort to ensure the long-term quality of your homemade vinegar.
-
5Bottle the finished vinegar through a filter and funnel. Place an unbleached coffee filter into a funnel, then place the funnel into the mouth of a clean, sterilized glass bottle—old wine bottles work well. Slowly pour the vinegar through the strainer and into the bottle. Seal the bottle with a cork or a screw-top lid.[13]
- Clean the bottle with soap and water, then pour in boiling water and leave it for 5-10 minutes to sterilize it.
- Affix a tag to the bottle that identifies the type of alcohol that was used and the amount of time the vinegar was left to ferment. This is especially helpful if you’re giving the vinegar as a gift or are stockpiling a personal collection!
-
6Don't use homemade vinegar for canning, preserving, or room temperature storage. Homemade vinegar is great to use in salad dressings and marinades, and for other uses when it will either be cooked or refrigerated. However, since the acidity (pH level) can vary widely, it is not safe for use in canning or preserving foods at room temperature.[14]
- If the acidity level is too low, the vinegar won’t ward off potentially harmful pathogens like e. Coli in the food you’re trying to preserve.
- This holds true even if you pasteurized the vinegar. It is, however, fine to store the vinegar itself at room temperature (pasteurized or not) in a dark, room temperature, or cooler place.


Recipe Variations
-
1Try maple vinegar for a unique flavor profile. For your 24 fl oz (710 ml) of starter liquid, combine 15 fl oz (440 ml) of pure maple syrup, 5 fl oz (150 ml) of dark rum, and 4 fl oz (120 ml) of distilled water. Follow the general-purpose vinegar recipe as described in the main body of this article.[15]
- Maple vinegar has a unique, rich flavor that works well drizzled over roasted squash or roasted chicken.
-
2Skip the alcohol altogether to make basic apple cider vinegar. Grind up about 4 lb (1.8 kg) of apples in a food processor, then squeeze the pulp in cheesecloth to extract the necessary 24 fl oz (710 ml) of starter liquid. Alternatively, you can use an organic, 100% apple juice or cider. Follow the recipe provided in the main body of this article.[16]
- Although this recipe contains no alcohol in the starter liquid, the sugars in the apple juice will provide enough food for the “mother” to do its work. It may take slightly longer to ferment into a vinegar that suits your taste, however.
-
3Give honey vinegar a try as another alcohol-free alternative. Boil 12 fl oz (350 ml) of distilled water and pour it over 12 fl oz (350 ml) of honey. Stir them together until they are fully combined, and let the mixture cool to slightly above room temperature (but below 94 °F (34 °C)). Then, use it in this article’s general-purpose recipe.[17]
- As with vinegar made with apple juice, the sugars in the honey will be sufficient to feed the “mother” and support the fermentation process.


Community Q&A
-
QuestionCan I use store bought vinegar to make the mother?
 Community AnswerIt is all explained above. You need unpasteurized and unfiltered vinegar (store-bought or otherwise) to make a 'mother.' You can sometimes even find a bottle of unfiltered and unpasteurized vinegar (at the store) with a 'mother' in it.
 -
QuestionHow can I prepare vinegar from sugarcane?
 Community AnswerSqueeze the sugarcane for juice. Put the juice in a container with a hole so carbon dioxide can escape and add yeast to the juice. Leave the mixture in a warm place with not too much movement. Taste the liquid periodically, once every few days. It should taste alcoholic. Keep fermenting until it no longer tastes sweet, just alcoholic. Then follow the above steps to make vinegar.
 -
QuestionHow long does it take to prepare vinegar from sugarcane?Community AnswerExtract matured sugarcane juice without any additives and then strain it through a cheesecloth in enameled earthen pot. Now leave it for about 30 days untouched. Post that, if the aroma is somewhat like vinegar, leave it for another 30 days. Then strain through a cheesecloth again to remove the mother, then add black/brown chickpeas for flavor and smoothness. Store for a couple of days, then strain and bottle for preservation. Your vinegar is ready!
Things You’ll Need
- 64 fl oz (1.9 L) glass jar
- Cheesecloth or paper towel
- Rubber band
- Plastic or reusable straw
- Medium saucepan
- Probe thermometer
- Empty, clean wine bottle with stopper
- Funnel
- Unbleached coffee filter


References
- ↑ https://thesurvivalmom.com/march-skill-of-the-month-make-your-own-vinegar/
- ↑ https://www.popsci.com/diy/article/2008-12/making-vinegar-home#page-3
- ↑ https://www.popsci.com/diy/article/2008-12/making-vinegar-home#page-3
- ↑ https://blog.williams-sonoma.com/weekend-project-make-your-own-homemade-vinegar/
- ↑ https://www.popsci.com/diy/article/2008-12/making-vinegar-home#page-3
- ↑ https://www.popsci.com/diy/article/2008-12/making-vinegar-home#page-3
- ↑ https://www.popsci.com/diy/article/2008-12/making-vinegar-home#page-3
- ↑ https://www.foodnetwork.com/how-to/articles/ask-ted-how-to-make-homemade-vinegar
- ↑ https://www.foodnetwork.com/how-to/articles/ask-ted-how-to-make-homemade-vinegar
- ↑ https://www.foodnetwork.com/how-to/articles/ask-ted-how-to-make-homemade-vinegar
- ↑ https://youtu.be/7rYQyWTeX1M?t=60
- ↑ http://ucfoodsafety.ucdavis.edu/files/192135.pdf
- ↑ https://blog.williams-sonoma.com/weekend-project-make-your-own-homemade-vinegar/
- ↑ https://recipes.howstuffworks.com/how-vinegar-works2.htm
- ↑ https://www.popsci.com/diy/article/2008-12/making-vinegar-home#page-3
- ↑ https://thesurvivalmom.com/march-skill-of-the-month-make-your-own-vinegar/
- ↑ http://naturemoms.com/homemade-vinegar.html
About This Article

To make your own vinegar, start by pouring equal parts wine and water into a sterilized jar. Alternatively, you can use hard cider or beer instead of wine. Next, add vinegar starter to the jar, and seal the jar with a cheesecloth or paper towel and a rubber band. Finally, place the jar in a dark, well-ventilated area, and let it sit undisturbed for 2 months. To learn how to pasteurize homemade vinegar so it lasts longer, scroll down!