This article was co-authored by wikiHow Staff. Our trained team of editors and researchers validate articles for accuracy and comprehensiveness. wikiHow's Content Management Team carefully monitors the work from our editorial staff to ensure that each article is backed by trusted research and meets our high quality standards.
There are 7 references cited in this article, which can be found at the bottom of the page.
The wikiHow Video Team also followed the article's instructions and verified that they work.
This article has been viewed 15,077 times.
Learn more...
Delicious, creamy, tart lemon curd—it’s fun and challenging to make, and you definitely want to make sure to store it properly so you can enjoy it for as long as possible. It’s popular as a summertime treat, but don’t discount its energizing freshness to beat back the wintertime doldrums. Whether you refrigerate, freeze, or can your lemon curd, you’ll love knowing it’s available to add to various baked treats.
Steps
Pouring Fresh Curd into Clean Containers
-
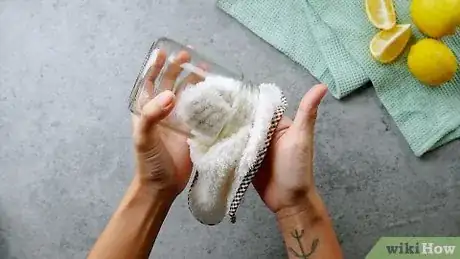
1Wash and dry several glass containers to prepare them for the curd. Canning jars work great for storing lemon curd, but you can use any glass container as long as it has a tight-fitting lid. Use warm, soapy water to thoroughly clean each container. Rinse off all the soap, and use a clean dishtowel to dry the jars.[1]
- If you clean the jars before making the lemon curd, set them upside down on a clean towel while you bake to prevent any contaminants from falling into them.
- If you’re going to freeze the lemon curd and decide to use plastic containers, make sure they contain “freezer safe” labels. Not all plastics are safe to freeze.
-
2Divide the lemon curd between the containers while it’s still hot. After you’ve made the lemon curd and sieved it to remove any bits of remaining lemon zest or egg, use a large spoon to carefully distribute the curd. If any curd gets onto the rim of the jars, wipe it away with a wet paper towel.[2]
- Be careful while handling the lemon curd. The bowl will likely be very hot, so use oven mitts or a dish towel so you don’t burn your hands.
- Because of the consistency of lemon curd, you may need to use a rubber spatula to get all of it out of the bowl.
Advertisement -
3Leave 1⁄2 inch (1.3 cm) of space between the curd and the rim of the jar. Liquids expand as they cool—leaving space at the top of the container will keep it from breaking as the curd cools off. If you overfilled the containers, simply use a spoon to remove some curd from each jar. [3]
- This is especially important if you don’t have enough time to let the jars cool before you put them into the fridge or freezer.
-
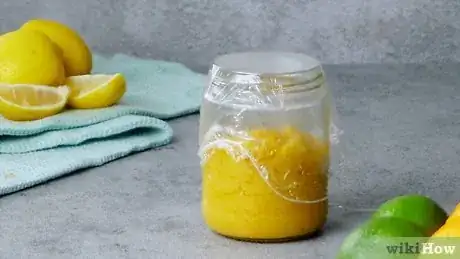
4Cover the curd with plastic wrap to prevent a skin from forming. Tear off a piece of plastic wrap that is 1 to 2 inches (2.5 to 5.1 cm) larger than the jar’s lid. Gently place the plastic wrap over the jar and push it down so it’s laying flat against the curd.[4]
- A thick layer would form over the curd if it came into contact with too much air while cooling. While not harmful, the consistency would be a little off from what you’d expect.
-
5Allow the lemon curd to cool for about 1 hour until it’s at room temperature. Leave the lids off of the lemon curd at this point. The plastic wrap will keep any bugs or contaminants from getting in the curd. When the jars are cool to the touch, you can move on to the next part of the process.[5]
- If you don’t have time for the lemon curd to fully cool, go ahead and put the lids on over top of the plastic wrap and put the jars into the fridge. If you need to freeze the curd, wait until the jars have thoroughly cooled in the fridge before removing the plastic wrap and transferring them to the freezer.
-
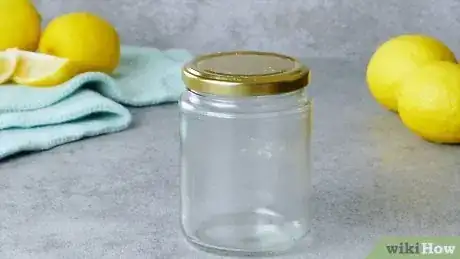
6Remove the plastic wrap and tightly secure the lids on the jars. Once the jars have cooled, peel off and discard the plastic wrap. A little bit of curd may come away with the wrap, but that’s okay. Make sure each lid is fitted tightly onto each jar.[6]
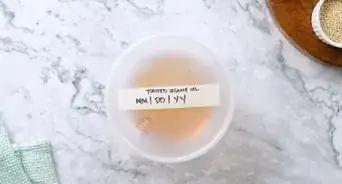
- Write the “date made” on pieces of masking tape and stick them to the jars. That way, you’ll know how long they’ve been in storage.
Keeping Lemon Curd in the Fridge or Freezer
-
1Store the lemon curd in your fridge for up to 4 weeks. Transfer the containers of lemon curd to your fridge if you plan on enjoying them within the next month. Take them out and use them as needed; if it gets close to the 4-week mark, you can transfer the jars to the freezer.[7]
- Avoid contaminating the lemon curd by always using a clean spoon when you scoop some out of the jar.
-
2Freeze the lemon curd for up to 1 year for the best taste. Lemon curd stored safely in the freezer will most likely be safe to eat for longer than 2 years, but the quality and strength of flavor will diminish over time. Store the jars flat on their bottoms rather than on their sides so that the curd doesn’t freeze to the lids.[8]
- If you lose power and the contents of your freezer start to thaw, you’ll need to either transfer the curd to a fridge or throw it out.
-
3Thaw the lemon curd in the fridge for 24 hours before you need to use it. Avoid putting frozen lemon curd on the counter to thaw—too drastic of a change in temperature could ruin the consistency of the curd. Let it come to temperature slowly in the fridge, then use it within 4 weeks.[9]
- As long as your lemon curd was thawed properly in the fridge, it could actually be frozen again if needed.
Canning Lemon Curd
-
1Wash and dry several glass canning jars to prepare them for the curd. Use warm, soapy water to clean several glass jars. After the soap is rinsed off, use a clean dishtowel to dry each jar. Set them to the side while you prepare your lemon curd.[10]
- A lot of recipes call for half-pints (8 ounces) of lemon curd; if you have jars that size, they’ll make it easier when it comes time to measure the curd for various recipes.
- If you’re going to can your lemon curd, the National Center for Home Food Preservations recommends using bottled lemon juice instead of fresh lemon juice. Bottled lemon juice has a stable acidity level, whereas the acidity level of fresh lemons could vary from fruit to fruit. Maintaining the right level of acidity is important for food safety in canning.
-
2Add enough water to a water canner so the jars will be fully covered. Use a single jar to test that the level is high enough—you won’t actually submerge the jars until after they’ve been filled with curd. Make sure the water is high enough to cover the jar by at least 1 to 2 inches (2.5 to 5.1 cm). Check that the water canner’s rack is in place to ensure the water level is high enough.[11]
- The rack is used to keep the jars from touching the bottom of the canner. This is important because otherwise, the contents in your jars might get over-cooked or burned since they’d be so close to the burner.
Trying an Alternative: If you don’t have a water canner, don’t despair! You can use a large stockpot—just make sure it’s deep enough to fully cover the glass jars. Place some kind of rack, like a roasting rack or a layer created from the outer bands from your canning lids, on the bottom to keep the jars from touching the stockpot, and check that the pot’s lid fits tightly in place. From there, you’ll just follow the same steps to can your lemon curd.
-
3Preheat the canner to about 180 °F (82 °C). At this stage, there shouldn’t be anything in the canner except water and the rack at the bottom. Place the water canner on a burner and turn the heat to high. Use a kitchen thermometer to monitor the temperature of the water. Lower the heat to medium once the temperature is around 180 °F (82 °C) so it doesn’t start boiling before the jars are in place.[12]
- The water in the canner should be kept lower than the boiling point at this stage so that the jars will have enough time to fully process once they’re added.
-
4Strain hot lemon curd into each jar, leaving 1⁄2 inch (1.3 cm) of space at the top. The headspace at the top of the jar between the lemon curd and the rim is important for it to safely process and seal. Use oven mitts or something similar to protect your hands—the jars will become hot from the freshly made lemon curd.[13]
- Straining the lemon curd helps remove any bits of lemon zest or egg that might mar the smooth consistency of the curd.
-
5Wipe off the rims of the jars with a damp paper towel and secure the lids. Remove any spillage from the rims and sides of the jars. Place the lids on the jars and turn them so they’re tightly in place.[14]
- Make sure to use the 2-piece lids that often come with canning jars. They’re made of a flat disc that covers the opening of the jar and a band that seals the cover in place.
-
6Lower each jar gently into the filled water canner. Be careful to not just drop the jars into the canner—you don’t want them to fall over or get sloshed around. Use a jar lifter or pair of tongs to carefully place each jar onto the rack in the canner. Leave a bit of space between each jar so they don’t touch.[15]
- Watch out for hot water and be careful to not splash yourself.
-
7Process the jars for 15 minutes after the water has come to a boil. Turn the heat back up to high and monitor the water until it reaches 212 °F (100 °C), or has started to boil. Put the lid on the canner and set a timer for 15 minutes once the water is boiling.[16]
- If you’re at an altitude above 1,000 feet (300 m), change the processing time to 20 minutes. For altitudes over 6,000 feet (1,800 m), process the lemon curd for 25 minutes.
-
8Remove the jars from the canner and let them cool for 12-24 hours. If you have a jar lifter, simply clamp it around the lid of a jar and carefully pull it out of the water bath. If you don’t have a jar lifter, use silicone tongs or something similar. Place the jars on a towel and let them rest upright so the lids can properly seal.[17]
- You’ll know the lids have sealed when they no longer flex or move when you push on the top.
- If the lid still moves or buckles when you press on it after 24 hours, store your lemon curd in the fridge and use it within 3-4 weeks.
-
9Store the lemon curd in a cool, dark place for 3-4 months. Place the curd on a shelf or in a pantry away from direct sunlight and heat sources. Use a piece of masking tape to label each jar with the “date made” to mark how long they’ve been in storage.[18]
- If you notice any separation or discoloration in the curd, throw it away.
Using Lemon Curd
-
1Make a delicious lemon tart to take to the next special gathering. Fill a baked tart crust with lemon curd and let it set overnight. You could even decorate the chilled tart with fresh berries to make a stunning centerpiece.[19]
- Pair this sweet and tart treat with cups of coffee for the perfect afternoon treat.
Making a Tart Crust: Use a food processor to pulse together 1 1/2 cups (192 grams) of all-purpose flour, 1/3 cup (40 grams) of powdered sugar, and 1/4 teaspoon (1.5 grams) of kosher salt. Add 1 stick of cold unsalted butter and blend the ingredients until it’s in pea-sized bits. Add 1 egg yolk, 2 teaspoons (9.9 mL) of heavy cream, and 1⁄2 teaspoon (2.5 mL) of vanilla extract and pulse the mixture until everything combines. Press the dough into a tart pan, then chill it for 1 hour before pricking the bottom with a fork several times and baking at 350 °F (177 °C) for 10-12 minutes. Fill the baked crust with fresh lemon curd when you’re ready!
-
2Fold lemon curd into cream cheese to use as a dip for fresh fruit. Use a food processor or stand mixer to mix 2 to 3 tablespoons (30 to 44 mL) of lemon curd with 8 ounces (225 grams) of cream cheese. Add more lemon curd if you want a stronger flavor. Put the dip into a bowl and serve it with fresh berries for a refreshing snack.[20]
- You could use strawberry cream cheese for a fun variation on this dip.
-
3Dollop lemon curd over top of ice cream to make a tart sundae. Vanilla ice cream would pair perfectly with lemon curd, but don’t discount less traditional flavors, like pistachio, banana, birthday cake, or blackberry ice cream. Simply add a scoop of curd to elevate a normal bowl of ice cream.[21]
- You could even blend the curd and ice cream to make a milkshake.
-
4Spread lemon curd over top of muffins or scones to add a burst of flavor. Upgrade your next breakfast by topping your favorite baked goods with a thin layer of lemon curd. Just take a spoonful and spread it over the top, or slice the baked good in half and sandwich the curd between the 2 sides.[22]
- If you’re hosting a breakfast or brunch, display the lemon curd in a small bowl along with a spoon so guests can serve themselves.
-
5Bake lemon bars for a bright, easy-to-share dessert. Lemon bars are perfect to take to picnics, parties, and cookouts. You can make the bars ahead of time with your lemon curd and store them in the fridge until you’re ready to enjoy them.[23]
- For a pretty presentation, sprinkle the top of the lemon bars with powdered sugar.
Warnings
- Throw out the lemon curd if it develops mold or a rancid smell.[26]⧼thumbs_response⧽
Things You’ll Need
Pouring Fresh Curd into Clean Containers
- Dish soap
- Clean dishtowel
- Glass containers with lids
- Large spoon
- Paper towels
- Oven mitts
- Rubber spatula
- Plastic wrap
- Masking tape
- Pen or marker
Keeping Lemon Curd in the Fridge or Freezer
- Prepared lemon curd
Canning Lemon Curd
- Dish soap
- Dishtowel
- Kitchen thermometer
- Water canner
- Sieve
- Glass canning jars with lids
- Paper towels
- Masking tape
- Marker
- Over mitts
- Jar lifter or alternative
References
- ↑ https://nchfp.uga.edu/how/can_02/lemon_curd.html
- ↑ https://nchfp.uga.edu/how/can_02/lemon_curd.html
- ↑ https://www.simplyrecipes.com/recipes/how_to_make_lemon_curd/
- ↑ https://www.epicurious.com/recipes/food/views/classic-lemon-curd
- ↑ https://www.simplyrecipes.com/recipes/how_to_make_lemon_curd/
- ↑ https://nchfp.uga.edu/how/can_02/lemon_curd.html
- ↑ https://www.simplyrecipes.com/recipes/how_to_make_lemon_curd/
- ↑ https://nchfp.uga.edu/publications/nchfp/factsheets/lemoncurd.pdf
- ↑ https://www.simplyrecipes.com/recipes/how_to_make_lemon_curd/
- ↑ https://nchfp.uga.edu/how/can_02/lemon_curd.html
- ↑ https://www.food.com/recipe/lemon-curd-for-canning-269028
- ↑ https://www.food.com/recipe/lemon-curd-for-canning-269028
- ↑ https://nchfp.uga.edu/how/can_02/lemon_curd.html
- ↑ https://nchfp.uga.edu/how/can_02/lemon_curd.html
- ↑ https://nchfp.uga.edu/how/can_02/lemon_curd.html
- ↑ https://nchfp.uga.edu/how/can_02/lemon_curd.html
- ↑ https://nchfp.uga.edu/how/can_02/lemon_curd.html
- ↑ https://www.simplyrecipes.com/recipes/how_to_make_lemon_curd/
- ↑ https://www.foodnetwork.com/recipes/ina-garten/lemon-curd-tart-recipe-1953051
- ↑ https://www.simplyrecipes.com/recipes/how_to_make_lemon_curd/
- ↑ https://nchfp.uga.edu/publications/nchfp/factsheets/lemoncurd.pdf
- ↑ https://nchfp.uga.edu/publications/nchfp/factsheets/lemoncurd.pdf
- ↑ https://www.foodnetwork.com/recipes/ina-garten/lemon-bars-recipe-1941483
- ↑ https://nchfp.uga.edu/publications/nchfp/factsheets/lemoncurd.pdf
- ↑ https://nchfp.uga.edu/publications/nchfp/factsheets/lemoncurd.pdf
- ↑ https://nchfp.uga.edu/publications/nchfp/factsheets/lemoncurd.pdf
