This article was co-authored by wikiHow staff writer, Nicole Levine, MFA. Nicole Levine is a Technology Writer and Editor for wikiHow. She has more than 20 years of experience creating technical documentation and leading support teams at major web hosting and software companies. Nicole also holds an MFA in Creative Writing from Portland State University and teaches composition, fiction-writing, and zine-making at various institutions.
The wikiHow Tech Team also followed the article's instructions and verified that they work.
Learn more...
Do you want to make games for Linux? GameMaker Studio makes it easy! If you already have the GameMaker IDE on your PC or Mac, you'll just need to install GameMaker Studio 2 on your Linux (Ubuntu) PC. Once installed, you can use the IDE on your PC or Mac to compile games for Linux and play them right away. While there's no official release of the GameMaker IDE for Linux yet, you can install the beta version if you want to make games without Windows or macOS. This wikiHow guide will walk you through setting up the latest version of GameMaker Studio on Ubuntu Linux.
Things You Should Know
- Once you install GameMaker on Linux, set the Linux PC as the build target in the IDE. When you compile a game for Linux, it will be pushed as a ZIP to the Linux PC.
- If you want to try the beta version of the GameMaker Studio IDE for Ubuntu, you can install the DEB package from Yoyo Games.
- The latest version of GameMaker Studio for Linux (and the beta version of the IDE) is for Ubuntu 20.04 LTS only.
Steps
Install the Required Ubuntu Libraries
-
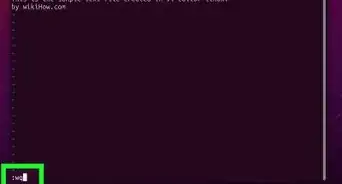
1Open a Terminal window. You can do this in most desktop environments by pressing Ctrl + Alt + T.
- The latest version of GameMaker Studio is made for Ubuntu 20.04.
- You will also need to have GameMaker Studio installed on your PC or Mac to compile games for Linux.
- If you just want to play games other people made with GameMaker Studio, you'll still need to follow all of these steps to install GM and the proper libraries.
-
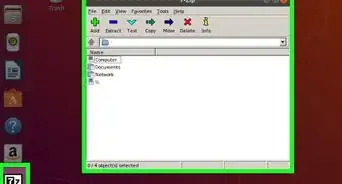
2Type sudo apt-get update and press ↵ Enter. This updates the software repositories so you're able to get the latest version of the software you need.Advertisement
-
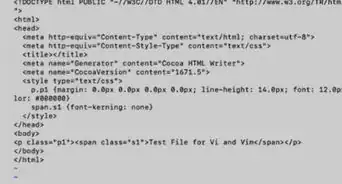
3Install the build tools. Before you can install GameMaker Studio on Linux, you'll need to install several libraries.[1]
- The packages you'll need:
- build-essential
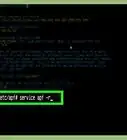
- openssh-server
- clang
- libssl-dev
- libxrandr-dev
- libxxf86vm-dev
- libopenal-dev
- libgl1-mesa-dev
- libglu1-mesa-dev
- zlib1g-dev
- libcurl4-openssl-dev
- ffmpeg
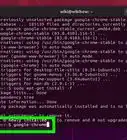
- To install all packages at once, use the command sudo apt-get install build-essential openssh-server clang libssl-dev libxrandr-dev libgl1-mesa-dev libglu1-mesa-dev zlib1g-dev libcurl4-openssl-dev ffmpeg.[2]
- The packages you'll need:
-
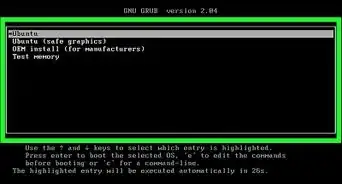
4Double-check the ffmpeg version if you're running Ubuntu 18. If you haven't updated Ubuntu to the latest version, you'll want to make sure you've installed the correct version of ffmpeg.[3]
- Type ffmpeg -version and press Enter.
- If you see "ffmpeg version 3.x.x", you'll need to run more commands to get the latest version, or else you won't be able to hear audio in your games.
- To get the latest version:
- Type sudo add-apt-repository ppa:savoury1/ffmpeg4 and press Enter.
- Type sudo apt-get install ffmpeg and press Enter.
-
5Install libfuse2 and curl if you're using Ubuntu 22.04. You can skip this step if you're using a different version of Ubuntu Linux.
- To install, run the command sudo apt-get install libfuse2 curl.


Install the AppImage Build Tools
-
1Type sudo mkdir /opt/steam-runtime/ and press ↵ Enter. This creates a directory for the Steam runtime libraries.
- You can use a different directory for this if you prefer. However, if you do, you'll need to change the next command to install in your preferred directory.
-
2Install the Steam runtimes. Now that you have a directory, use this command to download and install the Steam runtime:
- Type curl https://repo.steampowered.com/steamrt-images-scout/snapshots/latest-steam-client-general-availability/com.valvesoftware.SteamRuntime.Sdk-amd64,i386-scout-sysroot.tar.gz and press Enter.
- If you're using a different directory, replace /opt/steam-runtime/ with your preferred directory.
- Type curl https://repo.steampowered.com/steamrt-images-scout/snapshots/latest-steam-client-general-availability/com.valvesoftware.SteamRuntime.Sdk-amd64,i386-scout-sysroot.tar.gz and press Enter.
-
3Install linuxdeploy. To do this, you'll need to run two separate commands:
- To download the files, type wget https://github.com/linuxdeploy/linuxdeploy/releases/download/continuous/linuxdeploy-x86_64.AppImage and press Enter.
- To install, type the command sudo install -m 0755 linuxdeploy-x86_64.AppImage /usr/local/bin/linuxdeploy and press Enter.
-
4Install AppImage. Now that you have all the prerequisites, you can install AppImage using these commands:
- To get the files, type wget https://github.com/AppImage/AppImageKit/releases/download/continuous/appimagetool-x86_64.AppImage and press Enter.
- To install, type sudo install -m 0755 appimagetool-x86_64.AppImage /usr/local/bin/appimagetool and press Enter.


Connect Linux to GameMaker
-
1In the GameMaker IDE on your PC or Mac, open the Target Manager. You can do so by clicking the crosshair icon in the IDE.[4]
-
2Select Ubuntu in the "Platform" column. More options will expand.
-
3Select your compiler. Choose whether you want to use YYC or VM to compile your games. If you use both compilers, you can repeat this step a second time for the second compiler.
-
4Click the pencil icon next to "Device." This opens the Ubuntu Device Manager, where you can link to GameMaker on Ubuntu.
-
5Click Add New Device. This option is at the top of the window.
-
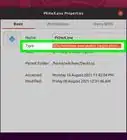
6Enter the hostname, Linux username and password, and other details.
- The hostname is the IP address or host name of your Linux machine. If you're on a local network, this will be the private IP address of your Linux PC.
- For the username and password, enter the login information for the user account you used to install GameMaker Studio.
- Set the installation folder to a location on your Linux PC where you want to install the components necessary for running your game. The default is GameMakerStudio2, which will be created in your home directory.
- Click Test Connection to make sure your PC or Mac can properly connect and log into the Linux PC.
-
7Click OK to save your changes. Now that you've connected GameMaker on Linux to your PC or Mac, you can test and build your game projects for Linux. Once you select VM or YYC, select your Linux computer and press the Play button.
-
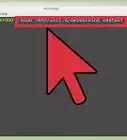
8Compile a game for Linux. To compile for Ubuntu, click the package icon at the top of the GameMaker IDE, then select a folder in which you'll create the package. This creates a ZIP file on your PC or Mac and pushes the ZIP file to the folder you specified on your Linux PC.[5]
-
9Play the game on Linux. Now you can unzip the game files on Linux and double-click the executable to run the game.
- If you get any errors, you may need to install a few extra libraries. Run these commands to get them.
- sudo apt install libcurl4
- sudo apt install libopenal1


Installing GameMaker Beta (Optional)
-
1Download the DEB package from Yoyo Games. If you want to try using the beta version of the GameMaker IDE for Ubuntu to create games, you can get the latest package from https://gms.yoyogames.com/ReleaseNotes-NuBeta.html. Just click the Ubuntu link at the top and save the .deb file to your home directory.
- While the developers admit that the beta version of the IDE for Linux is not suitable for production, installing the beta version of the IDE is the only way to create GameMaker games on Ubuntu without involving Windows or macOS.
- You must have already installed all the required libraries and other files from the previous sections to use the IDE.
-
2Install the DEB package. You can install the package easily in your file manager by double-clicking the .deb file. Alternatively, use the command sudo dpkg -i package_file.deb. Just replace that file name with the actual .deb package file.
- Once the IDE is installed, you'll find it in your app list.


References
- ↑ https://help.yoyogames.com/hc/en-us/articles/235186168-Setting-Up-For-Ubuntu
- ↑ https://manpages.ubuntu.com/manpages/xenial/man8/apt-get.8.html
- ↑ https://help.yoyogames.com/hc/en-us/articles/235186168-Setting-Up-For-Ubuntu
- ↑ https://manual.yoyogames.com/Introduction/Compiling.htm
- ↑ https://help.yoyogames.com/hc/en-us/articles/360024186531
About This Article