This article was co-authored by wikiHow staff writer, Jack Lloyd. Jack Lloyd is a Technology Writer and Editor for wikiHow. He has over two years of experience writing and editing technology-related articles. He is technology enthusiast and an English teacher.
The wikiHow Tech Team also followed the article's instructions and verified that they work.
This article has been viewed 312,746 times.
Learn more...
This wikiHow teaches you how to install a custom software version on your Android tablet, which is helpful when restoring a fresh version of the Android operating system or another operating system entirely. In order to do this, your tablet must be rooted, and your tablet will be wiped of all current information during the process.
Steps
Preparing to Flash
-
1Back up your tablet. Before you flash your tablet, you should make sure that all of your vital data is backed up to a secure location. This will make sure that you can recover the data if your tablet crashes or becomes unstable.
-
2Root your tablet if it hasn't yet been rooted. You'll need your tablet to be rooted, which is the Android equivalent of a jailbreak, in order to install custom software.Advertisement
-
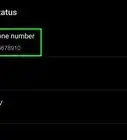
3Enable downloads from unknown sources. This will allow you to download and install programs from websites rather than having to go through the Google Play Store:[1]
- Open Settings
- Tap Security or Lock screen and security
- Tap the grey "Unknown sources" switch
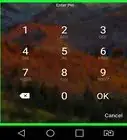
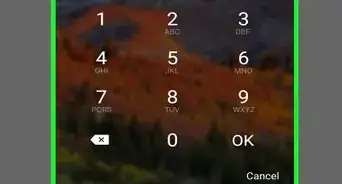
- Tap OK if prompted.
-
4Install a custom recovery. Custom recoveries allow you to select a downloaded file from on your Android, thus making the flash possible.
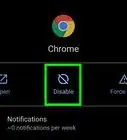
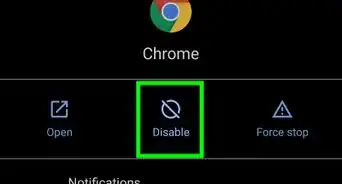
- Open Chrome.
- Enter your Android's model number and custom recovery into Chrome.
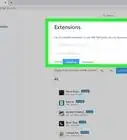
- Find a reputable download site.
- Find and tap the Download button.
- Tap the "Download complete" notification.
- Tap INSTALL
-
5Download a custom ROM for your Android. Once you've installed the custom recovery on your tablet, the only thing left to do is download the ROM (Read-Only Memory) file of the software that you want to install. This will depend on your exact tablet model number, so type the model number followed by custom rom into Chrome and search for the software just like you did for the custom recovery.
- If given a choice, download the ROM in a ZIP folder rather than any other folder format.
- Don't tap the notification that appears once your ROM finishes downloading.
-
6Make sure that your tablet is fully charged. Once your tablet's charge is at 100 percent (or the tablet is plugged in), you can proceed with actually flashing the tablet.


Flashing Your Tablet
-
1Turn off your tablet. Press and hold the "Power" button until a menu appears, then tap Power off. On some tablets, you'll have to tap POWER OFF or SHUT DOWN to confirm this decision.
-
2Place your tablet in recovery mode. The way to access recovery mode will vary depending on your tablet's manufacturer, but you'll usually press a combination of buttons (e.g., the "Power" button and the "Volume Down" button) at the same time to do so.
- If you don't know how to place your tablet in recovery mode, check the website from which you downloaded the custom recovery earlier.
-
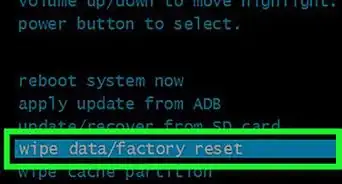
3Use the volume buttons to move the selection. Pressing the "Volume Down" button will move the cursor down, while pressing the "Volume Up" button moves the cursor up.
-
4Select the wipe data option. The wording used here may be different depending on your custom recovery.
-
5Press the "Power" button. Doing so will open the wipe data menu.
-
6Confirm your decision. Select the yes option and press the "Power" button to do so.
- It may take several minutes for your Android to finish wiping.
-
7Repeat the wipe process for the cache partition. If possible in your custom recovery, select the wipe cache partition option and press the "Power" button to select it, then confirm the decision.
- Failing to wipe the cache partition may result in errors later.
- If you can't find a cache partition option, your cache partition was most likely wiped during the wipe data process.
-
8Select Install or install from zip. It should be near the top of the screen, but your custom recovery's layout will dictate where the option appears.
- Your custom recovery option might have slightly different wording.
-
9Press the "Power" button. This will select the install option.
-
10Select choose from sd card and press the "Power" button. Again, you may see a differently titled option here, but the principle is the same across custom recoveries.
-
11Select Downloads and press the "Power" button. This will open the Downloads folder on your SD card, which is where the ROM that you downloaded earlier should be.
- You may first have to select and open the SD card's main directory, which is usually a folder entitled 0/ at the top of the screen.
-
12Select the ROM file and press the "Power" button. Depending on how many items you've downloaded onto your tablet, you may need to scroll down for a while before you find the ROM's name.
-
13Confirm your decision. Select yes and press the "Power" button to begin flashing your tablet.
- The flashing process can take several minutes. Do not touch your Android during the flashing.
-
14Reboot your tablet. Once you see the phrase "Install from SD card complete" displayed at the bottom of the screen, return to the main custom recovery window, select the reboot option, and confirm the decision to reboot your Android.
-
15Set up your tablet. Since your tablet is now essentially factory-new, you'll need to select location information, your preferred language, and other setup options before you can enjoy your newly flashed Android.


Community Q&A
-
QuestionHow many times can I flash my Android tablet?
 Community AnswerYou can flash your tablet any time you want (if you don't make mistakes like installing an incompatible "ROM").
 -
QuestionHow do I connect my phone to my pc?
 Community AnswerPlug it into the PC with a USB cable, then, depending what you are doing, you can unlock developers options and enable USB debugging to root your phone via KingoRoot, etc.
 -
QuestionMy tab was automatically switched off and automatically restarted. What happened?Community AnswerYou may have had a "bootloop." If you have a recovery, go to it and wipe cache, but not wipe data (or you will lost ALL personal data like pictures). Next, restart your device.


References
About This Article
1. Back up your data.
2. Power down the tablet.
3. Boot into recovery mode.
4. Select the wipe data option.
5. Confirm.
6. Wipe other partitions if available.
7. Select Install from ZIP.
8. Select Choose from SD card.
9. Select the ZIP file.
10. Reboot the tablet.