This article was co-authored by Julie Brow-Polanco and by wikiHow staff writer, Danielle Blinka, MA, MPA. Julie Brow-Polanco is a Master Herbalist & Certified Aromatherapist with more than 11 years of experience. She is an expert on natural remedies and specializes in using them to support whole-body wellness, particularly immune, digestive, nervous, and reproductive health. Julie earned a Bachelor's Degree in Psychology from Dominican University, a Master Herbalist Certification from The School of Natural Healing, and a Certificate of Aromatherapy from the Pacific Institute of Aromatherapy. Julie is a member of the American Herbalist Guild and a Certified Aromatherapist through the National Association of Holistic Aromatherapy.
This article has been viewed 38,627 times.
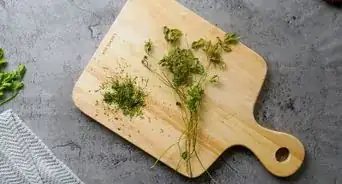
Herb gardens are a great addition to any home, and fresh herbs are readily available at many grocers or farmers markets. If you have herbs that you need to dry, you may want to dry them in the oven. While they can ruin the flavor of the herbs if you overcook them, ovens offer a speedy method for completing the process. Additionally, they can be a great option for people who live in humid areas that prevent air drying. If you’re ready to dry a batch of fresh herbs, you’ll first need to gather and prepare the herbs. Once you’ve dried the herbs, you should store them in an airtight container.
Steps
Gathering Your Herbs for Drying
-
1Harvest your herbs when they are tender just before flowers form. How the herbs taste will depend on when you cut them from the plant. You will get the best flavor while the herbs are still tender, which you can feel with your fingers. If the herb is flowering, this will be just before the buds open.
- You can still dry herbs that have flowered, but the taste will be bitter.[1]
- This process works for all herbs. If your herbs have already flowered, you can deadhead the flowers. This will allow more leaves to grow, which you can harvest and dry.
-
2Choose a warm, dry morning after dew has evaporated. A sunny day is the best time to cut your crop because the herbs will be dryer. The more moisture that remains on the herbs, the harder it is to dry them.[2]Advertisement
-
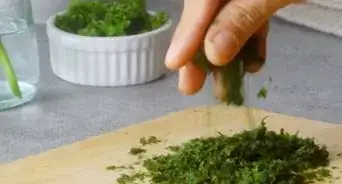
3Use scissors to cut the stems just above a leaf or leaves. You can use regular sharp scissors or small pruning shears. Place the cut herbs into a jar of fresh water until you’ve completed the harvest.
- Leave at least 4 to 6 inches (10 to 15 cm) of stem for the plant’s regrowth.[5]
-
4Pull large-leaf herbs from their stalks before drying. This includes herbs like sage, basil or mint. If it’s easy to hold just the leaf, then it’s best to remove them from the stalk before drying.[6]
- You can also cut the leaves from the stalk with your sharp scissors, but this will be more time consuming.
-
5Leave small-leaf and feathery herbs on their stalks until after they dry. This includes herbs like fennel, dill, and rosemary. While these herbs will eventually be removed from their stalks in most cases, its best to wait until after they are dry as the stalks make them easier to handle.[7]
- Additionally, some dishes may look better with these herbs still on the stalk.
-
6Limit your harvest to one herb at a time. It’s easy to mix herbs together or ruin the flavors of the herbs by drying them together. To protect the flavor, only dry one herb at a time.[8]


Preparing the Herbs
-
1Remove any damaged, soiled, or imperfect leaves or stems. Check each leaf or stalk for ruined pieces. Soiled herbs will have a bad taste, which could ruin the dish you season with your herbs.[9]
-
2Check the herbs for insects. Insects are common in an herb garden, but you don’t want them to get into your batch of dried herbs. Inspect each leaf for visible signs of insects, such as crawling bugs, webbing, or white spots that could be eggs. If you see these signs, throw that leaf or stalk away.[10]
- The oven will treat the herbs for anything too small for you to see.
-
3Rinse the herbs in cold water, shaking off the excess. It’s best to use running water so that any dirt and debris flows away from the herbs. Allow the water to run over them for a few seconds, then gently shake them to expel the excess water. Place the damp herbs on a dry towel.[11]
- If you have larger herbs, you could rinse them in a colander.
-
4Blot the herbs dry with a clean towel. Use another dry towel, gently pressing it over the herbs. Once the herbs are dry, transfer them to another dry towel or dish.[12]


Drying the Herbs
-
1Cover a cookie sheet with muslin or parchment paper. This provides the best surface for drying the herbs, though you can dry them on a plain cookie sheet or tray. Depending on the size of the herbs, you could also try a rack with close-set bars.
- If you use a rack, place it over the cookie sheet to prevent bits of herbs from falling down into the bottom of the oven.[13]
-
2Lay your herbs on the tray in a single layer row. Make sure that none of the leaves are overlapping or touching, as this could cause the herbs to dry unevenly. If this happens, then the whole batch could get ruined, as the centers of the leaves will burn if you try to finish drying the edges that are still moist.[14]
-
3Set your oven on the lowest temperature.[15] Oven drying can destroy the flavor, color, and oils in your herbs, so it’s important that you keep the temperature low. The drying process should be slow in order to keep the herbs edible.
- The highest temperature you should use is 180 degrees Fahrenheit (82 degrees Celsius).[16]
-
4Leave the oven door open if you have an electric oven. The air needs to circulate around the herbs while they dry, and leaving the door open allows for that to happen. Additionally, it lowers the risk that your oven will get too hot and burn the herbs.[17]
- If you have a gas oven, do not leave the door open, as this is very hazardous. Instead, open the door every five minutes to let the air circulate. Wait about 30 seconds, then close the oven again.
-
5Turn the herbs after 30 minutes. Use an oven mitt to remove the cookie sheet. With a pair of tongs or a fork, flip the herbs over so that both sides dry evenly.[18]
- Check the herbs every 15 minutes to make sure that they aren’t burning. If you suspect they are, pull them early to check them for dryness.
-
6Remove the herbs after 1 hour. Most herbs will be dry within an hour. If you aren’t sure, let them cool and check them for dryness.[19]
- If your herbs are not dry, continue drying them for 10 minutes at a time.
-
7Test the herbs for dryness. The leaves should be dry and crispy. Pick up a leaf or stalk and see if it easily crumbles between your fingers. Gently roll the herb between your fingers to see if it falls apart. If it does, then it is dry.[20]


Storing Your Herbs
-
1Crumble the entire batch of herbs. Herbs are most often crumbled before storage, which makes them easier to add to dishes. Gently rub the herbs between your fingers, breaking apart the leaves. Continue until each piece is crumbled.[21]
- If the leaves were still on the stalk, don’t crumble the stalk. Keep it intact and then discard it once the leaves are removed.
-
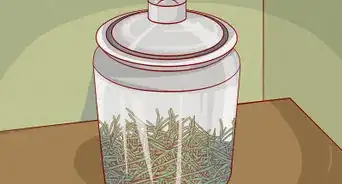
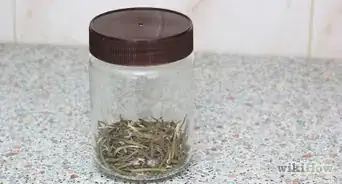
2Place your herbs in an airtight container. You can use a jar, tupperware container, or ziplock bag. Make sure that the seal is airtight, however, as moist air can ruin the herbs.[22]
-
3Store the container in a cool, dry area. Great options include your pantry, a cabinet, or the refrigerator. Place your freshly dried herbs with the rest of your seasonings.
- If you use a clear jar, place it in the dark to preserve the color of your herbs.[23]


Expert Q&A
-
QuestionWhat is the best way to dry fresh herbs?
 Julie Brow-PolancoJulie Brow-Polanco is a Master Herbalist & Certified Aromatherapist with more than 11 years of experience. She is an expert on natural remedies and specializes in using them to support whole-body wellness, particularly immune, digestive, nervous, and reproductive health. Julie earned a Bachelor's Degree in Psychology from Dominican University, a Master Herbalist Certification from The School of Natural Healing, and a Certificate of Aromatherapy from the Pacific Institute of Aromatherapy. Julie is a member of the American Herbalist Guild and a Certified Aromatherapist through the National Association of Holistic Aromatherapy.
Master Herbalist & Certified AromatherapistDefinitely dehydration. If you have a dehydrator, you can dry them while keeping them away from moisture, since that can make them moldy. It's always best to dry them in a very low heat oven or in a dehydrator.
Things You'll Need
- Fresh herbs
- Oven
- Water
- Cookie sheet
- Jar, tupperware container, or ziplock bag
- Oven mitt
- Tongs or fork
- Clean, dry towels
- Muslin or parchment paper (optional)
- Sharp scissors or pruning shears (optional)
- Jar (optional)


References
- ↑ https://www.tasteofhome.com/article/how-to-dry-herbs/
- ↑ https://www.tasteofhome.com/article/how-to-dry-herbs/
- ↑ https://extension.psu.edu/drying-herbs
- ↑ Julie Brow-Polanco. Master Herbalist & Certified Aromatherapist. Expert Interview. 12 April 2022.
- ↑ https://extension.psu.edu/drying-herbs
- ↑ https://www.tasteofhome.com/article/how-to-dry-herbs/
- ↑ https://www.tasteofhome.com/article/how-to-dry-herbs/
- ↑ https://www.tasteofhome.com/article/how-to-dry-herbs/
- ↑ https://extension.psu.edu/drying-herbs
- ↑ https://extension.psu.edu/drying-herbs
- ↑ https://extension.psu.edu/drying-herbs
- ↑ https://extension.psu.edu/drying-herbs
- ↑ https://extension.psu.edu/drying-herbs
- ↑ https://extension.psu.edu/drying-herbs
- ↑ Julie Brow-Polanco. Master Herbalist & Certified Aromatherapist. Expert Interview. 12 April 2022.
- ↑ https://extension.psu.edu/drying-herbs
- ↑ https://extension.psu.edu/drying-herbs
- ↑ https://www.tasteofhome.com/article/how-to-dry-herbs/
- ↑ https://www.tasteofhome.com/article/how-to-dry-herbs/
- ↑ https://www.tasteofhome.com/article/how-to-dry-herbs/
- ↑ https://www.tasteofhome.com/article/how-to-dry-herbs/
- ↑ https://extension.psu.edu/drying-herbs
- ↑ https://www.tasteofhome.com/article/how-to-dry-herbs/
About This Article

To quickly dry herbs in an oven, line a cookie sheet with muslin or parchment paper and place a single layer of herbs on that tray. Then, set your oven to its lowest temperature and put the tray inside, turning the herbs every 30 minutes. To make sure the air is circulating inside the oven, leave the door of an electric oven slightly ajar. If you have a gas oven, shut the door, but open it every 5 minutes for 30 seconds at a time to let the air circulate. The herbs are dry when you can easily crumble their leaves between your fingers. Keep reading the article to learn how to store dried herbs!