This article was co-authored by Chiara Corsaro and by wikiHow staff writer, Travis Boylls. Chiara Corsaro is the General Manager and Apple Certified Mac & iOS Technician for macVolks, Inc., an Apple Authorized Service Provider located in the San Francisco Bay Area. macVolks, Inc. was founded in 1990, is accredited by the Better Business Bureau (BBB) with an A+ rating, and is part of the Apple Consultants Network (ACN).
The wikiHow Tech Team also followed the article's instructions and verified that they work.
This article has been viewed 2,399,716 times.
Do you not have an Apple device anymore? You might want to delete your Apple ID or iCloud account. This wikiHow teaches you how to delete your Apple ID account. After removing your Apple ID account and authorizations from your different mobile devices and computers, you can request that the account be deleted by Apple's customer service. Once your account is deleted, it cannot be recovered or reactivated. Follow these same steps if you want to delete your iCloud account since you cannot delete it by itself.
Steps
Preparing to Delete
-
1Ensure that you actually want to permanently delete the Apple ID. When you delete an Apple ID, you will permanently lose access to all services and purchases that were associated with it. You will no longer be able to access the App Store, Apple Pay, iCloud, iCloud Mail, iMessage, Facetime, your subscriptions and all other services you receive through your Apple ID.
- If you've recently switched from an iPhone to another type of phone and are no longer receiving texts, see the "Disabling iMessage" section first.
- If you do not want to permanently delete your Apple ID, you can temporarily deactivate your Apple ID instead.
EXPERT TIPChiara Corsaro is the General Manager and Apple Certified Mac & iOS Technician for macVolks, Inc., an Apple Authorized Service Provider located in the San Francisco Bay Area. macVolks, Inc. was founded in 1990, is accredited by the Better Business Bureau (BBB) with an A+ rating, and is part of the Apple Consultants Network (ACN).Phone & Computer Repair Technician Chiara Corsaro
Phone & Computer Repair TechnicianIf you're planning to sell or recycle your device, you should deactivate your Apple ID. Even if you securely wipe the machine but you leave yourself logged in, the device will essentially be locked by whatever your Apple ID is.
-
2Back up any files or emails you want to save. You're going to lose access to your iCloud Mail and your iCloud Drive storage, so make sure that you back up any important messages or files before deleting the account.
- You can back up your iCloud Mail by moving messages from your iCloud inbox into an inbox stored on your computer.
- Documents and images can be downloaded from iCloud Drive onto your computer.


Deauthorizing Your Apple ID in iTunes on Windows
-
1Open iTunes. Double-click the iTunes app icon, which resembles a multicolored musical note on a white background.
- If you have not signed in to iTunes automatically, click Account in the menu bar at the top, then click Sign In. Sign in with the email address and password associated with your Apple ID.
-
2Click Account. It's in the menu bar at the top of the screen.
-
3Place the mouse cursor over Authorizations. This displays a sub-menu to the right.
-
4Click Deauthorize This Computer. It's in the sub-menu to the right of the Account menu.
-
5Enter your Apple ID password when prompted. You'll need to authenticate your account in order to deauthorize it. Enter your password in the bar below your email address. Also, check the email address to make sure you are signed into the right account.
-
6Click Deauthorize. It's in the lower-right corner of the sign-in window.
-
7Click Ok. You should see a message informing you that you have successfully deauthorized your computer. Click Ok to confirm.
-
8Click Account. It's in the menu bar at the top of the screen.
-
9Click Sign Out. This signs your Apple ID out of iTunes.


Deauthorizing Your Apple ID on Mac
-
1Open iTunes, Apple Music, Apple TV, or Apple Books. Click the icon to open Apple Music or iTunes on macOS. You can also open Apple TV, or Apple Books.
- On MacOS 10.15 (macOS Catalina) or higher, iTunes has been replaced with Apple Music, Apple TV, and Apple Books. Open one of these apps instead. You can deauthorize your account using any one of these apps using these same steps.[1]
-
2Click Account. It's in the menu bar at the top of the screen. A drop-down menu will appear.
-
3Place the mouse cursor over Authorizations. You'll see a submenu appear to the right.
-
4Click Deauthorize This Computer…. It's in the pop-out menu to the right.
-
5Enter your Apple ID password. When prompted, type in your Apple ID password.
-
6Click Deauthorize. It's in the bottom-right corner of the window. Doing so will deauthorize your Apple ID for iTunes, Music, Apple TV, and Apple Books on your Mac.


Signing Out on Mobile
-
1
-
2Tap your name. It's at the top of the Settings page.
-
3Scroll down and tap Sign Out. This red button is at the bottom of the page.
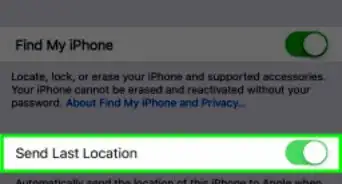
- If Find My iPhone is enabled, you'll be prompted to enter your password and tap Turn Off before you can proceed.
-
4Tap Sign Out. It's in the top-right corner of the screen.
- If you want to keep a copy of your Calendars, Contacts, Keychain, News, or Safari history on iCloud, tap the toggle switch next to the items you want to save.
-
5Tap Sign Out when prompted. This will prompt your Apple ID and any associated data to be removed from your iPhone.


Signing Out on Mac
-
1
-
2Click System Preferences…. It's at the bottom of the drop-down menu. Doing so opens the System Preferences window.
-
3Click iCloud or Apple ID. If you are using an older version of macOS, click the iCloud icon that resembles a blue cloud. If you are using macOS Catalina or higher, click the grey Apple ID icon with a white Apple logo.[2]
-
4Scroll down and uncheck the "Find My Mac" box. It's near the bottom of the window.[3]
-
5Enter your Apple ID password when prompted. Type your Apple ID password in the provided text field.
-
6Click Continue. It's in the bottom-right corner of the window.
-
7Click Overview (MacOS Catalina Only). If you are using the Apple ID app on MacOS Catalina, click Overview in the sidebar to the left.
-
8Click Sign Out. You'll find this option in the lower-left side of the window.
- You may be asked if you want to keep a copy of any of the data stored in your iCloud account. If so, click the checkbox for each category of data you want to keep, and then click Keep a Copy.
-
9Click Continue. Doing so will sign you out of your Apple ID account on your Mac.


Requesting Account Deletion
-
1Go to https://privacy.apple.com/ in your computer's web browser. You can use any web browser on PC or Mac.
- If you want to delete your iCloud account, you can do so from this website. The iCloud site does not offer this feature.
-
2Log into your Apple ID account. Enter your Apple ID email address and password, then click →. This will open the security questions page.
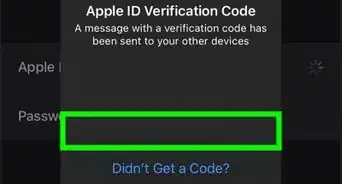
- If this opens the two-factor authentication page instead, use your iPhone to complete the authentication instead.
- If you do not have two-factor authentication enabled, answer the security questions or click Get Support PIN. Write down the support PIN and contact Customer Service.
-
3Scroll down and click Request to delete your account. It's at the bottom of the page below "Delete your account" next to the icon that resembles a trash can. This displays a page that explains everything you should do before deleting your account.
- Alternatively, if you do not want to permanently delete your account, you can click Request to deactivate your account to request to put a temporary pause on your account. It's next to "Temporarily deactivate your account" next to the icon that resembles a person.
-
4Select a reason for wanting to delete your account. Use the drop-down menu labeled "Select reason" to select a reason for wanting to cancel. It's near the bottom of the screen.
- If none of the reasons in the drop-down menu describe your situation, select "Other" and type your own reason for wanting to quit.
-
5Click Continue. It's the blue button below the drop-down menu.
-
6Read the information page and click Continue. There is another page of important information you need to know before deleting your account. Read the information and click the blue button that says Continue at the bottom of the page.
-
7
-
8Select a contact method and click Continue. This is how Apple can contact you if they have information about your account. Click the radio button next to the alternate email on file, "Use another email address", or "Use phone number".
-
9Enter a phone number or email address and click Continue. Use the space provided to enter your phone number or email address and click Continue when you are ready.
-
10Enter the verification code and click Continue. The verification code is sent to the email address or the phone number you entered. Check your email or text messages and enter the verification code to confirm the address belongs to you.
-
11Write down or print the access code and click Continue. You can use this access code if you need to contact Apple Support regarding your account. Write down the code or click Print Code to print it. Click Continue when you are ready.
-
12Enter the access code and click Continue. Enter the access code you got from the previous page and click Continue.
-
13Click Delete Account. It's the red button in the lower-right corner of the pop-up window. Click Delete Account to send your request to delete your account.


Disabling iMessage
-
1Go to https://selfsolve.apple.com/deregister-imessage/ in your computer's web browser. This is the web page where you can deregister your iMessage service.
-
2Scroll down to the "No longer have your iPhone?" heading. It's near the bottom of the page.
-
3Enter your current phone number. Type your phone number into the "Enter your phone number" text box.
-
4Click Send Code. It's to the right of the "Enter your phone number" text box. Apple will send a confirmation text to your number.
-
5Retrieve your verification code. Open your phone's Messages app, select the text message from Apple, and review the six-digit code in the text message.
-
6Enter your verification code. Type the six-digit code into the "Enter your verification code" text box.
-
7Click Submit. Doing so will verify that you own the number in question, thus prompting Apple to remove it from iMessage.


Community Q&A
-
QuestionWhat can I do if I've forgotten my Apple ID and can't recover my password?
 Community AnswerIf you don't know your Apple ID, and can't recover your Apple ID or password using the iForgot website, you're out of luck. Apple can't verify your identity if you don't have a recovery email address associated with your account. You'll need to start from scratch with a new Apple ID.
 -
QuestionWhy won't Apple delete my Apple ID?
 Community AnswerPermanently deleting your ID is not actually an available option, so it's up to the person you're talking to as to whether or not your account will be deleted. Try to stay polite and ask for your call to be escalated if you absolutely have to have your Apple ID deleted.
 -
QuestionI phoned and cancelled my Apple account but now need to erase my details off my Apple iPod touch. How can I do this if it wants my password, which I don't have anymore?
 Iactivate.icloud.removeCommunity AnswerLuckily, there is the iActivate Apple ID removal tool that can fix your problem.


References
About This Article
1. Deauthorize iTunes or Music on your Mac and/or Windows computer.
2. Sign out of your Apple ID on your Mac computers and iPhone or iPad devices.
3. Go to https://privacy.apple.com/ in a web browser on your Mac or PC.
4. Sign in to your Apple ID.
5. Scroll down and click Request to delete your account.
6. Select a reason for deletion and click Continue.
7. Read the information and click Continue
8. Click the checkbox to agree to the Deletion Terms and Conditions and click "Continue'.
9. Select a contact method and click Continue.
10. Enter an email address or phone number and click Continue.
11. Retrieve your verification code, enter it and click Continue.
12. Write down or print the access code and click Continue.
13. Enter the access code and click Continue.
14. Click Delete account.
15. Disable iMessage at https://selfsolve.apple.com/deregister-imessage/


