This article was co-authored by wikiHow Staff. Our trained team of editors and researchers validate articles for accuracy and comprehensiveness. wikiHow's Content Management Team carefully monitors the work from our editorial staff to ensure that each article is backed by trusted research and meets our high quality standards.
There are 13 references cited in this article, which can be found at the bottom of the page.
The wikiHow Video Team also followed the article's instructions and verified that they work.
This article has been viewed 345,618 times.
Learn more...
Cutting a sweatshirt is a simple way to make it fun to wear again! Try cutting your sweatshirt into a crop top, loosening up the neckline with a slit, creating a new style of neckline, or cutting slits in your sweatshirt for a distressed look. These techniques are all quick and easy, so you'll be rocking that old sweatshirt again in no time!
Steps
Creating a Crop Top
-
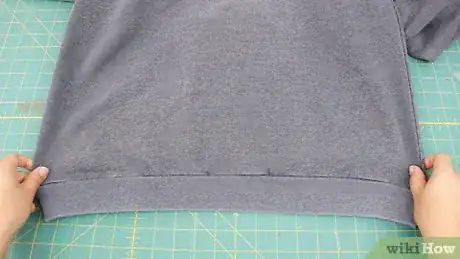
1Lay your sweatshirt out on a flat surface. Place the sweatshirt on a hard, flat surface like a table or hardwood floor. Smooth out the sweatshirt with your hands so that there are no lumps or bumps in the fabric.[1]
- Make sure that the area is clean so that your sweatshirt won't get dirty when you lay it out.
Warning: Avoid cutting your sweatshirt on a soft surface, such as carpet, a bedspread, or a sofa. This makes it harder to get the fabric to lay flat and increases the chances that you will cut through the surface material.
-
2Draw a line across the area you want to cut off. Use a piece of chalk or a fabric marker and a ruler to draw a line across the area of the sweatshirt you want to cut. You can cut the sweatshirt as high or as low as you want it to be.[2]
- You can hold the sweatshirt up to your body to identify where you want the new bottom of it to be. Then, make a few marks across the sweatshirt to indicate where you want to cut it. Use your ruler to connect the marks into a line after you lay it down again.
- Trying the sweatshirt on and marking it while you are wearing it is the best option if you want a very specific length.
Advertisement -
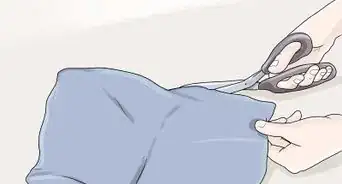
3Use a sharp pair of fabric scissors to cut across the sweatshirt. Double check to ensure that the sweatshirt is smooth. Then, start cutting along the line you have drawn onto the front of the sweatshirt. Cut through both layers of fabric at once going all the way across the sweatshirt.[3]
- Cut slowly and be careful not to bunch up the fabric as you go. This will result in uneven or jagged edges.
Loosening up the Neckline on a Sweatshirt
-
1Place the sweatshirt on a flat surface. Lay the sweatshirt on a flat surface, such as a table or clean patch of a hard floor, such as hardwood or linoleum. Then, smooth it out so that the fabric is even and there are no lumps or bumps.[4]
-
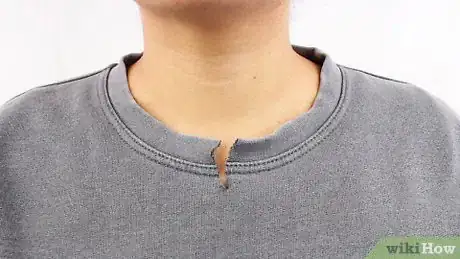
2Cut a 0.5 in (1.3 cm) slit in the neckline where the layers overlap. Locate the center of the neckline on the front of the sweatshirt. Look for the area of the neckline where the 2 layers of fabric overlap. Use a sharp pair of fabric scissors to cut a 0.5 in (1.3 cm) slit in the fabric right between the 2 layers of fabric.[5]
- Do not cut any more than this to start! You can always cut more, but you cannot put the fabric back.
-
3Try on the sweatshirt to see how it fits. After you have cut the slit, put the sweatshirt on and see if this has improved the fit to your liking. If you want the sweatshirt to be looser around the neck, then take it off and cut further down from the first slit you made.[6]
- Only cut 0.5 in (1.3 cm) at a time and try on the sweatshirt after each cut. This will help to ensure that you do not end up cutting more than you want.
-
4Pull the fabric apart for a more deconstructed look. If you want to add some frayed edges or make the sweatshirt look a bit distressed, then you can also pull the fabric apart with your hands. This will tear the opening apart going downwards from the slit you made.[7]
- Tug gently to avoid ripping a big slit down the front of your sweatshirt.
Creating a New Neckline for the Sweatshirt
-
1Cut all the way around the neckline for an off-the-shoulder look. For an off-the-shoulder look, use a sharp pair of fabric scissors to cut off the entire neckline of the sweatshirt. Cut right around the outside of the sweatshirt’s neckband. Go slowly to avoid creating any jagged or uneven edges.[8]
- Try on the sweatshirt after you finish cutting and cut off another 0.5 in (1.3 cm) of fabric going all the way around the neckline if desired.
Tip: Be careful not to cut too much fabric off the neckline of the sweatshirt or it might not stay up when you put it on.
-
2Cut an upside-down triangle going down from the neckline for a V-neck. Identify where you want the V to end and mark the sweatshirt at this point. Then, identify where you want each side of the V to start and mark the sweatshirt’s neckline to indicate where you will begin cutting. Use a sharp pair of fabric scissors to cut a straight line going down from the neckline mark to the bottom of the V, then repeat for the other side.
- You can make the V as deep or as shallow as you like. Try on the sweatshirt first to see where you would like the V to begin and end.
- Another option is to fold the sweatshirt so that the 2 sides of the front of the neckline are aligned, lay the sweatshirt on its side, and cut a diagonal line through both layers of fabric going from the lowest point of the V to the top of the neckline.[9]
- You could also use a V-neck t-shirt or sweater that you like as a guide. Measure how far down the V goes from the neckline and then use the same measurements to mark your sweatshirt before you cut it.
-
3Draw and cut a U-shape around the neckline for a scoopneck. If you prefer a scoop neck look, then cut a U shape going under the front of the sweatshirt’s neckline. Mark the neckline on either side of the front of the neckline to indicate where you want the scoopneck to start. Then, mark the point below the neckline to indicate where the lowest point of the scoopneck will be. Draw a U shape using these points and then cut along the line.
- Another option is to fold the neckline so that the shoulder seams are lined up and then cut a J-shape going through both layers of fabric. This will create a scoopneck when you open up the neckline again.[10]
- Make sure to use a sharp pair of fabric scissors to make the cut.
- Go slowly to avoid creating any jagged edges along the neckline.
Cutting Slits for a Distressed Look
-
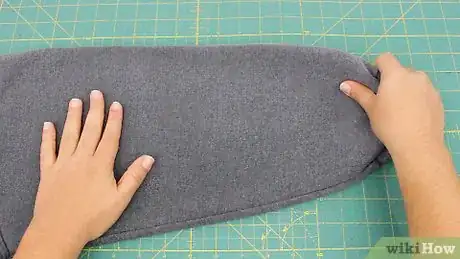
1Lay the sweatshirt out on a flat, hard surface. Smooth out the fabric so that there are no lumps or bumps in it. If you want to cut slits in the arms of the sweatshirt, make sure that the sleeves are laying flat. If you want to cut slits into the back of the sweatshirt, fold the sweatshirt down the center of the back of the sweatshirt and lay it on its side.[11]
-
2Identify where you want to make the first cut in the sweatshirt. Then, use a sharp pair of fabric scissors to make a 1 to 2 in (2.5 to 5.1 cm) cut. Position the cut along a sleeve, the back of the sweatshirt or in the front of the sweatshirt depending on the look you are going for.[12]
- Don’t cut any more than 1 to 2 in (2.5 to 5.1 cm) to start or you may end up with a slit that is too large. Keep in mind that you can always cut more, but you can’t add the fabric back in.
-
3Cut 5 more parallel 1 to 2 in (2.5 to 5.1 cm) slits in the sweatshirt. Continue cutting parallel slits into the fabric over the area until you have the desired number. Space the slits by about 0.5 to 1 in (1.3 to 2.5 cm) depending on how wide you want the fabric to be between them.[13]
- Go slowly and keep the layers together to ensure that you get straight cuts.
-
4Repeat in other areas of the sweatshirt you want to look distressed. Fold the sweatshirt in half and line up the sleeves if you want the slits to be exactly the same on both sides. Cut along the same lines you made on the first sleeve.[14]
Tip: Try cutting slits all the way down the sleeves and back for an ultra-distressed look, or just cut a few slits into the upper back for a subtle design element.
Our Most Loved Articles & Quizzes
Community Q&A
-
QuestionHow do I finish the front of the cardigan, I dont want the raw edge
 Ashley Ray HarrisCommunity AnswerYou can hem the edge or apply bias binding to give a finished look. The addition of trim, like lace, ribbon or fringe, is optional.
 -
QuestionHow do I finish the bottom?It is entirely up to you what type of finish to put on the bottom. The easiest is to leave the banding on the bottom. You can also hem the edge or apply bias binding to give a finished look. The addition of trim, like lace, ribbon, or fringe, is optional.
Warnings
- Practice with a sweatshirt you don’t care about before moving on to your final design. Pick up a cheap sweatshirt from a thrift store or use one you no longer wear.⧼thumbs_response⧽
Things You'll Need
Creating a Crop Top
- Fabric scissors
- Fabric chalk
- Ruler
Loosening up the Neckline on a Sweatshirt
- Fabric scissors
- Ruler
Creating a New Neckline for the Sweatshirt
- Fabric scissors
Cutting Slits Into the Sweatshirt for a Distressed Look
- Fabric scissors
- Ruler
References
- ↑ https://www.youtube.com/watch?v=NB3YkJoT6-s&feature=youtu.be&t=65
- ↑ https://www.youtube.com/watch?v=NB3YkJoT6-s&feature=youtu.be&t=76
- ↑ https://www.youtube.com/watch?v=NB3YkJoT6-s&feature=youtu.be&t=103
- ↑ https://www.youtube.com/watch?v=iTawxX_inlc&feature=youtu.be&t=27
- ↑ https://www.youtube.com/watch?v=iTawxX_inlc&feature=youtu.be&t=34
- ↑ https://www.youtube.com/watch?v=iTawxX_inlc&feature=youtu.be&t=46
- ↑ https://www.youtube.com/watch?v=iTawxX_inlc&feature=youtu.be&t=56
- ↑ https://www.youtube.com/watch?v=sLIpSv_z44o&feature=youtu.be&t=150
- ↑ https://www.youtube.com/watch?v=W3Dm8y-cs7w&feature=youtu.be&t=25
- ↑ https://www.youtube.com/watch?v=voK_feNty08&feature=youtu.be&t=59
- ↑ https://www.youtube.com/watch?v=VP0X9H1Ue6Q&feature=youtu.be&t=38
- ↑ https://www.youtube.com/watch?v=VP0X9H1Ue6Q&feature=youtu.be&t=42
- ↑ https://www.youtube.com/watch?v=VP0X9H1Ue6Q&feature=youtu.be&t=42
- ↑ https://www.youtube.com/watch?v=VP0X9H1Ue6Q&feature=youtu.be&t=90
About This Article
To cut a sweatshirt into a crop top, lay the sweatshirt on a flat surface and draw a line across the bottom to mark how much length you want to cut off. If you're concerned about length, put the sweatshirt on and mark where you want to cut it first. Then, just take it off and cut along the line with fabric scissors! If you want to create a new neckline for the sweatshirt, try cutting all the way around the collar for a cute, off-the-shoulder look. Another option is to cut an upside-down triangle going down from the collar to create a V-neck. For tips on creating a distressed look for your sweatshirt, read on!
