This article was co-authored by wikiHow staff writer, Hannah Madden. Hannah Madden is a writer, editor, and artist currently living in Portland, Oregon. In 2018, she graduated from Portland State University with a B.S. in Environmental Studies. Hannah enjoys writing articles about conservation, sustainability, and eco-friendly products. When she isn’t writing, you can find Hannah working on hand embroidery projects and listening to music.
There are 11 references cited in this article, which can be found at the bottom of the page.
The wikiHow Video Team also followed the article's instructions and verified that they work.
This article has been viewed 14,067 times.
Learn more...
Weddings, parties, and family gatherings are all made a little bit brighter with a tall cake that everyone can enjoy. Not only are these cakes wonderful decorations, they’re also a delicious treat for your guests to look forward to. When it comes time to serve the cake, the sheer height of this dessert can make it a little bit intimidating to slice into. You can wow your guests by using simple techniques to slice up your cake and serve it quickly at your next gathering.
Steps
Removing Inedible Pieces
-
1Unstack any tiers if your cake has them. If you are cutting a stacked cake, slide a knife under the tallest tier and use your other hand to steady it. Pick up the tier and move it to a separate plate. Unstack the rest of the tiers this way and give each tier their own plate or flat surface. This will make it much easier to cut and will save you from having to reach up to the highest tier.[1]
- Some cakes have wax paper inserts in between each layer to avoid getting frosting everywhere. If yours doesn’t, try to touch the top of the cakes as little as possible as you move them around.
Tip: If you are cutting your wedding cake, leave it intact for the photo and then unstack it to cut and serve to your guests.
-
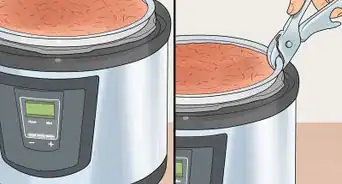
2Take out any wooden dowels that your cake has. Some cakes have wooden dowels in the middle to keep the tiers held together. Look for small holes in the bottom of each tier and use long tweezers to take out the wooden dowels.[2]
- You can also ask the bakery you bought your cake from if it has any dowels in it before you take it home.
Advertisement -
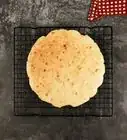
3Peel off the parchment paper between layers. Some cakes have wax or parchment paper in between each tier to save the frosting. Before you start cutting, peel off this paper and throw it away.[3]
- Not all cakes have paper in between the tiers.
-
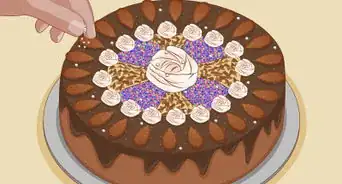
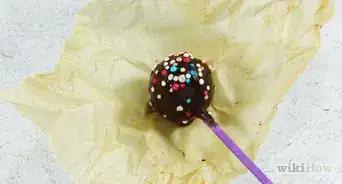
4Remove any plastic decorations. Fake flowers, balloons, or ribbons might all be on your cake as added decoration. Take these off before you start cutting so you don’t have to work around large objects.[4]
- You can add the decorations to individual slices later, but make sure your guests know that they aren’t edible.

Using a Cutting Board
-
1Make a horizontal cut across the entire cake, 2 in (5.1 cm) from the edge. Slide your sharp knife downward until it reaches the bottom of the cake, then continue that single cut across the cake. This will result in one long, rectangular, 2 in (5.1 cm) wide slice of cake.[5]
- If this is the first big slice you're cutting from a circular cake, the slice will not be an exact cuboid.
- Don't worry about the slice being too big for one person! It will be divided up later.
-
2Hold a cutting board next to the slice as you cut. Use a solid wood or plastic cutting board that won't bend. Make sure the cutting board is parallel to the cake and push it right up next to the side of the cake.[6]
-
3Tilt the slice with your knife onto the cutting board. As the knife reaches the bottom of the cake, tilt the slice toward the cutting board. Catch the slice with your cutting board as it falls over. The frosting should now be on the side.[7]
- Make sure you have a solid grip on the cutting board when you catch the slice.
-
4Transfer your cake slice onto a flat surface. Take the cutting board with the slice on it to a plate and move the slice over, keeping the slice on its side. If you don’t need to cut any more pieces of cake, you can leave it on the cutting board.[8]
- Leaving your slice on the cutting board will keep the frosting intact better than moving it around.
-
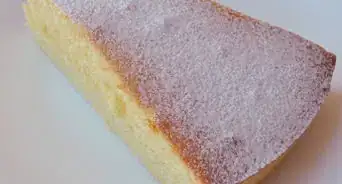
5Cut the large slice into rectangular servings. Use your knife to make skinny 2 in (5.1 cm) strips of cake from the larger slice, each with frosting on at least one side. Serve the individual strips on a plate to each of your guests.[9]
- Rectangular slices will sit better on a plate and might be easier to eat than traditional triangular slices.
-
6Catch more large slices with your cutting board if you need to. If you have a lot of guests or they want seconds or thirds, keep making new slices inward toward the middle of your cake with a large knife. Make your slices about 2 inches (5.1 cm) wide to keep them consistent.[10]


Cutting in a Circle
-
1Use a bread knife to make a deep cut 2 in (5.1 cm) from the rim of the cake. Hold your knife above the cake about 2 inches (5.1 cm) away from the edge. Make a cut from the top down while keeping your knife with the tip pointing downward for an initial cut into your cake. Do not cut out towards the rim of your cake.[11]
Tip: A bread knife will cut the cake better because it allows you to saw back and forth.
-
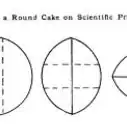
2Continue cutting all the way around the middle of the cake to form a circle. Keep your knife in the first cut you made and saw around the entire circumference of the cake, keeping your knife 2 inches (5.1 cm) away from the edge. Keep cutting until you come back around to the first cut you made so that there is a circle cut out in the middle of your cake.[12]
-
3Cut 2 in (5.1 cm) wedges around the circumference of the circle. Hold your knife over the outer rim of the cake. Make slices in the outer rim of the cake and leave the center circle intact. Space these wedged slices as evenly as possible so that each guest gets the same amount of cake.[13]
- These slices show off the layers of the cake well and preserve the height of the cake.
-
4Cut the inner circle into 4 wedged pieces. Use your knife to cut the inner circle in half. Then, cut the 2 halves in half again for wedged slices that match the pieces that you’ve already cut.[14]

References
- ↑ https://www.youtube.com/watch?v=XCF_KTa9w2I&feature=youtu.be&t=107
- ↑ https://www.youtube.com/watch?v=-j9VwBKT9po&feature=youtu.be&t=62
- ↑ https://www.youtube.com/watch?v=XCF_KTa9w2I&feature=youtu.be&t=112
- ↑ https://www.youtube.com/watch?v=XCF_KTa9w2I&feature=youtu.be&t=118
- ↑ https://www.delish.com/food/a53822/how-to-cut-cake-for-crowd/
- ↑ https://www.youtube.com/watch?v=hDgqvz6EsfE&feature=youtu.be&t=6
- ↑ https://www.youtube.com/watch?v=hDgqvz6EsfE&feature=youtu.be&t=7
- ↑ https://www.delish.com/food/a53822/how-to-cut-cake-for-crowd/
- ↑ https://www.delish.com/food/a53822/how-to-cut-cake-for-crowd/
- ↑ https://www.delish.com/food/a53822/how-to-cut-cake-for-crowd/
- ↑ https://www.youtube.com/watch?v=-j9VwBKT9po&feature=youtu.be&t=88
- ↑ https://www.youtube.com/watch?v=-j9VwBKT9po&feature=youtu.be&t=93
- ↑ https://www.youtube.com/watch?v=XCF_KTa9w2I&feature=youtu.be&t=148
- ↑ https://www.youtube.com/watch?v=XCF_KTa9w2I&feature=youtu.be&t=169
About This Article