This article was written by Pete Canalichio and by wikiHow staff writer, Nicole Levine, MFA. Pete Canalichio is a Brand Strategist, Licensing Expert, and Founder of BrandAlive. With nearly 30 years of experience at companies such as Coca-Cola and Newell Brands, he specializes in helping brands find the most authentic parts of their story to build a brand strategy. Pete holds an MBA from the University of North Carolina at Chapel Hill and a BS in Physics from the United States Naval Academy. In 2006, he won an MVP Award from Newell Brands for his contributions to their Global Licensing department. He’s also penned the award-winning book, Expand, Grow, Thrive.
This article has been viewed 176,242 times.
This wikiHow teaches you how to make a Facebook Page that other people can like and follow. Examples of Pages include Pages for businesses/organizations, blogs, public figures, and personal brands. You can create a Page within the Facebook mobile app as well as on the desktop site.
Steps
Using the Mobile App
-
1Open Facebook. It's the blue-and-white "f" icon on the home screen or in the app drawer. This opens your News Feed if you're already logged into Facebook.
- If you aren't already logged into Facebook, enter your email address (or phone number) and password to do so now.
-
2Tap the menu ☰. It's the three horizontal lines at the bottom-right corner (iPhone/iPad) or top-right corner (Android).[1]Advertisement
-
3Scroll down and tap Pages. It's toward the bottom of the menu. If you already have at least one Page, tap Your Pages instead.
-
4Tap + Create. It's at the top-left corner. Some information about Facebook Pages will appear.
-
5Tap the blue Get Started button. This option is at the bottom of the screen.
-
6Select up to 3 categories and tap Next. Choose categories that reflect the sort of content your Page will contain. For example, if you're an actor, type actor into the search bar and tap Actor in the search results.
-
7Name your page and tap Next. The name of your Page should be the name of your organization, brand, or business.
-
8Enter your website URL and tap Next. If you don't have a website, you can tap I don't have a website at the bottom and leave the "Enter website" field blank.
- Adding your website is optional but can help increase your visibility, especially if you're making a Page for a business, product, service, or something similar.
-
9Add a profile and cover photo. Your profile photo is should be your photo or logo, and the cover image can be any applicable image that you want to display in the large area at the top of your Page. To add photos:
- Tap Add profile picture, select the image, and edit it if you'd like. When you're finished, tap Use.
- Tap Add cover photo, select an image, and tap Done. Then, drag the photo to align it properly within the dimensions necessary for cover images.
- Tap Save to see a preview of your profile image and cover image together.
-
10Tap the blue Done button. It's at the bottom of the screen. The "Important Next Steps" screen will appear.
-
11Tap Next and follow the on-screen instructions. You'll be prompted to invite friends to like your Page, create a welcome post, and add a Page button that makes it easy for people to interact with you. Swipe left through the screens to move through each setup screen. Once you're finished, just tap elsewhere on the Page to visit it for the first time.
- Tap the gear icon at the top-right corner to access your Page's settings. This is where you can edit your Page info, set messaging preferences, add your location, and much more.
- Scroll down your Page a bit to bring up the navigation bar along the top that contains Home, Groups, Events, etc. This is where you can manage different parts of your Page, create events, add more photos, etc.
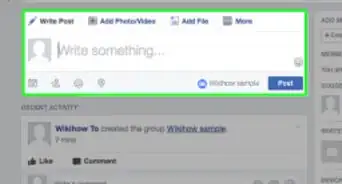
- Tap Create a post to create your first post.


Using a Computer
-
1Go to https://www.facebook.com/pages/create in a web browser. If you're signed in to Facebook, this opens the Create a Page screen. If you're not signed in, follow the on-screen instructions to sign in now.
-
2Type your Page's name into the "Page name" field. It's at the top of the left panel. The name of your Page should be the name of your organization, brand, or business.
-
3Enter up to three categories. Putting your Page into appropriate categories can help the right people find you. To get started, click the "Category" blank in the left panel—some suggestions will appear. You could also start typing a category like Blog, Public Figure, or Design and then click it in the search results.
-
4Type a description. The "Description" panel in the left panel should contain some information about your products, services, organization, or brand. You can type up to 255 characters in this box.
-
5Click the Create Page button. It's at the bottom-left corner. Additional fields will appear at the bottom of the left panel.
-
6Click Add Profile Picture to add a profile photo. It's in the left panel under "Images." Select an image that contains your likeness or brand/organization's logo. When people search for your Page, they'll see the profile photo along with the Page name in their search results.
-
7Click Add Cover Photo to select a cover photo. The cover photo is a wide image that appears at the top of your Page. When you select an image, drag it to the desired position in the preview window.
-
8Click the Save button. It's at the bottom of the left panel. This saves your progress and brings you to your brand new Page.
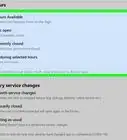
- Click Edit Page Info in the left panel to edit your Page's general information, add contact information, your location, and other details.
- Click Settings at the bottom of the left panel to manage your Page's visibility, messaging preferences, and other options.


Expert Q&A
-
QuestionShould a small business have a Facebook page?
 Pete CanalichioPete Canalichio is a Brand Strategist, Licensing Expert, and Founder of BrandAlive. With nearly 30 years of experience at companies such as Coca-Cola and Newell Brands, he specializes in helping brands find the most authentic parts of their story to build a brand strategy. Pete holds an MBA from the University of North Carolina at Chapel Hill and a BS in Physics from the United States Naval Academy. In 2006, he won an MVP Award from Newell Brands for his contributions to their Global Licensing department. He’s also penned the award-winning book, Expand, Grow, Thrive.
Brand Strategist & Licensing ExpertSure! This is important for your target audience to find you online! If they're going on Facebook to actually find your site, it has to come up first, so they have to be able to find you easily. Then, there should be something in the meta data description that really catches their attention that says ,“Oh, my gosh! I think this, in fact, is the place I need to be.” -
QuestionWhy can't I upload photos to Facebook from my mobile device?
 Community AnswerYou may need to update your phone or the application itself.
 -
QuestionHow do I add a friend on my Facebook page so they can manage it too?
 Community AnswerIf you want your friend to help manage your Facebook profile, you would just need to give them your login information.
Warnings
- Make sure your page—and its content—adhere to Facebook's terms of use.⧼thumbs_response⧽


Expert Interview
Thanks for reading our article! If you'd like to learn more about Facebook for business, check out our in-depth interview with Pete Canalichio.
About This Article

1. Tap the menu.
2. Tap Pages.
3. Tap Create.
4. Tap GET STARTED.
5. Follow the on-screen instructions.