X
wikiHow is a “wiki,” similar to Wikipedia, which means that many of our articles are co-written by multiple authors. To create this article, volunteer authors worked to edit and improve it over time.
This article has been viewed 49,829 times.
Learn more...
FireAlpaca is a free illustration and photo-editing software compatible with both Mac and Windows. Lots of people use this to start out their digital art career or hobby, so it's useful to know all the tools available. Coloring inside the lines is important for a clean look, and can be done with the Magic Wand tool or the Bucket tool.
Steps
Part 1
Part 1 of 3:
Setting Up
-
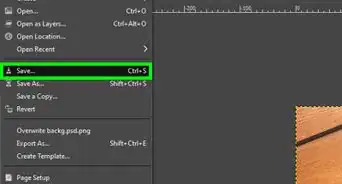
1Create a new file. Go up to "File" on the top left of your screen and select "New" from the dropdown menu. It should be the first option.
-
2Choose your file specifics in the window you opened. You can choose your background color from a color wheel, set your image size, and more. You don't need anything fancy, so you can just go ahead to press "OK" to move on with the default settings.
- The default settings are set to "Standard". If you're planning to use a comic outline, go to the top of the file window and choose "Comic".
- This tutorial has set the background color to white. The default is a clear checkerboard pattern.
Advertisement -
3Draw your image outline. It can be one item, two items, three items, anything. Use the pen tool or another clear drawing tool to make your outline. It's advisable to use a darker tool, such as the pen, because it'll show through easier when using translucent layers (described later).
- It can be a rough sketch for now, as this is an outline.
-
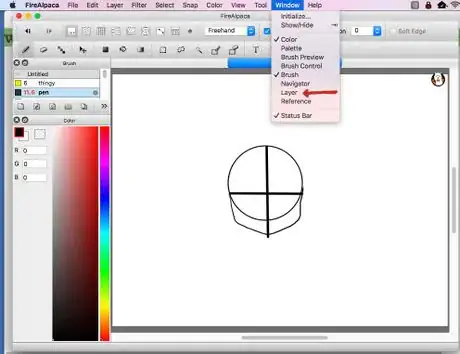
4Open up the Layer menu. Go to the top of your FireAlpaca window or the middle top of your screen. Click "Window" and select "Layer". A window showing your current layer should open up.
-
5Create a new layer. Go to the top left of your screen and select "Layer" and "Add" from the dropdown menu. A new layer should appear on your Layer window you opened in the last step.
-
6Name your layers. Go to the Layer window and double click on a layer. A window should pop up and you'll have the chance to name it. Click "OK" to save your changes.
- This is optional but useful to clear up confusion, especially when you have multiple layers at once.
-
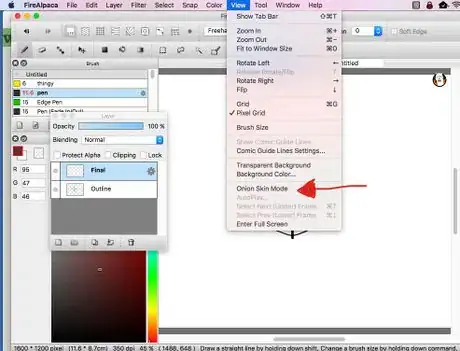
7Activate Onion Skin Mode. In the Layer window, click the layer you want the final drawing to be on, as opposed to the outline you originally made. Go to the top middle of the screen and select "View", then "Onion Skin Mode" from the dropdown menu.
- Drag the final drawing layer above the outline layer if not like that already, in the Layer window. This means your final drawing will be placed above the outline, which is what you want.
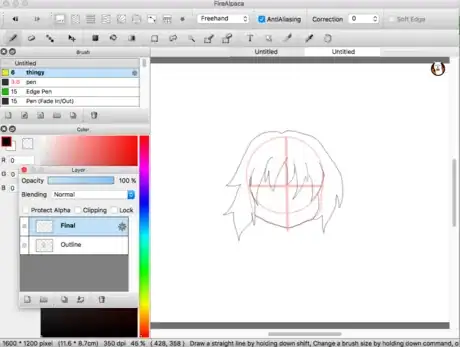
- The outline layer you made should appear faint pink in the final drawing layer.
-
8Make your drawing in the final drawing layer. Use the faint outline as a guide. Add necessary details but don't color yet.
-
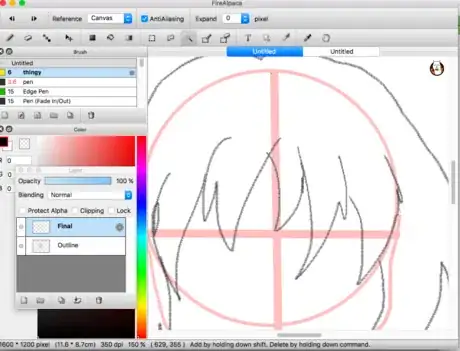
9Clean the lines. In order to use the Bucket or Magic Wand tool, your image should have lines that are all connected to each other. Otherwise, the software will not be able to recognize where your image ends and your background starts. Zoom in by scrolling your mouse to see if there are any breaks in the lines.
-
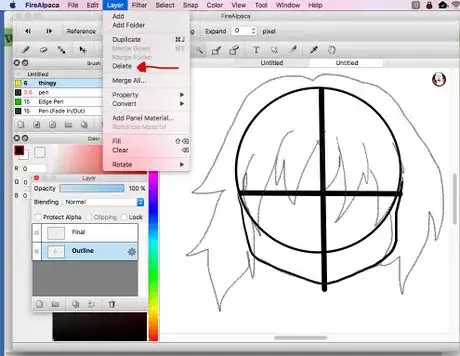
10Delete your outline layer and stop Onion Skin Mode. Select the outline layer from the Layer Window. Go to the top of the screen and click "Layer", then "Delete" from the menu. Stop Onion Skin Mode by going back to "View" and selecting "Onion Skin Mode" again.
Advertisement
Part 2
Part 2 of 3:
Using the Bucket Tool
-
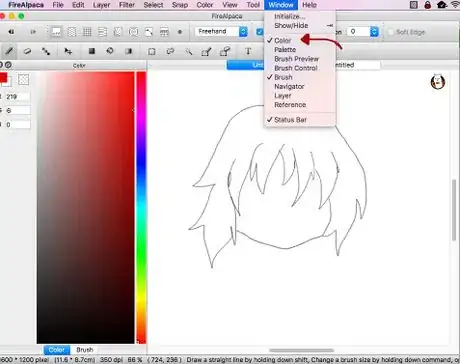
1Select a color from the Color window. Go to the top of the screen and click "Window", then "Color" from the menu. A window should open; choose your desired color here.
-
2Select the Bucket tool. A gray selection bar inside of your FireAlpaca window (the bucket tool is not in the Brush window) contains a lot of tools. Choose the icon that looks like a tipped bucket.
-
3Tap the section of the image you want painted. If your lines are neat and connected, the Bucket tool will cover a section with paint.
-
4Clean up the paint. Sometimes, when using a thick pen for the final outlines, the Bucket tool will leave a white outline inside of the image. Switch back to the Pen tool in your gray selection bar and clean this up. Zoom in by scrolling your mouse to get the smaller details.
Advertisement
Part 3
Part 3 of 3:
Using the Magic Wand Tool
-
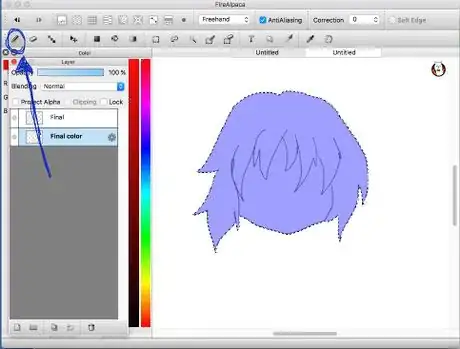
1Select the Magic Wand tool. Inside the gray selection bar in the FireAlpaca window, there's an icon that looks like an exploding firework stick. Click this.
-
2Click the area outside of your drawing. This will illuminate your drawing in blue, while being surrounded by moving dots. If this doesn't happen, your lines are not connected. Press Command+Z to deselect, and go back in to fill in the lines.
-
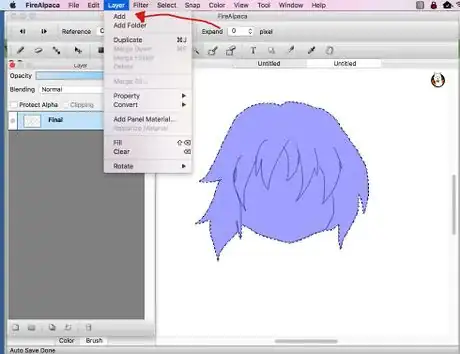
3Create a new layer. As before, go back to the "Layer" option on the top left of your screen and select "Add". A new layer should show in your Layer window, which you can then name.
-
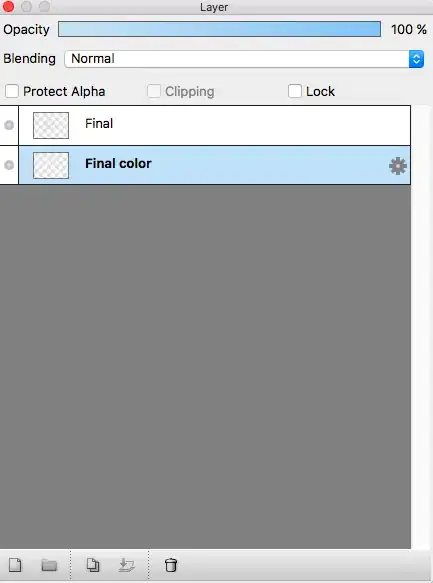
4Name the new layer and drag it below the current layer. In the Layer window, double tap the new layer and name it. Simply drag it below the current layer (that you used Magic Wand on) so that the color will stay inside the lines.
- Now you should be on the new layer you created. The blue image from the Magic Wand should still be there.
-
5Select the Pen tool. On the gray selection bar, click the first icon. This is important, because if you try to draw with the Magic Wand still on, your image will end up being dragged around and distorted.
- Your cursor will look like the Magic Wand icon if you are still using this tool.
-
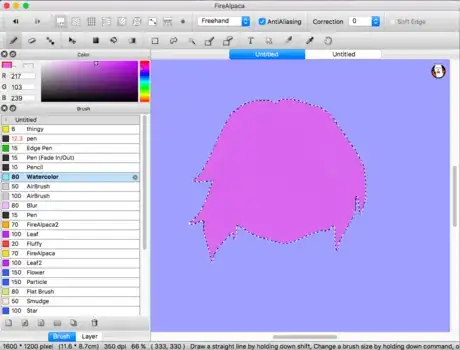
6Select your preferred brush. Go to the middle top of your screen and select "Window", and then "Brush" from the menu. The Brush window should open and give you options on a brush design. Watercolor works well to color, but you can play around with the settings.
-
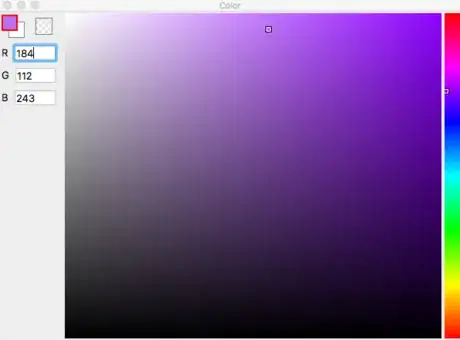
7Select a color from the Color window. Open the window from "Window" and "Color" if you have closed it.
-
8Invert the Magic Wand selection. Go to the top of your screen and select "Select" and then "Inverse" from the menu. The blue Magic Wand selection should now be outside of your image and leave your drawing white (or the color of your background).
-
9Color! You should now be able to scribble your color on without worrying about it going out out of the lines. You can add shading and details without going over the edges.
-
10Deselect the Magic Wand. At the top of your screen, select "Select" and then "Deselect" in the menu. Now your drawing should appear, cleanly colored!
- The outline will be visible (if the outline layer is placed above the color layer), because it is on a separate layer. You can delete this outline if you want, but it's useful to show fine details.
Advertisement
References
About This Article
Advertisement


