This article was co-authored by wikiHow staff writer, Eric McClure. Eric McClure is an editing fellow at wikiHow where he has been editing, researching, and creating content since 2019. A former educator and poet, his work has appeared in Carcinogenic Poetry, Shot Glass Journal, Prairie Margins, and The Rusty Nail. His digital chapbook, The Internet, was also published in TL;DR Magazine. He was the winner of the Paul Carroll award for outstanding achievement in creative writing in 2014, and he was a featured reader at the Poetry Foundation’s Open Door Reading Series in 2015. Eric holds a BA in English from the University of Illinois at Chicago, and an MEd in secondary education from DePaul University.
There are 13 references cited in this article, which can be found at the bottom of the page.
This article has been viewed 89,131 times.
Learn more...
Unlike companies like Beats and JBL, Sony produces a wide array of headphones in a variety of different styles and types of packaging. This makes them ideal targets for counterfeiters, since the average consumer is unlikely to notice differences when all of Sony’s headphones look, feel, and sound so different. Lower-end on-ear headphones and the vast majority of their earbuds are not particularly popular among fake headphone manufacturers, but there are a few models that are especially vulnerable to forgeries, like the XB540 and the WH-1000. Be especially careful when shopping online for the MDR-V6 studio monitors, since these are extremely popular and often expensive.
Steps
Inspecting the Packaging
-
1Check Sony’s website to see if you’re buying from an authorized dealer. If you aren’t buying your headphones from an authorized store or website that deals directly with Sony, there’s a greater probability that the headphones aren’t legitimate. To completely remove the possibility that the headphones are fake, cross-reference the name of the store or website you’re buying from with Sony’s list of authorized dealers online.[1]
- You can find a list of authorized dealers in the United States at https://www.sony.com/retailers.
-
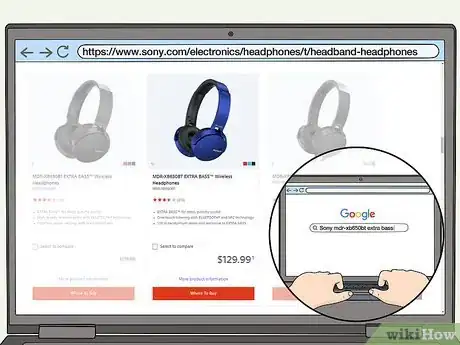
2Compare the price for the headphones to Sony’s suggested retail price online. Type “Sony” followed by the name and model number of the headphones into a search engine on your phone or computer. Open Sony’s website page for the headphones and check the suggested retail price. If the price on the headphones is more than 10-15% less than the MSRP, the headphones are highly-likely to be counterfeit.[2]
- The name and model number are always printed right next to each other on the front of Sony’s packaging. It’s usually 2-3 letters followed by numbers, and it shouldn’t be too hard to find on the front.
Advertisement -
3Feel the shrink wrap to see if it’s attached tightly. Loose shrink wrap is a clear sign of repackaging, which is an indicator that the headphones have been tampered with. While not every brand of Sony headphones comes shrink wrapped, the models that do should have tight, clear wrapping. If there are lots of wrinkles or the shrink wrap is torn or loose, the headphones are likely fake.[3]
- Some of the higher-end Sony brands do not come with shrink wrap.
-
4Check the bar code to see if the letters match your country. At the end of the bar code on the back, Sony puts a country code to indicate where the headphones were supposed to be sold. Look for 1-2 letters inside of parentheses. Unfortunately, many fake headphones are produced in China, so a code of (CH) or (CN) may be a sign that they’re fake if you aren’t buying the headphones in China.[4]
- This code is different depending on where you live. In the United States, it is (US), while in India it is (IN). If Sony doesn’t ship directly to your country, they probably ship to a neighboring nation. It’s okay if this 2-letter code matches a country that borders you.
- Counterfeiters often acquire old or discarded packages and repackage them with fake headphones for resale.
-
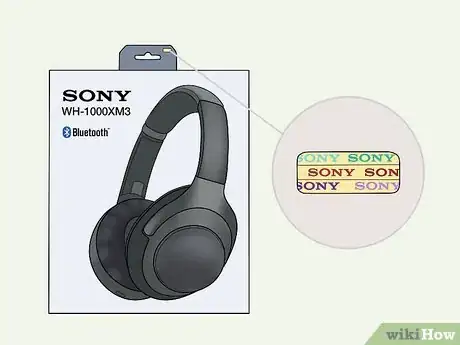
5Look for the Sony hologram on the clip at the top of the packaging. Check the plastic tab that hooks on to the shelving pole in the store. If there is a 2 by 1 in (5.1 by 2.5 cm) plastic tab, it should have a small holographic sticker on it. If the headphones are worth more than $40, Sony typically prints a holographic sticker on this tab.[5]
- The cheaper earbuds and on-ear headphones may not have this sticker.
Tip: If the clip is built into the packaging on a large tab at the top, there won’t be a sticker. The key products that won’t have a sticker are Sony’s MDR studio monitors.
-
6See if there’s a yellow warranty sticker on the front of the box. If there is a yellow sticker under the shrink wrap that says “1 year warranty,” the headphones are likely legitimate. Sony doesn’t include these stickers on every model, so it’s not a surefire way to determine if the headphones are fake, but they’re more likely to be original if this sticker is present.[6]
-
7Check any plastic on the packaging to see if it’s a part of the box. If part of the box is made of plastic, press gently on the plastic to see if it is attached to the cardboard, or a separate plastic insert. On real headphones, the plastic covers should be a part of the box. On fake models, the plastic is inserted between the cardboard box and the headphones.[7]
- This is a particularly helpful test for studio monitors. Sony almost always packages these headphones with a large plastic sheet so that potential buyers can see the fancier headphones.
Analyzing Over-Ear Headphones and Earbuds
-
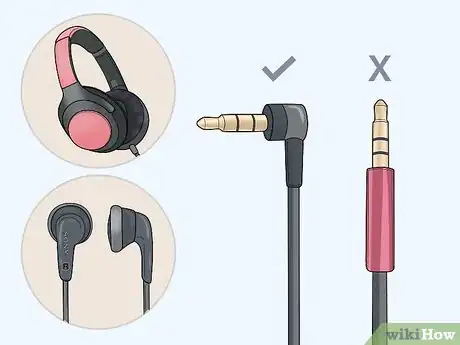
1Inspect the jack at the end of the cord to see if it’s L-shaped. The jack refers to the piece at the end of the headphone cord where you stick it into a phone or speakers. On earbuds and over-ear headphones that aren’t studio monitors, the plastic piece holding the jack in place is L-shaped to prevent bending. If you see lower-end on-ear headphones or earbuds with a straight jack, the headphones are definitely fake.[8]
- The high-end studio monitors have a straight jack, so the reverse is true for these models.
-
2Feel for embossed letters on the cord splitter and shells. If there is a bracket holding the cords together where they separate for the right and left ear, there should be embossed writing on it. It will either say “Sony” or have the name of the country where Sony produced it (usually Japan, Thailand, or India). On the shells of the cushions, the word “Sony” should be parallel to the floor when you’re wearing them and raised on top of the plastic.[9]
- The shells of the cushions are the plastic parts that hold the soft cushioning in place.
Tip: If the headphones are black, the words “Sony” should be printed in white. If the headphones are white, these letters should be black. On some higher-end headphones, it may be silver.
-
3Check the back of the headphone shells to see if they’re labelled R and L. Sony labels all over-ear headphones and earbuds on the back to let the listener know where each ear goes. These labels are always R and L, not the full words “right” and “left.” The R should be printed in red, while the L should be printed in blue.[10]
- For the really low end models, the R and L may be black or white. Models that cost less than $20 are rarely worth counterfeiting, though.
Checking Sony Studio Monitors
-
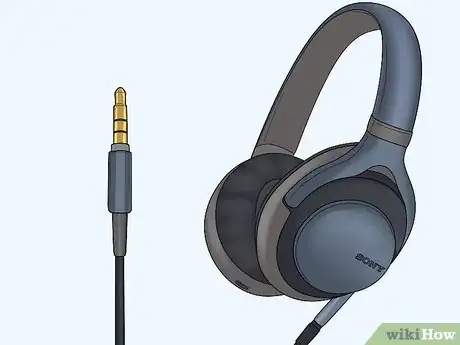
1Look at the jack at the end of the cord to see if it’s straight. Unlike their slimmer counterparts, studio monitors have straight jacks so that they don’t get in the way of other cords in an audio mixer or amplifier. Inspect the end of the cord to see if the metal pin and the plastic holding it in place are perfectly straight. If they are L-shaped, your headphones are fake.[11]
- Sony studio monitors are usually called “Studio Monitors” on the packaging and have “MDR” at the front of their model names.
- Studio monitors are specialized headphones designed to fit completely around the ear. They’re popular with recording artists and sound engineers.
-
2See if the manual comes in a plastic bag. Studio monitors come with manuals that are packaged in a small plastic bag. If there is no plastic bag and the manual is just floating around in the box, your headphones are almost certainly inauthentic.[12]
- If the manual looks like it was photocopied or the writing is smeared, this may be another sign that the headphones are fake.
- For cheaper earbuds and on-ear headphones, there is no plastic bag for the manual.
-
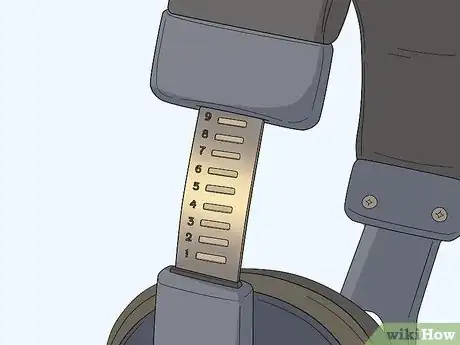
3Lift the headphone extenders out to see if the measurements line up. On studio monitors, the headphone extenders have numbers and hash marks printed on the exterior sides. Extend the headphones as far as they will go and inspect these measurements. If the hash marks are not centered against the numbers they correspond with, the headphones are fake. If there are no numbers or hash marks, the headphones are likely fake as well.[13]
- On authentic headphones, the hash marks line up with the center of the number that they correspond with.
-
4Feel the leather underneath the headband to see if it’s wrinkled. On headphones with padded extenders, feel underneath the frame of the headphones where they meet the top of your head. If the leather or fabric is wrinkled, they were likely not manufactured by Sony. On original headphones, this leather should be taut and smooth.[14]
- A few small wrinkles are fine, since the fabric or leather naturally bends when you handle the headphones, but the vast majority of this section should be smooth to the touch
-
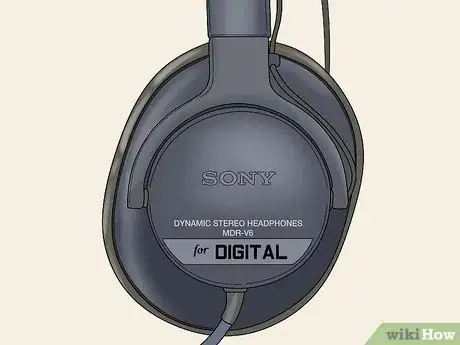
5Check the “for Digital” sticker on MDR-V6 headphones for consistency. There is a red sticker printed on MDR-V6 models that says “for Digital.” These stickers are high-quality and should never peel since Sony uses an incredibly strong adhesive. The word “Digital” should be embossed in a sequence of dots that make up each letter. If the sticker is peeling or the dots aren’t consistent and even, these headphones may not be legitimate.[15]
- This is the telltale sign that a pair of MDR-V6s are fake. This part of the headphone is extremely difficult to replicate and most counterfeiters don’t have the adhesive or printer required to create a good fake version.
Tip: Since their first production run in 1985, the MDR-V6 has been Sony’s most popular set of studio monitors. Depending on what year they were made and whether they’re refurbished or new, they can fetch anywhere from $100-300. This makes them a popular choice for counterfeiters.
References
- ↑ https://www.sony.com/retailers
- ↑ https://www.sony-asia.com/electronics/support/articles/00200902
- ↑ https://www.sony-asia.com/electronics/support/articles/00200902
- ↑ https://www.sony.co.in/microsite/mdrcaution/index.html
- ↑ https://youtu.be/e_GFb-7Sy78?t=49
- ↑ https://www.sony.co.in/microsite/mdrcaution/index.html
- ↑ https://youtu.be/qiGoyNbVDvI?t=28
- ↑ https://journeymantoolbox.pt/2019/01/29/how-to-spot-a-fake-sony-mh750-755/
- ↑ https://youtu.be/e_GFb-7Sy78?t=99
- ↑ https://youtu.be/e_GFb-7Sy78?t=122
- ↑ https://www.sony.com/electronics/headphones/t/headband-headphones
- ↑ https://youtu.be/qiGoyNbVDvI?t=108
- ↑ https://youtu.be/qiGoyNbVDvI?t=199
- ↑ https://www.thecounterfeitreport.com/product/232/MDR-V6-Studio-Monitor-Headphones.html
- ↑ https://youtu.be/qiGoyNbVDvI?t=316

