This article was co-authored by Jeremy Yamaguchi and by wikiHow staff writer, Caroline Heiderscheit. Jeremy Yamaguchi is a Lawn Care Specialist and the Founder/CEO of Lawn Love, a digital marketplace for lawn care and gardening services. Jeremy provides instant satellite quotes and can coordinate service from a smartphone or web browser. The company has raised funding from notable investors like Y Combinator, Joe Montana, Alexis Ohanian, Barbara Corcoran and others.
There are 12 references cited in this article, which can be found at the bottom of the page.
This article has been viewed 8,486 times.
Whether you stored your lawn mower away for winter or accidentally left a light switch on, dead batteries happen to everyone—but how do you juice your machine up after it's died? Don't worry, the process is super simple. With a battery charger or even some jumper cables, you can bring your battery back to life in no time. And we're here to help you along the way! For a complete guide covering absolutely everything you need to know about charging your lawn mower battery, read on.
Steps
Charging with a Battery Charger
-
1Protect yourself with gloves, glasses, and proper ventilation.[1] While working with batteries, sparks and electrical mishaps are a possibility. To stay safe, wear thick, rubber mechanic’s gloves. Keep metal (jewelry, tools, etc.) away from your workstation. Look out for signs of damage to your mower before you start working. Stop and call a professional if you notice signs of battery damage, such as:[2]
- Frayed connections
- A bloated, warped, or bulging battery
- Cracks in the battery's casing
-
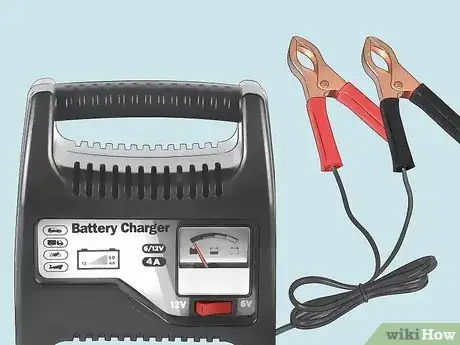
2Use a 12-volt (V) charger with no more than 10 Amp-hours (Ah). Check your lawn mower battery's label to determine its voltage (older models may be 6V). Then, make sure the charger you use is a 12V charger. Next, check your charger's Amp-hours. To charge lawn mower batteries, this should never be set above 10Ah.
- Note that some newer battery chargers may have adjustable Amp-hours.[3]
Advertisement -
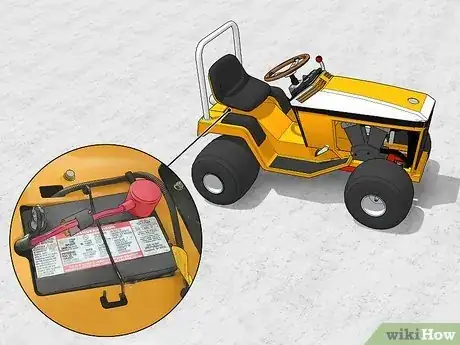
3Find the battery under the seat or hood of your lawn mower. Lift the seat of your machine to find your battery in standard lawn mowers. If it’s not there, consult your lawn mower’s manual. If you don’t have your manual, check online with your mower’s manufacturer. Luckily, you can charge your battery without removing it from your mower—so, go ahead and leave it in place.[4]
-
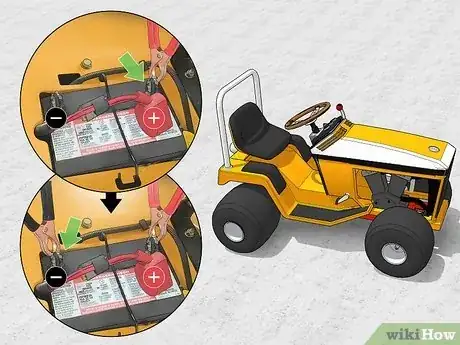
4Connect the positive clamp then the negative clamp to the battery. First, unplug your charger from the wall socket. Next, identify the positive terminal on your battery (signified by the color red, a “+”, “P”, or “Pos”). Connect your positive clamp to this terminal. Find the negative terminal, identified by the color black, a “-”, “N”, or “Neg”. Now, connect your black clamp to the negative terminal.[5]
-
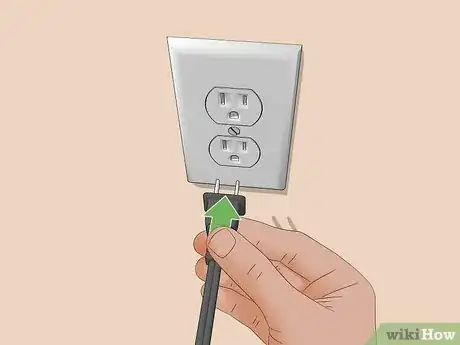
5Plug your charger into the wall until the battery is finished charging. Note the time when you plug your charger into the wall. After ~1 hour (and longer for lower Ah) or when the battery has fully charged, unplug the charger from the wall. Depending on your charger, it may shut off automatically or have a full charge indicator.[6]
- For older batteries, use an hour as a rule of thumb. Overcharging can damage your battery and cause dangerous fumes to leak.
- So, if your charger isn't automatic, it's especially important to unplug on time.
-
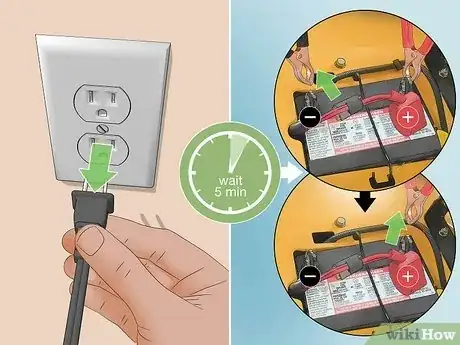
6Unplug the charger and remove the charger’s cables from the terminals. If you use a lead-acid battery, wait 5 minutes after unplugging your charger before removing your clamps from your terminals. Unclamp from the negative terminal first and then the positive terminal.[7]
Jump-Starting a Lawn Mower Battery
-
1Use jumper cables only if your lawn mower has a 12V battery. If you don’t have a charger handy, this method can help—but look over your battery carefully first. Your lawn mower probably uses a 12V, but if it doesn’t, you risk doing major electrical damage to your battery. Larger trucks may also send currents larger than 12V, so check your car's battery prior to charging too.[8]
- Be aware that sparking, shocks, and explosions are all unlikely, but possible.
- Make sure to wear thick gloves and use protective glasses. If you’re able, opt for a battery charger instead.[9]
-
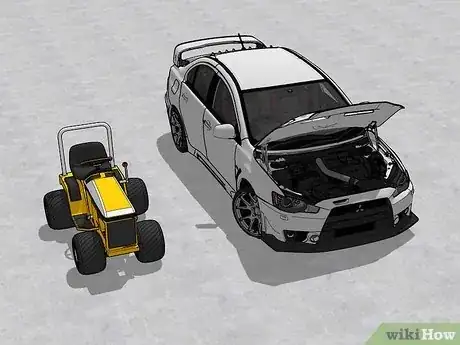
2Park your lawn mower and car near each other on level ground. Turn off your mower’s ignition and engage the parking brake. Position your car directly behind it, so the hood is nearest to your mower. Open the hood of your car. Then, expose your lawn mower battery, by lifting the seat, for example.[10]
- Before you proceed, remove tripping hazards from your area.
- Locate jumper cables. To use jumper cables, you'll need both ends to comfortably reach the lawn more and car battery at once. Before moving on, check that your vehicles are close enough to do this.
-
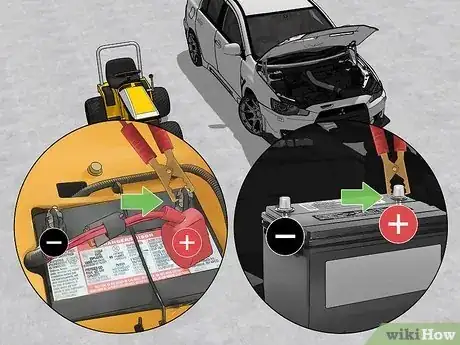
3Connect your cables to your mower's positive terminal, then your car's positive terminal. To begin, locate the positive terminals on your mower and car (these will be signified by the color red, a “+”, “pos”, or “P”). Attach your jumper cable’s red clamp onto the lawn mower battery. Next, take the clamp on the other side of the same cable and attach it to your car’s positive battery terminal.[11]
- Before moving on, check to make sure both connections are tight and secure.
-
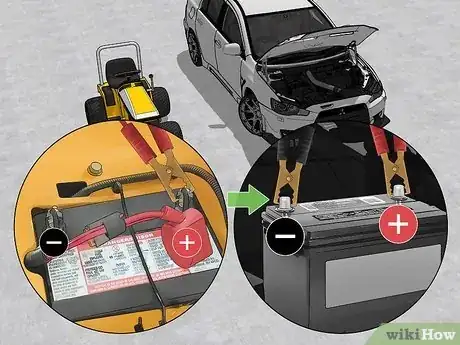
4Connect your black jumper cable clamp to your car’s negative terminal. A negative terminal will be signified by the color black, “N”, “Neg”, or “-”. As you're placing your clamp, stay away from the positive terminal. Bumping the positive terminal with your negative cable could cause a damaging or dangerous surge of electrical currents. Then, double-check that your negative clamp is securely fastened. [12]
-
5Connect your last black clamp to the lawn mower’s metal frame. Locate the jutting metal piece on the back of your mower, called the hitch. Or, choose another metal extremity that’s far away from your fuel tank and battery. Connect your negative clamp to this metal piece. [13]
- This helps ground the electrical circuit. Because sparks can occur when attaching that last clamp, you want this to happen far from flammable hydrogen gas.
- So to be safe, hook your final clamp to your mower’s metal frame instead.
-
6Start your car and let it run for 5 minutes. First, check that your lawn mower is turned off. Then, to bring your mower’s battery back to life, turn your car on. It can take the battery up to 30 minutes to fully charge, so wait ~5 minutes before trying your mower. After you've given the battery time to juice up, turn your lawn mower on as well.[14]
- As you turn your mower on, expect to see a few sparks.
- If your jumpstart worked, you’ll hear the lawn mower’s engine turn over.
- If this doesn’t work right away, give your mower a few more minutes to charge.
-
7Disconnect the cables from the negative terminals and then the positive terminals. Leave your mower and car running while you unhook each clamp in the opposite order to how you initially hooked them. So first, remove the negative cable from your lawn mower’s hitch. Then, unhook your second negative end, then the positive cable attached to your car, and finally, unhook your positive cable attached to your mower.[15]
- As you're disconnecting your clamps, make sure you set them where they won’t come into contact with other metal.
- Once you’re done disconnecting, drive your lawn mower around for ~30 minutes. This will recharge your battery.[16]
References
- ↑ https://www.gardenguides.com/13404469-how-do-i-charge-a-lawn-tractor-battery.html
- ↑ https://www.gardentoolexpert.com/how-to-test-a-lawnmower-battery-a-step-by-step-guide/
- ↑ https://obsessedlawn.com/how-long-does-it-take-to-charge-a-lawn-mower-battery/
- ↑ https://youtu.be/vwPr-UguA-o?t=51
- ↑ https://youtu.be/m4dYsdq3EgM?t=490
- ↑ https://youtu.be/vwPr-UguA-o?t=133
- ↑ https://batterymanguide.com/how-long-does-it-take-to-charge-a-lawn-mower-battery/
- ↑ https://kylesgarage.com/can-you-jump-start-a-lawn-mower-with-a-car/
- ↑ https://www.lawnsbesty.com/can-you-overcharge-a-lawn-mower-battery/
- ↑ https://www.lawnsbesty.com/can-you-overcharge-a-lawn-mower-battery/
- ↑ https://husqvarna.custhelp.com/app/answers/detail/a_id/922/~/general-info---can-i-use-my-vehicle-to-jump-start-my-lawnmower%3F
- ↑ https://husqvarna.custhelp.com/app/answers/detail/a_id/922/~/general-info---can-i-use-my-vehicle-to-jump-start-my-lawnmower%3F
- ↑ https://support.cubcadet.com/s/article/186-1
- ↑ https://kylesgarage.com/can-you-jump-start-a-lawn-mower-with-a-car/
- ↑ https://kylesgarage.com/can-you-jump-start-a-lawn-mower-with-a-car/
- ↑ https://youtu.be/FbHweFEm3LI?t=19
