X
wikiHow is a “wiki,” similar to Wikipedia, which means that many of our articles are co-written by multiple authors. To create this article, volunteer authors worked to edit and improve it over time.
This article has been viewed 14,235 times.
Learn more...
Changing the font size and style on your Kindle Paperwhite is easy, and it can be cool to play around with. In this wikiHow article, you will learn how to change the font size and style on your Kindle Paperwhite.
Steps
Part 1
Part 1 of 2:
Changing the Font Style
-
1Decide which book you want to change the font style of. Once you've decided, tap on that book.
-
2Tap on the top of your screen. A bunch of different options should pop up. Select "Aa" to change your font style.Advertisement
-
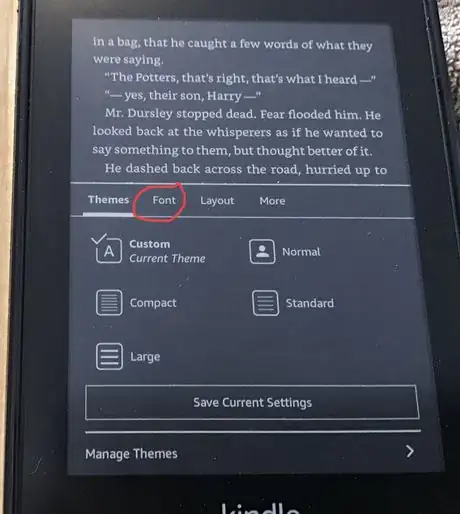
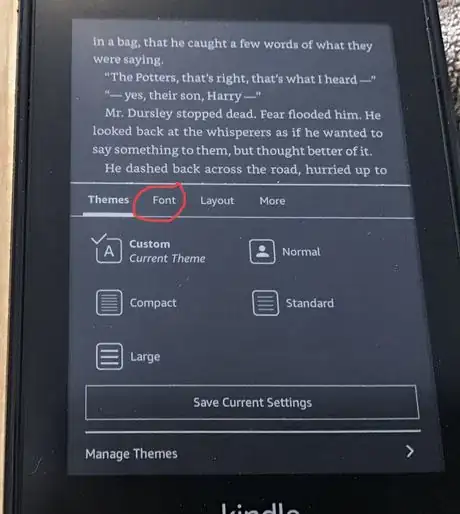
3Select “Font”. When you click “Aa”, there will be more options for you to choose from. You'll want to select the "Font" option.
-
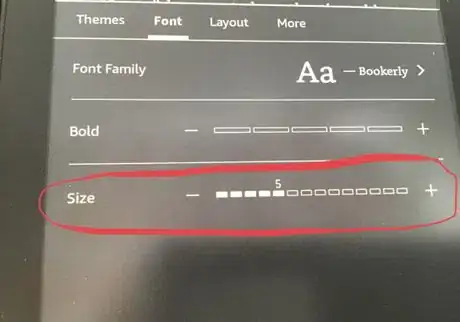
4Click “Font Family”. Once you tap "Font", you'll want to select "Font Family" when the next screen pops up.
-
5Choose a different font style. After you click “Font Family”, you should see different font styles. Choose which one you want, and then click “Font Family” with the back button on your screen to go back to the font options.
-
6Leave the options. Click above the box to leave the options and go back to your book, which should now have your new font.
Advertisement
Part 2
Part 2 of 2:
Changing Font Size
-
1Decide which book you want to change the font size of. Once you've decided, tap on that book.
-
2Click the top of your screen. Click the top of your screen, and similar to changing the font style, you'll want to select “Aa”.
-
3Select “Font”.
-
4Change the font size. At the bottom of the “Font” page is the option to change your font size. Click the “+” to make the font bigger or the “-” to make it smaller.
-
5Leave the options. Once the font size is adjusted to your liking, tap above the box to go back to your book.
Advertisement
About This Article
Advertisement


