This article was medically reviewed by Jennifer Boidy, RN and by wikiHow staff writer, Janice Tieperman. Jennifer Boidy is a Registered Nurse in Maryland. She received her Associate of Science in Nursing from Carroll Community College in 2012.
There are 12 references cited in this article, which can be found at the bottom of the page.
This article has been viewed 70,182 times.
Knowing how to apply splints is a valuable skill, whether you’re a concerned bystander or a seasoned medical professional. If someone gets badly hurt on a hike or camping trip, a makeshift splint can keep their injury stable until they’re able to get medical attention. If someone needs long-term support for an injury, like a fractured leg or arm, a medical splint can help the injury heal properly. We’ve covered absolutely everything you need to know about both types of splints, so you can help your friend, loved one, or patient recover safely.
Steps
Makeshift Splints
-
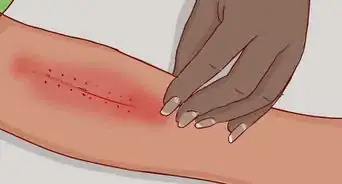
1Apply first aid to any wounds around the injury. Sanitize your hands and check for any cuts, scrapes, punctures, or other wounds. Then, clean the wound and bandage it.[1] Make sure that the wound is completely clean and covered up before you apply any type of splint.[2]
- Apply firm pressure to any wounds to help stop the bleeding.[3]
- Call emergency services right away if the injured person continues to bleed profusely, even if you aren’t close to a hospital. The sooner medical help arrives, the better.[4]
-
2Look around for something rigid, like a stick or board. Search for something that’s both sturdy and big enough to support the injured body part, like a rolled-up section of a newspaper. Items like rolled-up clothes and blankets can work if you’re in a pinch.[5]
- Walking sticks and trekking poles are both great options.[6]
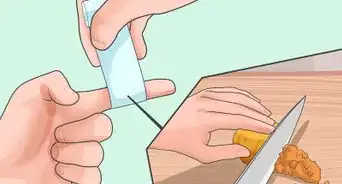
- For smaller injuries, like a finger fracture, you can use the neighboring finger as a “sturdy object.”[7]
- If the elbow or shoulder is injured, tuck the person’s arm close to their body and wrap the whole torso, immobilizing the limb against the body. For these injuries, it’s better to make a soft splint like a sling rather than making a rigid splint. This treatment also works well for wrist or forearm injuries.[8]
Advertisement -
3Splint the injured body part without adjusting it. It can be concerning to find a bent or misaligned limb, but never try to straighten or realign the injury on your own. Any type of adjustment could risk making the injury even worse. Instead, treat and splint the injury in the exact position you find it in.[9]
-
4Plan to splint around the neighboring joints. The goal of a makeshift splint is to keep the injury stable and immobile. Let’s say that someone injured their lower leg on a hike—to best support the injury, you’d splint the ankle and knee as well as the leg.[10] Here are a few best practices for other types of injuries:
- Ankle: Splint from foot to mid-calf
- Thumb: Splint from mid-palm to mid-forearm
- Fingers: Splint from the injured fingers to the wrist
- Wrist: Splint from the hand to the elbow[11]
-
5Pad the area between the injured limb and the splint. Gently surround the injury with some sort of soft material, like a shirt or jacket—this will act as a cushion between the injury and the splint itself. Be sure to place plenty of padding around any bony and swollen parts of the injury, especially.[12]
- Make sure that the padding is snug around the injury without cutting off circulation.
-
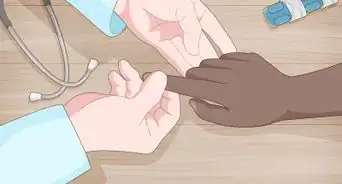
6Apply the splint to one side of the injury. Take the rigid item that you grabbed earlier and gently place it along the injured body part. Whenever possible, line the splint along the uninjured side of the limb.[13]
- For example, you could brace a leg injury by placing a long, rigid walking stick beneath the person’s leg (under the knee).
- You could brace an injured forearm by placing the rigid item beneath the arm (in line with the palm).[14]
-
7Tie the splint to keep it in place. Anything thin and flexible can work for this, like a belt, necktie, or section of tape. Arrange these along the top and bottom of the splint (near the joints), so you aren’t putting any pressure on the injury itself.[15]
- Tie your splint securely, but make sure that it isn’t too tight. A really tight splint could prevent circulation.
-
8Make a hand splint with a clean cloth. Treating hand injuries requires a different splinting process. Set a soft object (like a rolled-up sock) or a cloth ball under the injured person’s hand so their fingers are resting on top of the soft item. Then, stick strips of clean cloth in between the injured fingers to act as padding. Wrap a clean piece of cloth all the way around the injured hand, followed by a second layer of cloth to help hold everything in place.[16]
- You can use adhesive tape instead of cloth for the second layer of your splint.
- Wrap 4 strips of cloth or tape between the gaps of the fingers before you wrap the second layer of cloth around the injury. This helps keep them separated.
- Make sure the person’s fingertips are completely exposed and uncovered by the splint. This way, you can test their circulation easily.
-
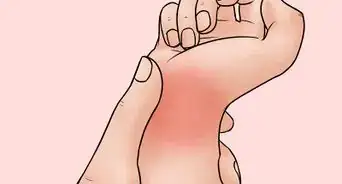
9Check the injury frequently to make sure it isn’t getting worse. Once your splint is in place, inspect the injury once every couple of minutes to see if it looks more swollen or pale than it did before. If so, loosen the bindings around the makeshift splint a little bit.
- Check the patient’s pulse to make sure they have enough circulation around their injury. If their pulse feels faint, loosen the splint ties a little bit.
- Check in with the injured individual, too. Ask them if their injury feels numb at all—if it does, loosen up the ties.[17]
- Watch for any warning signs of shock, like short, quick breathing. If the person’s injuries allow it, lay them down with their legs elevated and their head a little lower than their chest.[18]
-
10Take the injured individual to a hospital ASAP. Splints are an invaluable resource when you’re stuck in the middle of nowhere, but they aren’t a replacement for a professional medical diagnosis and treatment. Take the injured individual to a hospital as soon as possible to prevent any complications.[19]


Medical Splints
-
1Treat any immediate injuries. Wash your hands and clean out any scrapes, cuts, punctures, or other wounds surrounding the injured body part. Bandage and dress these wounds completely before you start applying the splint.[20]
- If you’re creating a splint for an open fracture (where the bone is sticking out of the skin), gently place a saline-moistened piece of sterile gauze on top of the injury.[21]
-
2Choose the best splint for the injury. Different types of splints yield better results, depending on which body part is hurt. Here are a few different types of splints you might consider:
- Colle’s/Volar: Best for upper forearm injuries
- Long arm or gutter: Best for wrist, forearm, and metacarpal proximal phalanx injuries
- Sugar tong: Best for elbow and upper arm injuries (needs to be used with a sling)
- Thumb spica: Best for thumb or scaphoid injuries
- Long leg: Best for lower femur or upper tibia/fibula injuries
- Posterior (short) leg: Best for lower tibia/fibula, foot, or ankle injuries
- Stirrup: Best for ankle injuries (even if the injury only affects the soft tissue)[22]
-
3Protect the patient’s clothing before applying the splint. If time permits, drape a sheet or gown on top of the patient before you do anything else. This helps protect their skin and clothing from the water and plaster you’ll use to make the splint.[23]
-
4Apply a stockinette to protect the patient’s skin. Grab a section of stockinette that’s at least 10 cm (3.9 in) longer than the splint and slide it on top of the injured body part (wherever the splint will go). Once the splint is complete, you’ll fold the extra stockinette fabric over the edges to create a smooth finish.[24]
- A stockinette is a thin layer of fabric that creates a barrier between the patient’s skin and the splinting.
-
5Measure and cut your splinting material. Hold the splinting material next to the injured body part and mark off a section that’s long enough to cover the surrounding joints. Then, measure around the injury—the splint needs to be wide enough to cover about half of the circumference of the injured body part. Cut the splinting material down to size once you’ve collected your measurements.[25]
- Finger splints are typically 2 in (5.1 cm) wide, arm splints are usually 3 to 4 in (7.6 to 10.2 cm) wide, and leg splints are traditionally 5 to 6 in (13 to 15 cm) wide.
- Plaster splinting material usually comes in prefabricated splint rolls, with each roll having about 10-20 plaster sheets in it. Plaster of Paris is another popular type of splinting plaster—it usually comes in rolls or strips.[26]
- Make your measurement slightly longer if you’re working with Plaster of Paris strips or rolls, since this material often shrinks a little when the splint sets.[27]
-
6Choose a splint thickness that best suits the patient’s injury. About 8-10 layers of plaster will get the job done if you’re splinting an arm, wrist, or shoulder injury, while leg and ankle splints typically need 12-14 layers.[28]
-
7Wrap Webril padding around the limb on top of the stockinette. Grab a roll of Webril splint padding and carefully loop it around the stockinette. Divide the total number of plaster layers you’ll be using by 2—this is how many wrap-arounds of padding you’ll need for the splint.[29]
- If you plan on splinting an arm with 10 layers of plaster, only use 5 layers of padding.
- If you plan on splinting a leg injury with 13 layers of plaster, just use 6-7 layers of padding.
-
8Double-check the injury to make sure it’s positioned correctly. Make sure that the body part is in a completely immobile position where it can heal properly.[30]
- Radial/Ulnar gutter: Make sure that the forearm is vertically upright.
- Thumb spica: Place the wrist in a completely neutral position with the thumb pointed out.
- Volar/Colles: Arrange the wrist in a neutral position with all 5 fingers slightly bent.
- Long arm or sugar tong: Lay the patient face-down and bend their arm around the side of the bed/stretcher at a right angle.
- Posterior (short) leg or stirrup: Sit the patient upright and have them bend their knee at a right angle. Make sure that the connected foot also creates a right angle with their leg.
-
9Soak your splint material in water and squeeze it out. Dip the plaster in a basin of clean, room temperature water—or, water that's around 24 °C (75 °F). Then, carefully squeeze out any leftover water from the soaked plaster so it’s not dripping wet.[31]
- It also helps to smooth out the damp plaster on a flat surface to get rid of any wrinkles or grooves.[32] It should have a really sloppy texture at this point.[33]
- Never use hot water to apply a splint. Wetting the plaster generates heat—when combined with hot water (especially water that’s at least 40 °C/104 °F), the patient might get burned.[34]
-
10Apply and mold the splinting material to the injury. Start by shaping the splint around the joints of the injury.[35] Continue to mold the plaster around the injury while the plaster is still a sloppy consistency.[36]
- Give the patient a head’s up before you start molding the splint, since the process can be a bit painful.
-
11Cover the wet splint with Webril and an elastic bandage so it holds its shape. Grab a section of Webril padding and carefully wrap it around the wet plaster. Then, loop an elastic bandage on top—this helps the splint stay put.[37]
- If you don’t put a layer of padding down first, the bandage might meld with the plaster as it sets. This will make it really difficult to remove later on.
-
12
-
13Keep the injured body part steady and let the splint dry. Remind the patient to keep the injured body part in the right position so the splint sets correctly. Depending on the plaster you used, it may take 2-8 minutes for the splint to set.[40]
- Plaster labeled as “fast-drying” takes about 5-8 minutes to set, while “extra-fast-drying” plaster only takes 2-4 minutes.


Things You’ll Need
Makeshift Splints
- Sturdy object
- Makeshift padding
- Rope, clothing, or tape
Medical Splints


References
- ↑ https://medlineplus.gov/ency/article/000040.htm
- ↑ https://medlineplus.gov/ency/article/000043.htm
- ↑ https://medlineplus.gov/ency/article/000045.htm
- ↑ https://medlineplus.gov/ency/article/000040.htm
- ↑ https://medlineplus.gov/ency/article/000040.htm
- ↑ https://blog.nols.edu/2016/07/18/common-supplies-for-improvised-splint
- ↑ https://medlineplus.gov/ency/article/000040.htm
- ↑ https://www.coloradowm.org/blog/splinting-review/
- ↑ https://medlineplus.gov/ency/article/000040.htm
- ↑ https://medlineplus.gov/ency/article/000040.htm
- ↑ https://www.coloradowm.org/blog/splinting-review/
- ↑ https://www.coloradowm.org/blog/splinting-review/
- ↑ https://medlineplus.gov/ency/article/000040.htm
- ↑ https://sites.psu.edu/davidminchakportfolio/files/2018/07/Instructions-set-part-2-David-Minchak-2lbwp6l.pdf
- ↑ https://medlineplus.gov/ency/article/000040.htm
- ↑ https://medlineplus.gov/ency/presentations/100142_3.htm
- ↑ https://medlineplus.gov/ency/article/000040.htm
- ↑ https://www.mayoclinic.org/first-aid/first-aid-fractures/basics/art-20056641
- ↑ https://medlineplus.gov/ency/article/000040.htm
- ↑ https://www.oregon.gov/oha/PH/PROVIDERPARTNERRESOURCES/EMSTRAUMASYSTEMS/EMSFORCHILDREN/Documents/Splinting.pdf
- ↑ https://em.uw.edu/sites/em.uw.edu/files/Chapter%2050%20Splinting.pdf
- ↑ https://www.oregon.gov/oha/PH/PROVIDERPARTNERRESOURCES/EMSTRAUMASYSTEMS/EMSFORCHILDREN/Documents/Splinting.pdf
- ↑ https://em.uw.edu/sites/em.uw.edu/files/Chapter%2050%20Splinting.pdf
- ↑ https://em.uw.edu/sites/em.uw.edu/files/Chapter%2050%20Splinting.pdf
- ↑ https://www.oregon.gov/oha/PH/PROVIDERPARTNERRESOURCES/EMSTRAUMASYSTEMS/EMSFORCHILDREN/Documents/Splinting.pdf
- ↑ https://em.uw.edu/sites/em.uw.edu/files/Chapter%2050%20Splinting.pdf
- ↑ https://www.oregon.gov/oha/PH/PROVIDERPARTNERRESOURCES/EMSTRAUMASYSTEMS/EMSFORCHILDREN/Documents/Splinting.pdf
- ↑ https://www.oregon.gov/oha/PH/PROVIDERPARTNERRESOURCES/EMSTRAUMASYSTEMS/EMSFORCHILDREN/Documents/Splinting.pdf
- ↑ https://www.oregon.gov/oha/PH/PROVIDERPARTNERRESOURCES/EMSTRAUMASYSTEMS/EMSFORCHILDREN/Documents/Splinting.pdf
- ↑ https://www.oregon.gov/oha/PH/PROVIDERPARTNERRESOURCES/EMSTRAUMASYSTEMS/EMSFORCHILDREN/Documents/Splinting.pdf
- ↑ https://www.oregon.gov/oha/PH/PROVIDERPARTNERRESOURCES/EMSTRAUMASYSTEMS/EMSFORCHILDREN/Documents/Splinting.pdf
- ↑ https://www.oregon.gov/oha/PH/PROVIDERPARTNERRESOURCES/EMSTRAUMASYSTEMS/EMSFORCHILDREN/Documents/Splinting.pdf
- ↑ https://em.uw.edu/sites/em.uw.edu/files/Chapter%2050%20Splinting.pdf
- ↑ https://em.uw.edu/sites/em.uw.edu/files/Chapter%2050%20Splinting.pdf
- ↑ https://www.oregon.gov/oha/PH/PROVIDERPARTNERRESOURCES/EMSTRAUMASYSTEMS/EMSFORCHILDREN/Documents/Splinting.pdf
- ↑ https://em.uw.edu/sites/em.uw.edu/files/Chapter%2050%20Splinting.pdf
- ↑ https://em.uw.edu/sites/em.uw.edu/files/Chapter%2050%20Splinting.pdf
- ↑ https://www.merckmanuals.com/professional/injuries-poisoning/how-to-splint-or-immobilize-a-lower-limb/how-to-apply-a-sugar-tong-ankle-splint
- ↑ https://em.uw.edu/sites/em.uw.edu/files/Chapter%2050%20Splinting.pdf
- ↑ https://em.uw.edu/sites/em.uw.edu/files/Chapter%2050%20Splinting.pdf
- ↑ https://medlineplus.gov/ency/article/000040.htm
- ↑ https://www.co.grand.co.us/DocumentCenter/View/14624/sam_splint_user_guide_lowres_compressed?bidId=
- ↑ https://em.uw.edu/sites/em.uw.edu/files/Chapter%2050%20Splinting.pdf


Medical Disclaimer
The content of this article is not intended to be a substitute for professional medical advice, examination, diagnosis, or treatment. You should always contact your doctor or other qualified healthcare professional before starting, changing, or stopping any kind of health treatment.
Read More...