This article was co-authored by wikiHow staff writer, Travis Boylls. Travis Boylls is a Technology Writer and Editor for wikiHow. Travis has experience writing technology-related articles, providing software customer service, and in graphic design. He specializes in Windows, macOS, Android, iOS, and Linux platforms. He studied graphic design at Pikes Peak Community College.
The wikiHow Tech Team also followed the article's instructions and verified that they work.
This article has been viewed 42,538 times.
Learn more...
Zoom is a popular video conferencing service that allows you to host and attend virtual meetings online. Zoom has been steadily increasing as millions of people are seeking ways to stay connected with their friends, family, and co-workers while in isolation during the COVID-19 pandemic. Zoom is easy to use, works across a variety of platforms, has many tools to assist with collaboration.[1] This wikiHow teaches you how to use Zoom.
Steps
Signing Up for Zoom
-
1Download the Zoom app. Zoom has a blue icon with an image that resembles a video camera. You can download the Zoom app for free on iPhone, iPad, Android, PC, Mac and Linux. Use the following steps to download the Zoom app.
-
Smartphone & Tablet
- Open the Google Play Store or App Store.
- Tap the Search tab (iPhone and iPad only).
- Enter "Zoom" in the search bar.
- Tap GET or INSTALL next to the "Zoom Cloud Meetings" app.
-
PC or Mac:
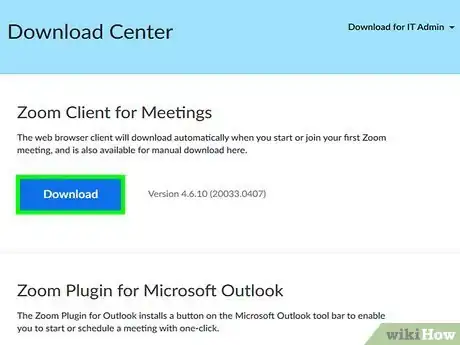
- Go to https://zoom.us/download in a web browser.
- Click Download below "Zoom Desktop Client".
- There are other download options, including Zoom mobile apps available in the Apple App Store and Google Play, if you're looking for an alternative to the desktop client.
- Open the install file in your web browser or Downloads folder.
-
Smartphone & Tablet
-
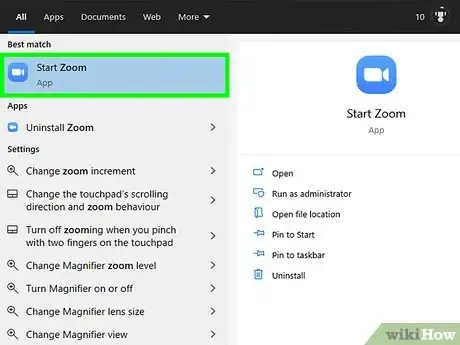
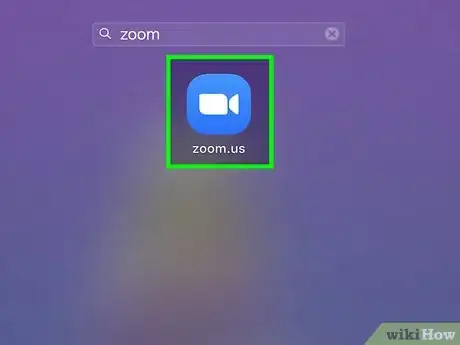
2Open Zoom. Tap the icon on your Home screen or apps menu to open Zoom on your mobile device. On PC and Mac, click the Zoom icon in the Windows Start menu, or Applications folder on Mac.Advertisement
-
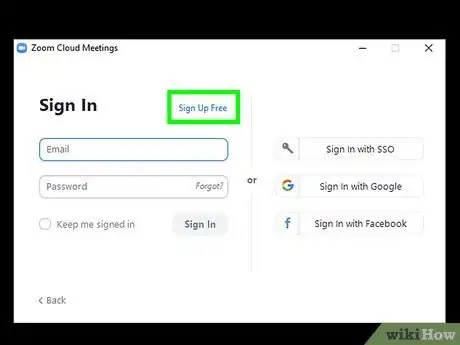
3Tap Sign Up or click Sign Up Free. If you are using the mobile app, tap the blue text that says Sign Up at the bottom of the screen. If you are using the computer application, click the orange button that says Sign Up for Free.
-
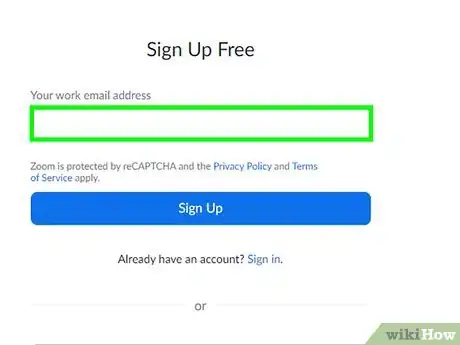
4Enter your name and email address. Use the spaces provided to enter your name and email address. Be sure to use a valid email address that you have access to. You will need to check your email in order to verify your account.
- If you are using a web browser on your computer, you only need to enter your email address. You will be asked to fill out the rest of the information when you confirm your account.
- Alternatively, if you are signing up using the computer client, you have the option to sign up with your Facebook or Google account. To do so, click the blue Facebook button, or white Google button at the bottom of the page.
-
5Tap the checkbox next to "I agree to the Terms of Service" (mobile only). If you are using a smartphone or tablet, you need to tap the checkbox at the bottom of the form in order to agree to the terms of service. On PC or Mac, you agree to the terms of service by signing up.
-
6Click or tap Sign Up. On smartphones and tablets, it's the blue button in the upper-right corner. On the computer client, it's the blue button below the line with your email address. This automatically sends a confirmation email to your email inbox.
-
7Check your email. Open whichever app or website you use to check your email and sign in.
-
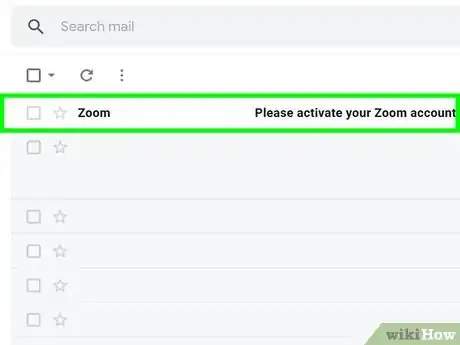
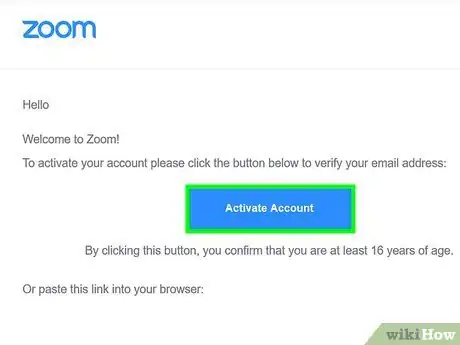
8Open the confirmation email. Look for an email from Zoom titled "Please activate your Zoom account" in your Inbox.
-
9Tap Activate Account. It's the blue button in the center of the verification email. This opens a form you can use to finish settings up your account.
-
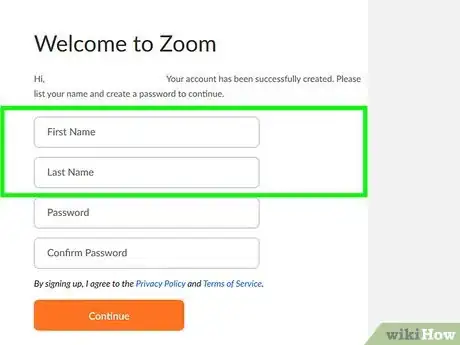
10Enter your first and last name. It may populate in the fields automatically. If it does not, enter your first and last name in the first two fields in the form.
-
11Enter your desired password and confirm it. The next two fields are where you enter your desired password. Your password must be at least 8 characters long and contain a combination of letters and numbers. You can also use special characters. Be sure you enter the exact same password in both fields.
-
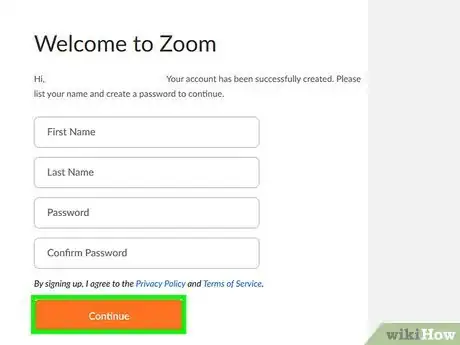
12Click or tap Continue. It's the orange button at the bottom of the page. This creates your account.
-
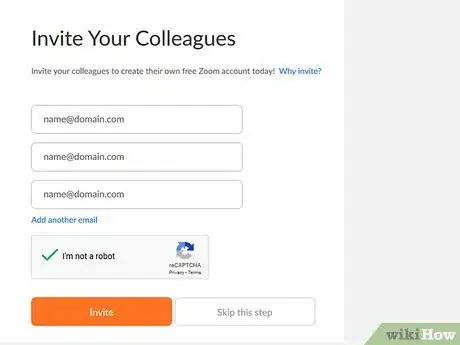
13Invite others to use Zoom (optional). If you would like, you can invite other friends or colleagues to use Zoom. If you do not wish to invite anybody, click or tap Skip this step. Otherwise, use the following steps to invite others to use Zoom:
- Enter 3 email addresses in the spaces provided.
- Click or tap Add another email to add more email spaces.
- Click or tap the checkbox next to "I am not a robot"
- Click or tap the orange button that says Invite.
-
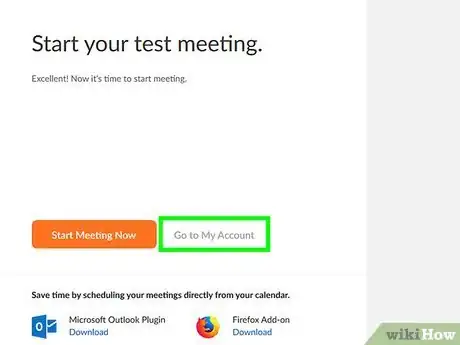
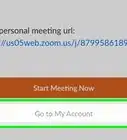
14Click or tap Go to My Account. This signs you into Zoom and takes you to the main page on PC or Mac, or opens the Zoom app on your smartphone or tablet.
- The first time you open the Zoom app on your smartphone or tablet, you may be asked to allow Zoom to access your camera, microphone, and other features. Tap Allow to continue on all prompts.
Starting a Meeting
-
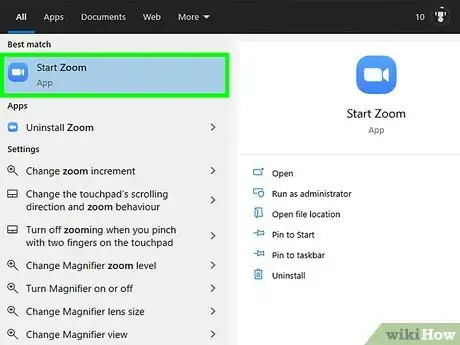
1Open the Zoom app. It has a blue icon with an image that resembles a video camera. Tap the icon on your home screen or apps menu, or click the Zoom icon in the Windows Start menu or Applications folder on Mac.
-
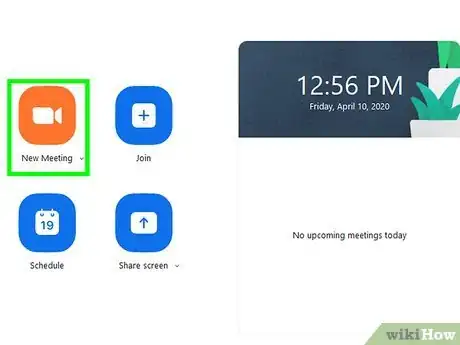
2Click or tap New Meeting. It's the orange button with a video camera. It is either in the center of the screen or at the top.
- This will start the meeting immediately on PC and Mac. Use the drop-down menu below the "New Meeting" icon to access further options.
-
3Tap the toggle switch to turn the video on or off. You can host a meeting with or without video. Tap the toggle switch next to "Video On" to start a meeting with video on or off.
- On PC and Mac, click the arrow pointing down below the "New Meeting" icon and check or uncheck the checkbox next to "Start with video" in the drop-down menu.
-
4Select if you want to use your Personal Meeting ID. Your Personal Meeting ID (PMI) is a 10-digit number assigned to your account. People who know your PMI can use it to join your meetings. Tap the toggle switch next to "Use Personal Meeting ID (PMI)" to use your assigned PMI. If you toggle this option off, your meeting will be assigned a random 10-digit number you can use to invite other people to your meeting.[2]
- To use your Personal Meeting ID on PC and Mac, click the arrow pointing down below the "New Meeting" icon. Click the checkbox next to "Use Personal Meeting ID" in the drop-down menu.
-
5Click or tap Start a Meeting. This starts your meeting.
-
6Click or tap End Meeting. When you are ready to end the meeting, click or tap the red text that says "End Meeting". On smartphones and tablets, it's in the upper-right corner. On PC and Mac, it's in the lower-right corner.
Scheduling a Meeting
-
1Open the Zoom app. It has a blue icon with an image that resembles a video camera. Tap the icon on your home screen or apps menu, or click the Zoom icon in the Windows Start menu or Applications folder on Mac.
-
2Click or tap Schedule Meeting. It's the blue icon that has an image that resembles a calendar page. This opens a form you can use to schedule a meeting.
-
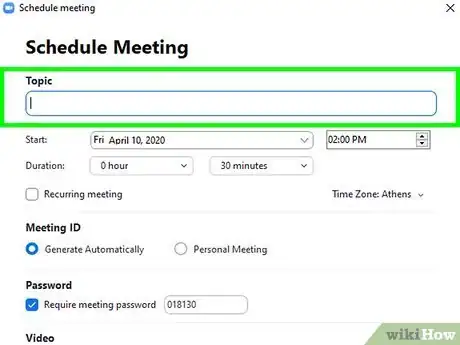
3Enter a meeting topic. Use the space provided at the top to enter a topic or name for the meeting.
-
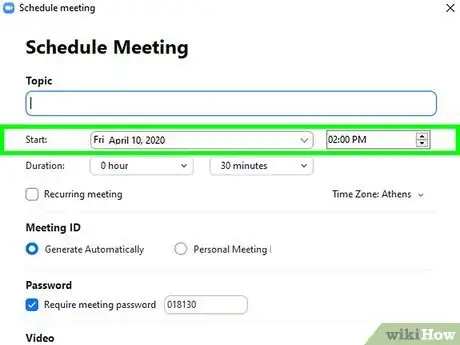
4Set a date and time. Use the following steps to set a date and time.
- Click or tap Date and use the pop-up calendar to select a date for the meeting.
- Click or tap Duration and select how long the meeting is. On Android, select the start time and end time using the drop-down menu next to "From" and "To".
- Tap Time Zone and select which time zone you want to use.
-
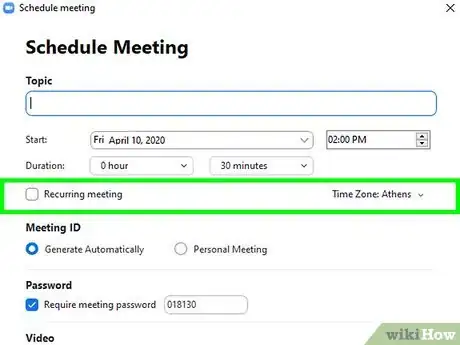
5Select if and when you want the meeting to repeat. If you want this to be a recurring meeting, tap Repeat and select "Never", "Every Day", "Every Week", "Every 2 Weeks", "Every Month", or "Every Year".
- To set a meeting as recurring on PC and Mac, click the checkbox that says "Recurring". Then you will need to set the event as recurring in the calendar app you use.
-
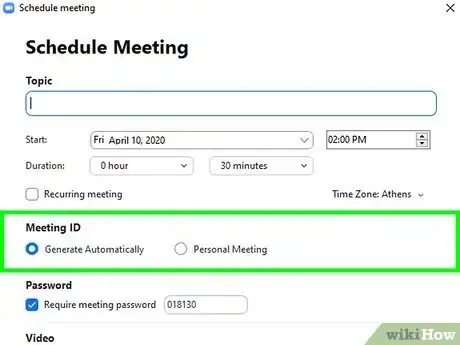
6Select if you want to use your Personal Meeting ID (PMI). Your Personal Meeting ID (PMI) is a 10-digit number assigned to your account. People who know your PMI can use it to join your meetings. If you want to use your PMI for the scheduled meeting, tap the toggle switch next to "Use Personal Meeting ID" or click the radio option next to "Personal Meeting ID" on PC and Mac. To generate a random 10-digit number for each meeting, click the radio option next to "Generate automatically" on PC and Mac, or turn the option to use a Personal Meeting ID off on smartphones and tablets.
-
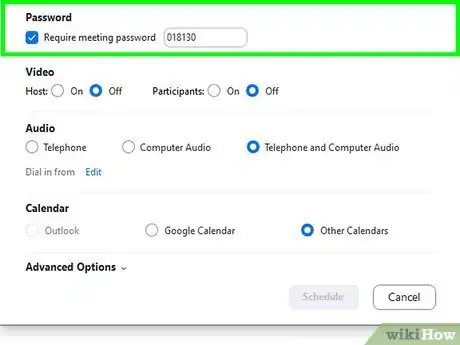
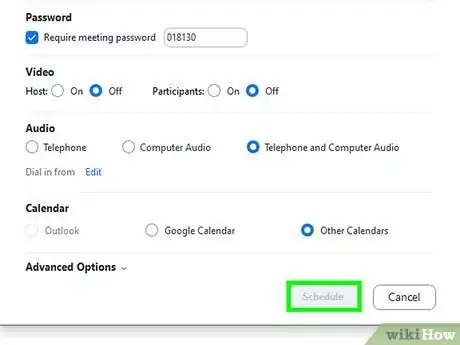
7Set a password for the meeting (optional). If you want to set a password for the meeting, click the checkbox or tap the toggle switch next to "Required Meeting ID". Then enter the desired password in the space provided.
-
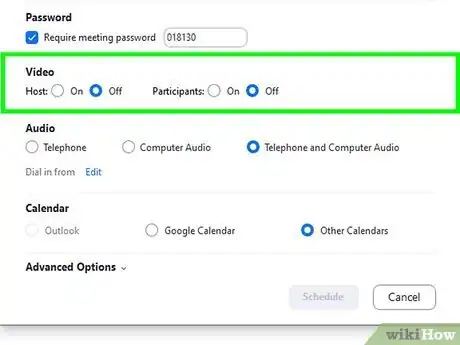
8Turn video on or off for the host and/or participants. Use the toggle switch next to "Host Video On" on smartphones and tablets, or click "On" or "Off" next to "Host" on PC and Mac to enable or disable the meeting host's video feed. Use the toggle switch next to "Participant video On" on smartphones and tablets, or click "On" or "Off" next to "Participant" on PC or Mac to enable or disable the video feed for each of the meeting's attendees.
-
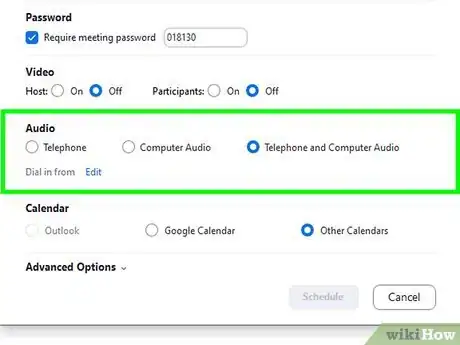
9Select audio options. Tap Audio Option on smartphones and tablets and select an audio option from the menu. On PC and Mac, click the radio button next to your preferred audio option. The three audio options are "Telephone and Device Audio", "Device Audio", and "Telephone Audio."
-
10Select a calendar to add the event too. Depending on which device you are using, you can add the Meeting to your Outlook Calendar, Google Calendar, or iCalendar. To add the meeting to your calendar on Android, tap the toggle switch next to "Add to calendar". On iPhone and iPad, tap the Calendar option and select which calendar you want to use. On PC and Mac, click the radio option next to the calendar you want to add the meeting too.
-
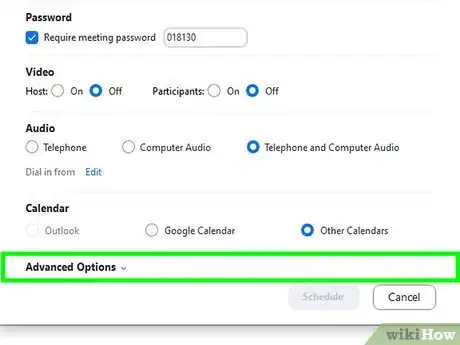
11Select advanced options (optional). If you want to select advanced options, click or tap Advanced Options and click the checkbox or tap the toggle switch next to the advanced options you want to enable. The advanced options are as follows:
- Enable Waiting Room: This creates a virtual waiting room that attendees can wait in. The host can then decide when to admit each of the attendees into the meeting.
- Enable Join Before Host: This option allows attendees to enter the meeting before the host arrives.
- Mute participants on Entry: (PC and Mac only). This option turns off the audio for attendees when they enter the meeting.
- Automatically Record Meeting: This option saves a video recording of the meeting to your computer or mobile device.
-
12Tap Done or click Schedule. This schedules your meeting with your settings.
Joining a Meeting
-
1Retrieve the Meeting ID. The Meeting ID is the 10-digit number associated with each meeting. If you are invited to a meeting, you should receive a URL that ends with a 10-digit number. That 10-digit number is the Meeting ID. Your invitation may come over email, instant message, or other communication means.
- You can click or tap the URL in the invite message to immediately join the meeting in the Zoom app.
- If you do not have a Meeting ID, contact the host of the meeting.
-
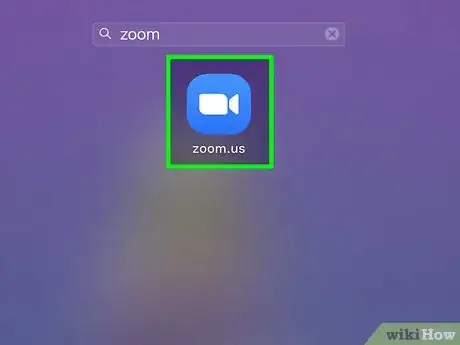
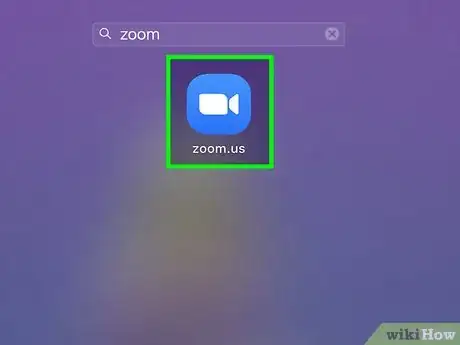
2Open the Zoom app. It has a blue icon with an image that resembles a video camera. Tap the icon on your home screen or apps menu, or click the Zoom icon in the Windows Start menu or Applications folder on Mac.
-
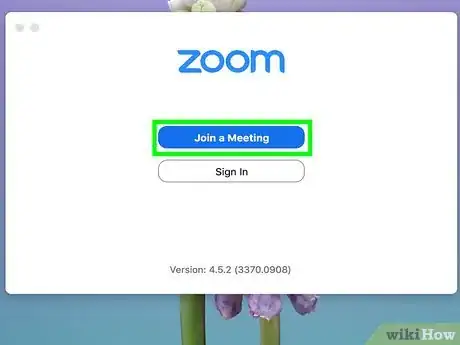
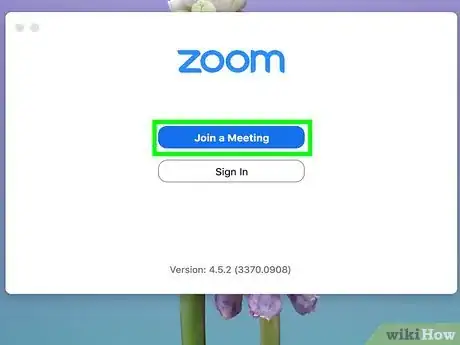
3Click or tap Join Meeting. It's the blue icon that has an image with a plus (+) sign.
-
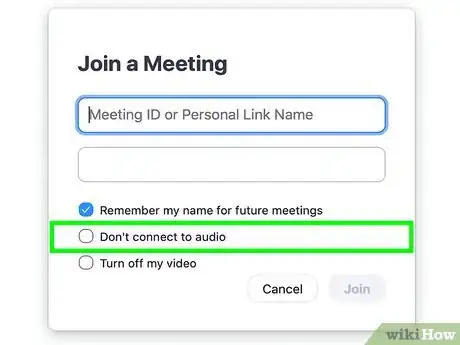
4Enter the Meeting ID or URL. Use the space provided at the top of the form to enter the 10-digit Meeting ID number or URL.
-
5Change your display name (optional). Your display name is automatically populated in the second space in the form. If you want to change it, enter your desired display name in the second space provided.
-
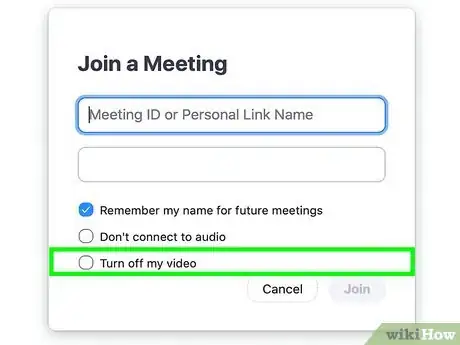
6Turn off audio (optional). If you don't want the other attendees to hear your microphone, tap the toggle switch or click the checkbox next to "Don't connect to audio".
-
7Turn off your video (optional). If you don't want the other attendees to see you on camera when you join the meeting, tap the toggle switch or click the checkbox next to "Turn off my video".
-
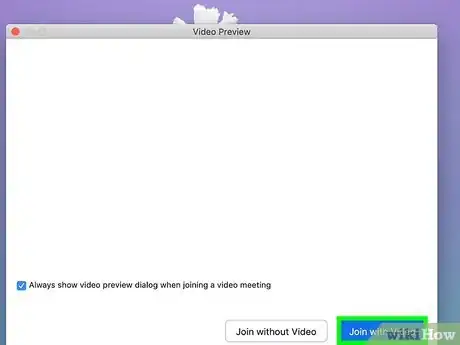
8Click Join or tap Join Meeting. This connects you to the meeting as a participant.
-
9Click or tap Leave Meeting. When you are ready to leave the meeting, click or tap the red text that says Leave Meeting. On smartphones and tablets, it's in the upper-right corner. On PC and Mac, it's in the lower-right corner.
Inviting Participants to a Meeting
-
1Open the Zoom app. It has a blue icon with an image that resembles a video camera. Tap the icon on your home screen or apps menu, or click the Zoom icon in the Windows Start menu or Applications folder on Mac.
-
2Connect to a meeting. You can either start a new meeting or join an existing meeting using the Zoom app.
-
3Tap the center of the screen (mobile only). If you are using Zoom on a smartphone or tablet, tap the center of the screen to display all the controls.
-
4Tap Participants (mobile only). If you are using Zoom on a smartphone or tablet, tap the icon that says "Participants" to display a drop-down menu with a list of all the attendees and some options. It's the icon that resembles a person.
-
5Click or tap Invite. It's at the bottom of the Participants' menu on smartphones and tablets. On PC and Mac, it's the icon that resembles a person at the bottom of the screen.
-
6Select a messaging method. Use one of the following steps to select a method to send invite messages.
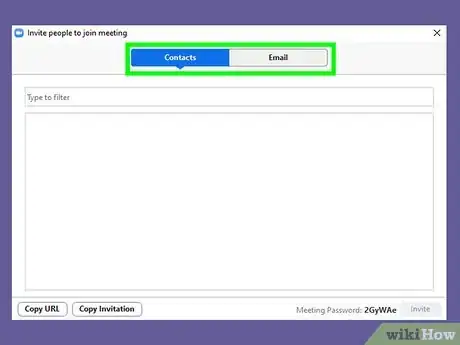
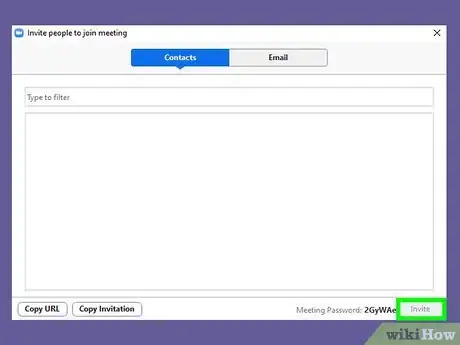
- PC & Mac: Click "Contacts" and select a contact from the list of contacts, or click Email at the top of the screen and select an email service to open an email with an invite message already composed. Alternatively, you can click Copy URL or Copy Invitation at the bottom of the invite screen and paste the URL or Invitation in an email, instant message, or web post of your choice.
- iPhone & iPad: Tap Send Email or Send Message to open an open a pre-composed invitation in Mail or Messages. You can also tap Invite Contacts and select contacts to invite. You can also tap Copy URL at the bottom and paste the URL in an email, instant message or web post to compose your own invitation.
- Android: Tap an app you want to compose an invite message in. Alternatively, you can tap Copy URL to copy the meeting URL and paste it in an email, instant message, or web post on your own.
-
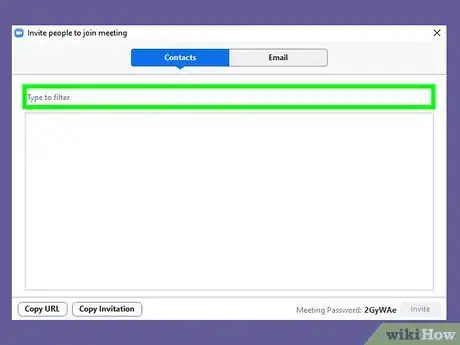
7Enter a recipient. If you select to send an invite as an email or instant message, you need to enter an email address or contact name in the field next to "To:".
-
8Compose an invite message. If you select the option to send an invite in an app, email, or message, Zoom generates a pre-written invitation. You can change the message to say whatever you want. Make sure the URL or 10-digit meeting ID is clearly is somewhere in the message.
-
9Send the message. When you are finished composing the message, click the button to send the message. This may be a button that says "Send" or an icon that resembles an arrow pointing up, or a paper airplane icon. This sends the message to your recipient.
Sharing Your Screen During a Meeting
-
1Open the Zoom app. It has a blue icon with an image that resembles a video camera. Tap the icon on your home screen or apps menu, or click the Zoom icon in the Windows Start menu or Applications folder on Mac. Screen sharing allows you to stream the contents of your screen to the meeting attendees instead of your camera feed. This is useful for displaying photos, text, emails, documents, videos, PowerPoint Presentations, and more.
-
2Connect to a meeting. You can either start a new meeting or join an existing meeting using the Zoom app.
-
3Tap the center of the screen (mobile only). If you are using Zoom on a smartphone or tablet, tap the center of the screen to display all the controls.
-
4Tap Share, Share Screen, or Share Content. It has an icon that resembles a screen with an arrow pointing up. On iPhone and iPad, it's at the top of the screen. On Android, PC, and Mac, it's at the bottom of the screen.
- Alternatively, you can click or tap Share Screen before you enter the meeting and enter the 10-digit Meeting ID to share your screen when you enter a meeting.
-
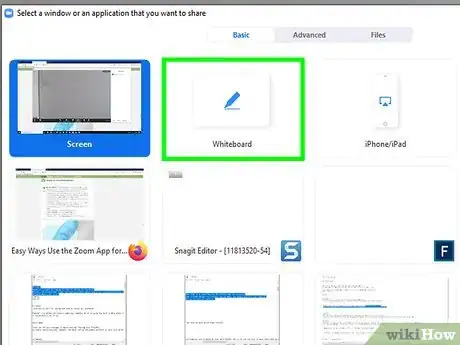
5Select an app you want to share. You can select a specific app you have open on your device to share in the meeting, or you can tap Screen to share everything that appears on your screen.
- Alternatively, you can select "Whiteboard". Whiteboard displays a white page with basic options for drawing, adding stamps and text at the top of the page. You can use this as a virtual whiteboard during your meetings.
- iPhone and iPad require a special plug-in in order to share the screen in a Zoom meeting.
-
6Make annotations. Not only can you share your screen, Zoom also allows you to make annotations on-screen. PC and Mac has more drawing options than mobile devices. Use the following steps to make annotations while sharing your screen.
- Hover the mouse cursor over the Meeting ID at the top of the screen on PC and Mac, or tap the arrow pointing right in the bottom-left corner on mobile devices.
- Click or tap the pencil icon to display the Annotations menu.
- Use Pen and Highlighter (mobile devices), or Draw options (PC and Mac only) to draw over your screen.
- Click Format or tap Color to select color and line thickness for your annotations.
- Use the Text option to type text over your screen (PC and Mac only)
- Use the Spotlight option as a laser-pointer-like tool to highlight objects on the screen.
- Click or tap Undo to remove the most recent annotation.
- Click or tap Redo to redo the most recent "Undo".
- Click or tap the trashcan icon to clear all annotations.
- Click the red "X" icon or tap Stop Annotation to stop making annotations.
-
7Click the red Stop icon. When you are ready to stop sharing your screen, click the stop icon. It's the red button with a white square ■ Stop Share. On PC and Mac, it is the red button at the top of the screen. On Mobile devices, it's in the lower-left corner when you tap the arrow pointing left.
Community Q&A
-
QuestionWhich one is the toggle switch?
 WikiVYCommunity AnswerIf you mean toggle switch to turn your video on of off, you can do that either before joining the meeting (directly with a link or punching the meeting ID). It asks whether you want to join with your video on or off. Or, you can join the meeting, and then click on the video option on the left bottom of your screen and put the video off. You can also click on settings while on zoom, either in a meeting or not, and then set the audio, video etc on or off when you join. Toggle only means to either put something on or off.
References
About This Article
To get started with Zoom, install the Zoom app. On a computer, head to zoom.us/download, and click the Download link under ""Zoom Client for Meetings.” Once downloaded, double-click the installer to install Zoom. If you're using an Android, open the Play Store, search for the Zoom app, and then tap Install. On an iPhone or iPad, open the App Store, search for Zoom, and then tap GET. Once installed, open Zoom and select the Sign Up option to create your Zoom account. To join a meeting, open Zoom and click Join. If you have a 10-digit meeting ID from the host, enter it—if you have a URL, you can enter that instead. Make sure your name looks how you'd like it to appear in the meeting. If you want to disable your microphone for the meeting, you can select ""Do not connect to audio."" If you don't want to show yourself on camera, select ""Turn off my video."" Click Join when you're ready to enter the meeting. To create your own meeting, open Zoom and click New Meeting. To invite others to participate, click Participants at the bottom of the screen, and then click Invite to send your meeting link to anyone you'd like to attend. To schedule a meeting for another time, open Zoom and select Schedule. Give the meeting a name, time, and date, and choose preferences such as whether you want to require a password to join. Select a calendar, such as iCalendar or Outlook, and click Save’' to schedule your meeting. Once scheduled, Zoom will prompt you to create an event in your calendar, which you can use to invite participants to your meeting. To start the meeting, open Zoom, click the Meetings tab, and then click Start.
