This article was co-authored by wikiHow Staff. Our trained team of editors and researchers validate articles for accuracy and comprehensiveness. wikiHow's Content Management Team carefully monitors the work from our editorial staff to ensure that each article is backed by trusted research and meets our high quality standards.
There are 8 references cited in this article, which can be found at the bottom of the page.
This article has been viewed 148,020 times.
Learn more...
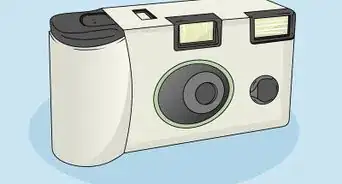
Polaroid OneStep cameras are easy-to-use, fun options for instant, printed photography. Polaroid cameras produce small prints that can be hung up on your fridge, put in a photo album, or shared with friends.
Steps
Loading and Prepping
-
1Load your film into the camera. Pull the switch to open the bottom flap of your camera. This will reveal the slot where you should insert your film cartridge. Put the cartridge in the slot with the dark side facing up and the metal contacts facing down, then close the flap.[1]
- If your Polaroid camera has an old cartridge that you’d like to preserve, remove the film in a completely dark room and place the cartridge in a container that protects it from any light exposure.
-
2Wait for a dark slide to pop out of your camera. Immediately after you’ve loaded your film, a dark slide should emerge from your camera. This indicates that the camera is working properly and is ready for use![2]
- If a dark slide does not come out of the camera, it likely means that there’s a problem with your film or camera. If you’ve purchased new film, you might have a problem with the camera itself. Test with another cartridge to determine the problem.
- You may want to save this dark slide, as you can use it as a cover to protect your photos during their exposure time after they emerge from the camera.
Advertisement -
3Turn on Polaroid 600 cameras by opening or flipping up your flashbar. These cameras require you to wake them up before use. Examine your model to determine whether you’ll need to open and close your flash bar or flip it up. These cameras turn off quickly, so simply repeat the process whenever you’re ready to take a picture.[3]
- If you can’t see your flashbar on a 600-series Polaroid OneStep camera, that means you have a model that requires you to flip it up.
- Polaroid SX-70 Land cameras do not have an on/off button. These cameras are ready to use as soon as your film is loaded.[4]
-
4Play with your exposure compensation switch to fix exposure problems. A camera’s exposure refers to the camera and film’s sensitivity to light, which will then be captured in the image. Most OneStep models include a small slider that increases or decreases the amount of light the camera will let in. Experiment with multiple shots at different exposure levels to see what produces the best results for your film and camera.[5]
- If you’re shooting with Impossible Project SX-70 film, move the switch toward the darker side. This film has higher light sensitivity, which will make images appear over-exposed if the switch remains in the middle of the slider.


Taking a Picture
-
1Stand at least 4 feet (1.22 m) away from your subject. Because OneStep cameras contain fixed-focus lenses, they use distance, or depth of field, to focus on their subjects. They don’t contain the electronics necessary for autofocus. Provide enough distance between yourself and your chosen subject to allow the camera to produce a sharp image.
- You may need to experiment with distance when taking photographs with Polaroid cameras. Some models may produce better images at a distance of about 10 feet (3.04 m). Some models may not work at distances above 10 feet (3.04 m), so be patient and get ready to test out your camera.
- Some models may include a closeup setting that is supposed to allow you take pictures of subjects located under 4 feet (1.22 m) away from you. Unfortunately, these settings generally don’t work very well. Ignore them, and adhere to the 4-foot (1.22-m) rule.[6]
-
2Use the viewfinder to frame your shot. Unlike most modern cameras, the viewfinder doesn’t allow you to see through the camera’s lens. Since the viewfinder doesn’t provide you with a perfect replica of what the image will be, give yourself plenty of room on either side of your chosen subject when framing your shot.[7]
-
3Push down the trigger to snap a photo. Once you’re ready to go, taking a picture with a Polaroid OneStep is about as easy as it gets. No need for adjustments. Just push down your button, take the picture, and get ready to view your handiwork![8]
-
4Protect your photograph from the light to prevent damage. When your pictures pop out of your camera, keep them from getting exposed to light. You can either immediately place them in a pocket or light-safe container, or cover them with a piece of paper. This will ensure that the chemical process necessary for development works properly.[9]
-
5Wait at least 10 and up to 30 minutes before viewing your photos. Keep your photos face-down or shielded from light the entire time they’re developing. While some old Polaroid film may be ready within 90 seconds, it’s safer to wait longer. If you’re using the Impossible Project’s new film, be especially cautious. You’d rather have a properly developed picture after a half-hour than a dud after five minutes.[10]
- The Impossible Project recommends waiting 10 minutes for black-and-white film and 30 for color film.


Improving Your Pictures
-
1Shoot outdoors for best results. Polaroid cameras respond well to lots of natural light. They do best with outdoor shots taken on either sunny or slightly overcast days. When you’re starting out, try taking landscape shots first. This will allow you to get comfortable with your camera.[11]
-
2Avoid extreme heat or cold when shooting with Impossible film. This new film does best in temperate temperatures between about 55℉ (13℃) and 82℉ (28℃). Cold weather may lead to overexposed prints that don’t contain color contrast, while hot days could give you pictures with a red or yellow tint. To shoot at higher or lower temperatures, either heat up the film by placing it in a pocket and using your body heat or cool it down by putting in the refrigerator before taking your photos.
-
3Use Polaroid 600-series cameras for indoor photography. SX-70 film generally isn’t light-sensitive enough to produce good indoor pictures. Because Polaroid cameras need so much light to give you clear images, it’s important to choose a camera that’s compatible with more light-sensitive film.[12]
-
4Fire the flash indoors to add to any natural-light sources. Use the built-in flash on your camera. While the flash may produce harsh lighting in some of your pictures, it’s important to start with the flash in order to see how best to lighten up your indoor pictures.[13]
- If you can, shoot in a room with plenty of windows to benefit from natural light even when indoors.
-
5Cut out a square of paper to tape over your flashbar. Most older Polaroid cameras are designed for the flash to be in use at all times, so it’s often difficult or impossible to manually shut it off. If you want to see what turning off the flash does for your photos, use a small piece of dark-colored paper and some tape to cover the bulb.[14]
-
6Use external light sources to brighten your subject. If you’re taking outdoor shots at night, shooting on a dark day, or are indoors, you may need to add some light to your subject. Try LED strobe lights aimed at your subject. For a simpler option, start by aiming a flashlight at your subject.[15]


Choosing a Camera
-
1Pick Polaroid 600 OneStep models for cheap, reliable cameras. OneStep cameras have fixed-focus lenses that allow you to simply point your camera and snap your photo. Polaroid produced tons of these cameras in the 1980s and 1990s, and they remain popular because they’re relatively easy to find and even easier to operate.[16]
- You can purchase refurbished Polaroid 600 OneStep cameras online at the Impossible Project. This will provide you with a camera that has been inspected and tested by a team of repair technicians.
- For less expensive but potentially faulty cameras, look online or at garage sales. Because Polaroid produced so many of these cameras, there are a variety of ways to find them used. Be aware that this may result in a broken piece of equipment.
- Many customers now buy Fujifilm instax cameras, which are a type of instant camera not produced by Polaroid. These newer options are extremely easy to use, and they produce durable instant prints. They require their own Fuji instax film that’s compatible with a variety of cameras that come in different sizes and colors.[17]
-
2Pick the Polaroid SX-70 OneStep Land camera for a retro option. These iconic cameras are only available for purchase used on a website like eBay. The generally easy-to-use camera gives you the classic Polaroid look with its white body and rainbow sticker. They don’t come with a built-in flash, making them slightly more high maintenance than 600-series options.[18]
- You’ll need to attach the flashbar to the top of the camera. The camera should include the optional flashbar when you purchase it.
-
3Purchase new Polaroid film at the Impossible Project. The Impossible Project produces new film that’s compatible with all Polaroid cameras. Deciding to purchase this newer film is a surer bet than going with the used film you can find online. The Impossible Project’s film does require longer exposure times, and it’s usually more expensive than used film cartridges.[19]
- Be sure that you’re purchasing the correct film for your camera. 600-series cameras require 600-type film, while SX-70 cameras need SX-70-type film.
- SX-70 cameras can use 600-type film if you install a Neutral Density filter on your film cartridges. You’ll need to purchase these filters separately from your film. They’re available at the Impossible Project.
-
4Find old Polaroid film on eBay for a cheaper but less reliable option. Used film cartridges, like Polaroid cameras, can be found easily online. While this purchase could result in film that’s cheap and works well, you may also receive dead film that won’t produce pictures. If you’re worried about cost, try used options first, then move to the Impossible Project’s products only if necessary.[20]
- The film cartridges contain Polaroid OneStep cameras’ “batteries,” so if the film doesn’t work, neither will the camera.


Community Q&A
-
QuestionDo I need to shake it or anything when it develops?
 Community AnswerUnlike older models, modern Polaroid pictures should not be shaken because it can cause blobs of chemicals to accumulate on the picture.
 -
QuestionIs it okay to take pictures of phone screens when using Polaroid cameras?
 Community AnswerYes, but the quality will be horrendous and probably not capture the screen well.
 -
QuestionWhat do I do if I took a picture with my Polaroid camera and no film came out?
 Community AnswerTry fiddling with the shutterspeed to hasten this a little. It's a small dial on the front on the camera. If it never comes out, try reloading the film. Take it out and put it back in. Make sure your camera spits out the first card (which is not an actual photo, it's a card to prove it works). If none of this works it might be your camera just doesn't work.
Warnings
- Don’t believe the myth that shaking Polaroid photos speeds up their development. This could actually damage the photograph.⧼thumbs_response⧽


References
- ↑ https://support.polaroid.com/hc/en-us/articles/219000467-How-do-I-insert-Polaroid-film-into-the-camera-
- ↑ https://support.polaroid.com/hc/en-us/articles/219000467-How-do-I-insert-Polaroid-film-into-the-camera-
- ↑ https://danfinnen.com/review/polaroid-onestep-flash-camera-review/
- ↑ https://danfinnen.com/review/polaroid-rainbow-white-onestep-camera-review/
- ↑ https://danfinnen.com/article/an-introduction-to-using-polaroid-cameras-and-instant-film/
- ↑ https://danfinnen.com/review/polaroid-onestep-flash-camera-review/
- ↑ https://danfinnen.com/review/polaroid-onestep-flash-camera-review/
- ↑ https://danfinnen.com/article/an-introduction-to-using-polaroid-cameras-and-instant-film/
- ↑ https://danfinnen.com/article/an-introduction-to-using-polaroid-cameras-and-instant-film/
- ↑ https://danfinnen.com/article/an-introduction-to-using-polaroid-cameras-and-instant-film/
- ↑ https://danfinnen.com/article/an-introduction-to-using-polaroid-cameras-and-instant-film/
- ↑ https://danfinnen.com/2014/01/19/how-to-shoot-polaroid-and-instant-film-indoors/
- ↑ https://danfinnen.com/2014/01/19/how-to-shoot-polaroid-and-instant-film-indoors/
- ↑ https://danfinnen.com/article/an-introduction-to-using-polaroid-cameras-and-instant-film/
- ↑ https://danfinnen.com/2014/01/19/how-to-shoot-polaroid-and-instant-film-indoors/
- ↑ https://danfinnen.com/review/polaroid-onestep-flash-camera-review/
- ↑ https://www.bhphotovideo.com/explora/photography/buying-guide/everything-you-need-know-about-fujifilm-instax
- ↑ https://danfinnen.com/article/buying-guide-for-used-polaroid-cameras/
- ↑ https://danfinnen.com/2015/08/25/fuji-instax-vs-impossible-project-vs-polaroid-instant-film/
- ↑ https://danfinnen.com/article/an-introduction-to-using-polaroid-cameras-and-instant-film/
About This Article

To use a OneStep camera, open your camera’s bottom flap and insert a film canister with the dark side facing up. Open your camera’s flash bar if necessary, then toggle the exposure compensation switch to fix lighting problems. Stand at least 4 feet from your subject, then frame your shot in the viewfinder and press the trigger! Once your photo prints out, keep it away from light for 10 to 30 minutes to prevent exposure damage. For more tips and tricks, including how to take professional-looking Polaroid pictures, scroll down!