This article was co-authored by Kelly Medford. Kelly Medford is an American painter based in Rome, Italy. She studied classical painting, drawing and printmaking both in the U.S. and in Italy. She works primarily en plein air on the streets of Rome, and also travels for private international collectors on commission. She founded Sketching Rome Tours in 2012 where she teaches sketchbook journaling to visitors of Rome. Kelly is a graduate of the Florence Academy of Art.
There are 16 references cited in this article, which can be found at the bottom of the page.
This article has been viewed 37,695 times.
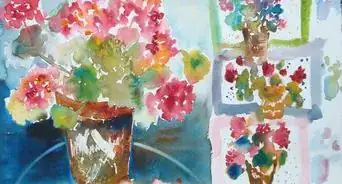
Whether you’re an experienced artist or you’re finger painting with preschoolers, watercolor tubes can take a lot of the difficulty out of setting up your project. Just squeeze a small amount of watercolor onto a plastic paint tray or palette and use a wet brush to pull out as much color as you need. As you work, you can blend your paints in different proportions to produce a nearly endless variety of stunning, unique colors.
Steps
Setting up Your Materials
-
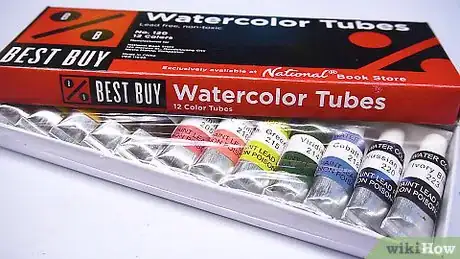
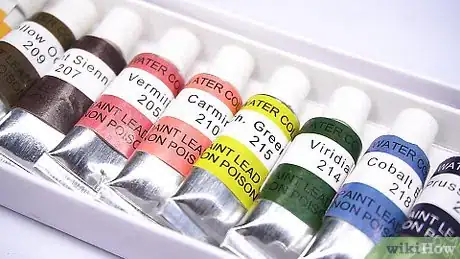
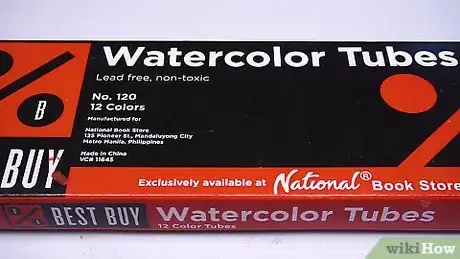
1Purchase watercolor tubes at your local art supply store. Watercolor tubes are available in a wide variety of colors, which makes them suitable for just about any traditional art project. You can often pick up a set of primary colors for as little as $10-30.[1]
- Look for watercolor tubes that are labelled as “student-” or “academic-” grade. These paints don’t have quite the same quality as artist-grade watercolors, but they can save you a lot of money.[2]
- Watercolor paints come in both staining and non-staining formulas. Non-staining paint sits on the surface of your paper and can easily be removed for different “lift off” techniques, while staining paints set into the paper, creating a permanent color base.
-
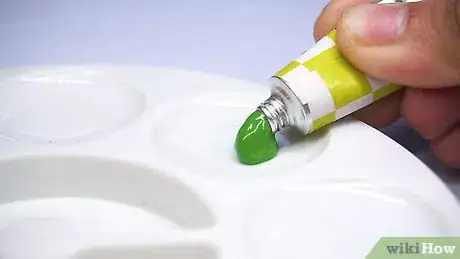
2Squeeze a small amount of paint onto a plastic paint tray or palette. Remove the cap from the tube in the color you want to use. Hold the tube straight up and down with the opening positioned just above your mixing surface. Apply gentle pressure to the middle of the tube to begin releasing the paint.[3]
- The biggest advantage of using a paint tray is that there’s a small well for each individual shade. This can be useful if you want to keep your colors separated until you put them on paper.[4]
- Plastic watercolor palettes have a smooth, glossy finish that’s perfect for mixing. They’ll also keep your paints wet longer, so you won’t have to worry about them drying out.
Tip: If you’re using a transparent plastic palette, slip a sheet of white paper underneath to improve the visibility of each of your colors.
Advertisement -
3Lift the tube away from your mixing surface as the paint emerges. This will cause the thick paint to pile up on itself rather than spreading out in all different directions. As a result, you’ll get a nice, neat blob, and you won’t have to clean the tube when you’re done with it. Only use as much paint as you think you’ll use at one time.[5]
- The paint in watercolor tubes is highly concentrated, since it’s meant to be mixed with water. For most projects, a dime-sized blob will be more than enough.
- When you’ve got as much paint as you need, be sure to put the cap back on the tube to avoid potential messes.
-
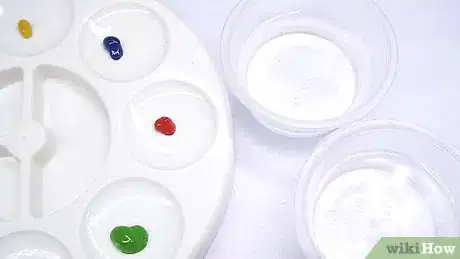
4Make a blob of each color your plan on using for your project. By preparing all your colors at once, you won’t be forced to hunt down your tubes one by one as you’re painting. If you’re working with a paint tray, squeeze a single color into each individual well. If you’re using a palette, leave 2–3 inches (5.1–7.6 cm) of space between each shade.[6]
- It’s very important to keep your colors separated as best as you can. Once one shade has become mingled with another, it can be nearly impossible to recapture its original color.[7]
-
5Fill two small containers with clean water and station them nearby. You’ll be using one of these containers to wet your brush when you begin mixing your concentrated paints with water. The second one will come in handy for cleaning excess pigment off of your brush between colors.[8]
- You can use just about any type of container as a water cup. However, those with large openings, such as drinking glasses, coffee mugs, and mason jars will work best.
- Be sure to use a container you can wash or throw away when you're done so you won't risk contaminating your dining ware.
Mixing Watercolors
-
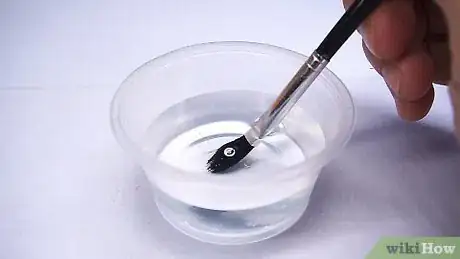
1Wet a soft-bristled paintbrush in one of your water cups. Dip the tip of your brush just below the surface of the water, then pull it back out. Once you’ve wet the bristles, tap the shaft of the brush against the edge of the cup a few times to shake off the excess moisture. You want it to be saturated, but not dripping.[9]
- A #8 round red sable watercolor brush makes a good all-around brush for painting with watercolors.[10]
- You may also want to keep a #4 brush and 1 in (2.5 cm) flat brush around for fine detailing and filling large areas, respectively.
-
2Make a small pool of water besides each color on your mixing surface. Press the tip of your brush onto a clean part of your paint tray or palette to release some of the water from the bristles. For best results, make sure your water pool is be about the same size as your paint blob, or slightly bigger.
- Make sure you’re starting with a clean brush.[11] If there’s any leftover pigment from past projects in the bristles, it will contaminate your new colors.
Tip: When mixing watercolors from a tube, you always want to apply your paint to your water and not the other way around.
-
3Dab the paint you want to use lightly with your wet brush. Sweep the tip of your brush over the surface of your chosen color. Avoid slathering it too heavily—just coat the edge enough to transfer a little color to your water pool.
- If you accidentally grab too much paint, wipe some of it off on the edge of the well or on a separate piece of scrap paper.
-
4Transfer the color to your water pool. As you do, you’ll notice traces of the pigment mixing with the water. The idea is to pull a little bit of color out of the concentrated paint at a time so as not to overdo it. Keep adding paint to your water pool gradually until you achieve the desired depth of color.[12]
- Remember, you can always add more pigment as needed, but you can’t take it away once it’s there.
-
5Brush the diluted pigment onto a sheet of watercolor paper. Now that you’ve got just the right shade, you can begin applying it to your paper. Guide the tip along using smooth, delicate strokes to ensure that the paint goes exactly where you want it and nowhere else.[13]
- Choose a type of paper with a weight of at least #140. Heavier papers not only absorb pigment better, but also prevent warping and wrinkling as you continue to layer on moisture.[14] [15]
- To paint broad areas, press more of the bristle into the paper, or switch to a brush of a different size (if you have more than one).
-
6Blend two or more colors to produce new combinations. Bringing together like and unlike colors is a simple way to make colors you don’t have, create interesting variations, and add subtlety to existing shades. Just pull a small amount of each color into the same pool and stir them thoroughly. Brush on the resulting shade the same way you would a single color.[16]
- Mixing primary colors like red and blue or blue and yellow, for example, can give you secondary ones like purple and green.[17]
- Always start a new water pool when mixing colors so you don’t contaminate your other paints.
Maintaining and Storing Watercolor Tubes
-
1Wipe off of your watercolor tubes when you’re done with them. As long as you hold your tubes vertically while squeezing out your paint, they shouldn’t ever get too messy. Even so, it’s a good idea to clean off any paint that happens to find its way onto the edges of the tube. You can do this with an ordinary paper towel or cleaning rag in just a few seconds.[18]
- If you don’t keep your watercolor tubes clean, the excess paint around the cap can dry out and turn crusty, effectively gluing it on. Needless to say, this can be frustrating!
Tip: For extra cleaning power, dip your paper towel or rag in mineral spirits before giving your tubes a wipedown.
-
2Keep all of your watercolor tubes together in one place. Rather than leaving your paints scattered all over your work area, bundle them up in a small and move them in and out of storage as a unit. You’ll cut down on the time it takes you to locate a certain color, and also lose fewer paints in the process.[19]
- Consider investing in a small carrying case to keep your watercolors organized. One of these will help you keep track of your art supplies while also making it easier to transport them from place to place.
- Another option is to designate one entire section your work area for your watercolors so you’ll always know where they are.[20]
-
3Store your watercolor tubes in a cool, enclosed space. Watercolor tubes can crack, split, or burst if they’re exposed to air or get too warm. To prevent this, place your paints in an airtight container before putting them into storage. A compartmentalized organizer with a locking lid or even an couple unused food containers can come in handy for this purpose.[21]
- If you don’t have a suitable container for your watercolor tubes, at least tuck them away in a drawer or closet so they’re not left sitting out.
- The better protected your watercolor tubes are, the longer they’ll last and the more use you’ll get out of them.
Expert Q&A
-
QuestionHow do you pick watercolor paper?
 Kelly MedfordKelly Medford is an American painter based in Rome, Italy. She studied classical painting, drawing and printmaking both in the U.S. and in Italy. She works primarily en plein air on the streets of Rome, and also travels for private international collectors on commission. She founded Sketching Rome Tours in 2012 where she teaches sketchbook journaling to visitors of Rome. Kelly is a graduate of the Florence Academy of Art.
Professional Artist Choose a paper that's at least a weight of #140. Heavy papers take color better and will remain undamaged once water is applied.
Things You’ll Need
- Watercolor paint tubes
- Plastic paint tray or palette
- Soft-bristled round watercolor paintbrush
- Watercolor paper (#140-weight or heavier)
- Clear, open containers (for water cups)
- Paper towels or cleaning rag
- Mineral spirits (optional)
- Additional paintbrushes in assorted sizes (optional)
- Various storage containers (optional)
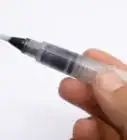
- Water brushes in assorted sizes (optional)
References
- ↑ https://mymodernmet.com/best-watercolor-paint-sets/
- ↑ http://somecallmebeth.com/watercolor-tubes-vs-pans-which-are-better
- ↑ https://www.youtube.com/watch?v=23ctbGC7rEg&feature=youtu.be&t=107
- ↑ https://watercolorpainting.com/beginners-guide-watercolor/
- ↑ https://www.youtube.com/watch?v=23ctbGC7rEg&feature=youtu.be&t=129
- ↑ https://www.prekinders.com/using-tube-watercolors/
- ↑ http://somecallmebeth.com/watercolor-tubes-vs-pans-which-are-better
- ↑ https://www.art-is-fun.com/watercolor-painting-supplies/
- ↑ https://www.youtube.com/watch?v=23ctbGC7rEg&feature=youtu.be&t=145
- ↑ https://watercolorpainting.com/beginners-guide-watercolor/
- ↑ Kelly Medford. Professional Artist. Expert Interview. 2 July 2019.
- ↑ https://www.youtube.com/watch?v=23ctbGC7rEg&feature=youtu.be&t=162
- ↑ https://www.youtube.com/watch?v=zlPD0xtkfJ0&feature=youtu.be&t=105
- ↑ Kelly Medford. Professional Artist. Expert Interview. 2 July 2019.
- ↑ https://watercolorpainting.com/beginners-guide-watercolor/
- ↑ http://www.watercolorpaintingandprojects.com/basics/mixing-two.html
- ↑ https://www.enchantedlearning.com/art/Colormixing.shtml
- ↑ http://somecallmebeth.com/watercolor-tubes-vs-pans-which-are-better
- ↑ https://www.youtube.com/watch?v=Jc9VpFUVO2s&feature=youtu.be&t=238
- ↑ https://www.thecreativityexchange.com/2016/01/creative-ways-to-organize-craft-supplies-and-paint.html
- ↑ https://www.cansonstudio.com/cleaning-and-maintaining-your-watercolor-materials
