This article was co-authored by Kelly Medford. Kelly Medford is an American painter based in Rome, Italy. She studied classical painting, drawing and printmaking both in the U.S. and in Italy. She works primarily en plein air on the streets of Rome, and also travels for private international collectors on commission. She founded Sketching Rome Tours in 2012 where she teaches sketchbook journaling to visitors of Rome. Kelly is a graduate of the Florence Academy of Art.
There are 9 references cited in this article, which can be found at the bottom of the page.
wikiHow marks an article as reader-approved once it receives enough positive feedback. This article received 28 testimonials and 93% of readers who voted found it helpful, earning it our reader-approved status.
This article has been viewed 1,116,645 times.
Painting is a great hobby that can alleviate stress and anxiety, and is a great outlet for creativity. There are a variety of different kinds of paint that all have their own characteristics, but watercolor is one of the hardest to master because it dries fast, and leaves little room for error. However, if you develop a good technique and have the right tools the sky's the limit on what you can paint.
Steps
Painting With A Pan Set Or Tubed Paint
-
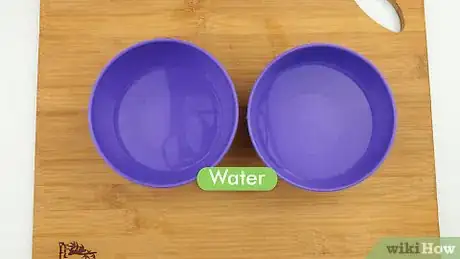
1Fill up two cups of water and put them next to your workstation. You will need a lot of fresh water if you plan on painting with watercolor paint. Place at least two cups of water next to your workstation so you don’t need to constantly get up and down. Leave one cup of water so you can wash the paint off your brush after you are done with a particular color, and then dip it in the other cup to wet it.
- When either cup of water gets murky brown or black you should empty it in your sink and get fresh water.
-
2Squeeze out the tubes of paint on your palette. If you are using a pan set, you don’t need to do this step, but you may still want to use a palette so you can mix your colors. Separate the colors into their own zones, and use extra space on your palette to mix the colors. You can create more colors than the ones you bought by mixing them together.
- You can get a wooden or plastic palette that you wash after use, or disposable paper palettes that come in a book.
- The three primary colors are red, blue, and yellow, and are impossible to achieve by mixing other colors but can be mixed together to create secondary colors.[1] Secondary colors are orange, violet, and green, and can be further mixed to make six tertiary colors.
Advertisement -
3Wet your brush in fresh water. It might be instinct to just dip your brush into the paint, but watercolor requires you to add water first. Make sure your brush is saturated, and dedicate one of your water cups to wet your paint-less brush.
- Weaker colors require less water, while richly pigmented paint can handle a lot of water without losing vibrancy.[2]
- To get a fine tip on a round brush, hold it in your hand and flick your wrist while it’s wet. You should do this over a paper towel so you don’t get paint and water everywhere.
-
4Dip your brush into the paint, and create a “puddle” on your palette. If you are using tubed paint, dip your wet brush into the color you want to use. Then transfer the paint on your brush to the palette in a circular motion. Add more water until you create a puddle of watercolor that can soaked up by your brush. If you’re using a pan, you should see a small puddle form on top of the colors you want to use. Keep adding water to your brush until this happens.
- When mixing, create a puddle exclusively for your new color.
-
5Apply broad strokes and get a feeling for the watercolor. Go from one side of the paper to the other in a thick line. Tilt your easel or workstation backward so that the watercolor bleeds down, and doesn’t get built up on the surface of your paper. The watercolor should be lighter than the color in your tube paint, and should uniform in tone. If you want to achieve a darker result, apply more paint to the same area.
- You can fill in a pencil drawing with water color or just do it free form.
- Watercolor may not feel as intricate as other paint like oil or acrylic, but that's what makes it so unique.
- Before you try to make a painting of an object, just get the feeling of painting with watercolors first.
-
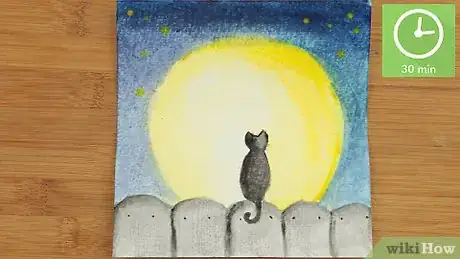
6Allow your painting to dry for at least 30 minutes. Avoid rubbing or touching the surface of your painting because it will smudge. Keep it in a dry area, and wait to see the results. When watercolor fully dries it typically looks lighter than when it’s wet.
- Unlike oil paintings, usually watercolors are done in a single sitting.
Painting With Watercolor Pencils
-
1Draw an outline of your painting with a pencil. You can use a mechanical or traditional no. 2 graphite pencil to do this. Start off with something easy, like a bottle that you have sitting on your desk, or a simple shape like a triangle or square. Avoid a lot of detail because watercolor is a skill you need to develop, and the paint has a tendency to bleed, making your details difficult to paint.
- If you’re not confident with your drawing skills the only way to get better is to practice. Start by drawing simple, flat shapes.
- Draw other static objects you find in your house to further develop your drawing skills.
- If you’re not confident, you can draw lighter lines so you can easily erase mistakes.
- Don’t try to scratch at your drawing with the pencil. Use confident and long strokes.
-
2Color your painting by filling in the shapes with the watercolor pencils. This will feel a lot like a coloring book. For this, you can use a simple back and forth motion until you’re satisfied with how much color is on the painting.
- The color from your pencils will look much darker and more vibrant once wet.[3]
- You can give your painting the illusion of depth or shadow by coloring some areas darker than others. Use multiple pencil strokes on a concentrated area of your painting to make it darker.
- Try more than one color so you can see how each one blends and interacts.
-
3Dip your brush into a cup of water. Make sure to fully saturate your brush with water to make the colors on your painting pop. You should keep two cups of water near your workstation at all times. One for cleaning your brush, and the other for wetting your brush once it's clean.
- If you don’t fully rinse your brush in water before switching colors, they will blend together and give your painting a muddy appearance.[4]
-
4Apply the wet brush to the filled in areas. Using a back and forth motion, brush over the colors in your painting. Go slow, and try to use long strokes, until your brush needs more water. At this point you should start to have a feeling for how the pencils work, and how your paper reacts to water.
- Use a smaller brush for more intricate areas.
- To remove paint that's gone out of the lines, paint over unwanted areas with a wet, paint-free brush.
Buying Your Equipment
-
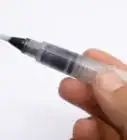
1Buy a size 5-8 round watercolor brush. Some watercolor artists only use a single brush. The most common brush you’ll use water coloring is a size 5-8, round brush.[5] A round brush has rounded bristles that come to form a fine tip at the end. They are versatile brushes, and can paint detail and larger areas. A good watercolor brush will be able to hold a lot of water and paint.
- Sable brushes are the best but most expensive brushes to use for water coloring.[6]
- If you’re on a budget, try buying a synthetic brush.
-
2Purchase watercolor pencils, tubed paint, or a pan set. Watercolor pencils are a great alternative to real paint if you’re a beginner. They work like regular pencils, but interact with water on paper to create paint. Tube watercolor paint looks similar to acrylic paint and needs to be diluted with water as well. Tubed paint is necessary if you want to paint on larger canvasses, or want to give a deeper and richer feeling to your watercolor paintings. Pan sets on the other hand are hardened paints that come as a box set.[7] Pan sets are great for smaller paintings, or if you’re on the go.
- If you are brand new to painting all together you should look into watercolor pencils. If you’ve painted using other mediums however, tubed paint will probably feel more familiar to you.
- Pan sets are great for beginners as well.
-
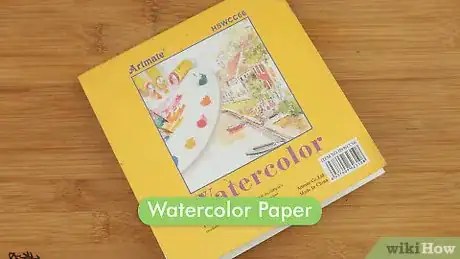
3Purchase watercolor paper. There are different varieties, weights, and textures of paper that you can get. Heavier paper is more expensive, but will be able to hold your paint better without warping, while lighter paper might buckle or wrinkle when touching water. Rough paper will take your paint and water well and gives your painting luminosity.[8]
- There is students’ and artists’ quality paper. Artist quality is higher grade and will stand the test of time, while student grade paper may yellow over time.
- The difference between regular paper and watercolor paper is the level of absorbency. Regular computer paper is too absorbent and will cause your paint to spiderweb.[9]
- Some paper is also tinted off white which can give your paintings a different effect.
Expert Q&A
-
QuestionCan you use watercolor on printer paper?
 Kelly MedfordKelly Medford is an American painter based in Rome, Italy. She studied classical painting, drawing and printmaking both in the U.S. and in Italy. She works primarily en plein air on the streets of Rome, and also travels for private international collectors on commission. She founded Sketching Rome Tours in 2012 where she teaches sketchbook journaling to visitors of Rome. Kelly is a graduate of the Florence Academy of Art.
Art Teacher & Painter Use printer paper for rough drafts and sketches. Printer paper is a little more flimsy than specialized watercolor paper, so painting on it usually leads to warping. But you can still use it to experiment with ideas or colors before committing to a final design.
 -
QuestionHow do I clean watercolor brushes?
 Community AnswerJust swirl them around in water a few times and they should be good. Unlike acrylics, the paint will not permanently damage your brushes if they aren't perfectly clean, as it will reactivate when in contact with water again.
 -
QuestionHow do you use water colour tubes?
 Community AnswerSqueeze a little bit of the paint out and then dip a brush in water. Then mix the water into the tiny blob of paint. It is now ready to use.
References
- ↑ http://willkempartschool.com/beginners-colour-mixing-acrylic-paint/
- ↑ http://www.nitaleland.com/faq/watercolorfaq.htm
- ↑ http://www.craftsy.com/blog/2014/04/watercolor-pencil-techniques/
- ↑ http://www.artistsandillustrators.co.uk/how-to/watercolour/330/painting-autumn-colours-watercolour-masterclass-with-paul-talbot-greaves-
- ↑ http://www.art-is-fun.com/paintbrushes-for-watercolors/
- ↑ http://www.art-is-fun.com/paintbrushes-for-watercolors/
- ↑ http://www.art-is-fun.com/watercolor-paint/
- ↑ http://www.art-is-fun.com/watercolor-paper/
- ↑ https://thepostmansknock.com/painting-with-watercolors-for-beginners/
- Videos provided by Wonder Forest
About This Article
To paint with watercolors as a novice, fill 2 cups of water and place them by your work station for getting fresh water and cleaning off your brush. Then, wet your brush and dip the wet brush into the color of your choice. Move the brush to the paper and use bold, long strokes to get a feel for how the paint moves on the page. If you want to make an area darker, go over it a few times with the brush to build up the paint. When you’ve finished painting, let the artwork dry for at least 30 minutes to prevent smudging or bleeding of the colors.
