X
wikiHow is a “wiki,” similar to Wikipedia, which means that many of our articles are co-written by multiple authors. To create this article, volunteer authors worked to edit and improve it over time.
The wikiHow Tech Team also followed the article's instructions and verified that they work.
This article has been viewed 44,056 times.
Learn more...
Padlet is an Internet site that allows you to collaborate with other users with text, photos, links and other content. Each collaborative space is called a “wall” It can also be used as a private bulletin board. Teachers and companies use Padlet to encourage creative multi-media conversations and brainstorming.
Steps
Part 1
Part 1 of 3:
Starting a Wall
-
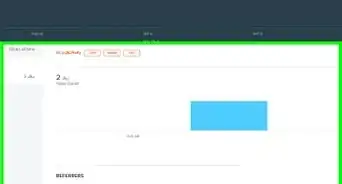
1Go to padlet.com. Click the button that says “Create Something” or “Make a Wall.” You will be sent to your own wall with a unique link.
-
2Drag a photo from your desktop or folders on your computer to place it on your wall. As long as you drag it onto the browser window, it will land on your wall. Click the center of the picture to move it around the wall, or use the arrows in the corners to make it bigger or smaller.Advertisement
-
3Double click on photo to name it. Type a title for the picture or a caption.
-
4Click or tap on an empty place on the wall. Start typing to create a message.
-
5View the small icons below your message. There is a link button, an upload button and a video button. Use these buttons to attach a multi-media element to your message.
- Click on the link icon to attach a URL to the message. This is also a good way to attach a photo, since you can link to an image on a website.
- Click on the upload link to choose a file from your computer.
- Click on the video link if you have a webcam. You can take a video, including audio, and post it to the page.
-
6Click on any element on the wall to make it larger and easier to see. Clicking the pencil icon in the upper right part of the post will allow the author or wall owner to edit it. Use a pinching motion to resize an image on another device, such as a mobile phone or tablet.
-
7Copy the URL in your browser. It should start with “padlet.com/wall/” and then include an alphanumeric code that is unique to your wall. Paste this in any browser to grant access to the wall.
-
8Select the plus sign in the right hand column to start a new wall.


Advertisement
Part 2
Part 2 of 3:
Changing the Settings
-
1Click on the cog in the right column. This icon will allow you to access your modification settings.
-
2Move from the top down in the tabs to modify the wall. Begin with the Basic Info, which includes the title and description. Type in these elements.
-
3Tap or click the next tab, Wallpaper. You can choose a paper or wood texture. Opt to use your own image or a vector image that is in the list.
-
4Choose the layout in the third tab. You can associate a random layout, or do a chronological stream. The third option is a grid, which looks like a Pinterest board.
-
5Click on the Privacy tab to choose whether you wall will be private, hidden, password protected or public. Padlet describes these options to you underneath each radio button. Click “Submit” to save these settings.
-
6Consider signing up for an account to share your wall. The rest of the privacy settings and the other tabs require this.


Advertisement
Part 3
Part 3 of 3:
Sharing Your Wall
-
1Click the “Sign Up” button to share your wall. Sign up using your email and other information. Confirm your signup and then return to your wall using the unique URL.
-
2Click the Log In button if you want to share your wall, but you aren't already logged in. Add emails in the “Add People by Email” section. Then, they will receive a link to access and edit the wall.
-
3Click the button to moderate your posts if you are using this wall in a teaching capacity. This means you must approve anything before it is posted. Click “Submit” to change your privacy settings.
- You can manage the notifications you get for posts in the Notifications tab.
-
4Create a custom wall URL in the Address tab. If you have an account, you will be able to choose an available URL that is easier to remember, such as “padlet.com/wall/mayberry.”[1]
-
5Sign into the wall in the first 24 hours to claim the wall and become the person who controls the wall. If you do not, the wall will remain public and anyone can claim it or edit it.
-
6Press the Delete tab to get rid of the wall if you are the owner. The site will ask for a confirmation.


Advertisement
Community Q&A
-
QuestionCan I create a folder of images or text or files on the Padlet?
 Community AnswerSadly, folders in Padlet have not been created yet, so no.
Advertisement
Things You'll Need
- Computer/tablet


References
About This Article
Advertisement