X
wikiHow is a “wiki,” similar to Wikipedia, which means that many of our articles are co-written by multiple authors. To create this article, volunteer authors worked to edit and improve it over time.
This article has been viewed 9,457 times.
Learn more...
Channel masks are a fairly easy way to make selections for difficult items like hair or trees, or to really finesse your masks to get some outstanding results. The following will show you how to use channel masking.
Steps
Method 1
Method 1 of 2:
RGB Channel Masking
-
1Open the image in Photoshop. Just about any version of Photoshop that has layers should have channels.
-
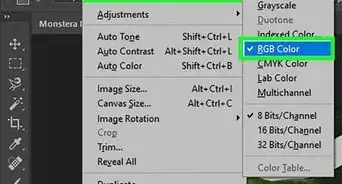
2Click on the Channels tab. If you don't see it, go to Windows >> Channels. The channels are RGB channels. All images are made of varying degrees of red, green, and blue.Advertisement
-
3Click on each of the channels to see which channel has the most contrast. Quite often, that is the blue channel, but it really depends on the colors of the image.
-
4Drag the chosen channel to the plus sign at the bottom of the channels window. This will create a copy of the channels. You make a copy because if you change the actual channel, you will change your image in pretty unpredictable ways.
-
5Click on the copy of the channel and press CtrlL. This brings up the Levels dialog window.
-
6Move in the two sliders on the end. The black and the white (shadows and highlights) sliders. You are trying to get even more contrast.
-
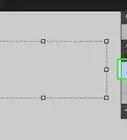
7Press down Ctrl while clicking on the layer that you just adjusted levels on. This will create a selection for a mask to be created with.
-
8Click on the layer that you want to apply the mask to, hold down Alt and click on the Mask icon. This will automatically create an inverted mask of the selection.
- Alternatively, you can invert the channel in the Channels tab.
-
9Remove the parts of the mask that you don't want. If there are parts of the mask that are exposing pieces of the image that you don't want it to, just use the brush and paint black on the parts that you don't want to show.
-
10Press Alt and click on the mask to see what your mask looks like.
-
11Press B for Brush and change the Mode to 'Overlay'.
-
12Select White as your foreground color and paint over the image where you want the white to be for cleaning up your mask.
-
13Select Black as the foreground color and paint over the image where you want the black to be.
-
14Apply your effect.


Advertisement
Method 2
Method 2 of 2:
HSB/HSL Channel Masking
-
1Duplicate your layer that you want to create a mask for.
-
2Go to Filter >> Other >> HSB/HSL.
-
3Go to the Channels tab. If you don't see it, go to Windows >> Channels. There are your three layers. Red is the Hue layer. Green is the Saturation layer and Blue is the Brightness/Lightness.
-
4Hold down Ctrl and click on the 'Green' layer. This will select the saturated colors in your image in their varying degrees.
-
5Delete the layer that you ran the HSB/HSL filter on.
-
6Click on the layer (or adjustment layer) that you want to apply the mask to and click on the mask icon.
- If you need to invert the mask for different effects, press CtrlI to get the opposite mask.


Advertisement


-Step-9-Version-2.webp)
About This Article
Advertisement