This article was co-authored by wikiHow Staff. Our trained team of editors and researchers validate articles for accuracy and comprehensiveness. wikiHow's Content Management Team carefully monitors the work from our editorial staff to ensure that each article is backed by trusted research and meets our high quality standards.
This article has been viewed 19,428 times.
Learn more...
Tatting is the process of creating lace. You can tat just by using your fingers, some thread, and a special spool that is known as a shuttle. To create stitches in tatting, you weave the shuttle in and out of loops of thread on your fingers. It may seem complicated at first, but with a little practice and patience you can tat your own beautiful lace projects.
Steps
Making Double Stitches
-
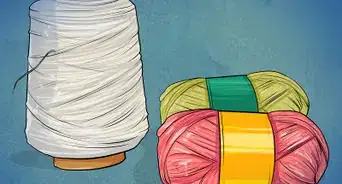
1Gather your supplies. Tatting is a simple craft because you only need a few items to do it. To start tatting, you will need:
- Thread in the colors of your choice.
- A shuttle with or without a hook. (If your shuttle does not have a hook, then you will need a small crochet hook as well.
- Scissors.
-
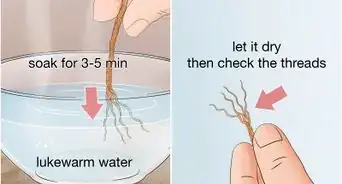
2Wind the shuttle. To wind the shuttle, tie a knot around the center of the shuttle’s spool. Then, begin to wind the thread around the shuttle. Make sure to distribute the thread evenly as you wind it onto the shuttle. Cut the thread when you can’t add any more.
- Wrap your thread around the shuttle until it just borders the edges of the shuttle. Don’t wind to much thread onto the shuttle or the string may get dirty.
- After you finish winding the shuttle, leave about 18 inches (46 cm) of thread hanging from the shuttle to begin tatting.
Advertisement -
3Create a ring with your fingers. Hold the shuttle between your index finger and thumb in your dominant hand. Then, hold the end of the thread with your other hand by placing the thread between your thumb and index finger. Then, spread out your other fingers and wrap the thread around them and back to your thumb and index finger to form a ring.
- Grasp this part of the thread with your thumb and index finger to secure the ring of thread on your fingers.
-
4Loop thread over opposite hand. Next, take the free end of the thread and wrap it around the middle finger of the hand holding the shuttle. This thread should create a half circle of thread, which you will use to create your first knot.
-
5Insert shuttle through the ring and over the top. Take the shuttle and insert it through the side of the ring that is facing you. Then, bring the shuttle up over the top of the ring and through the other loop you created. Pull the shuttle through and return it to your starting position.[1]
-
6Reverse the direction. The next stitch is just a reversal of the first one, but otherwise it is the same. For the next stitch, you will also need to loop the thread over the middle finger of your hand holding the shuttle to form a half circle. Then, you will insert the thread over the top of the ring first, then down and through the ring and through the loop you created.[2]
- Completing one of each type of knot (through and over along with over and through) is known as a double stitch in tatting.
-
7Pinch and pull to create a ring. After you have completed the desired number of stitches or the number indicated by your pattern, you can pull the free end of the string to form a ring of stitches. Just pinch the stitches and pull on the free end of the string to form a ring. They should slide easily into place.[3]


Creating Picots
-
1Start with a double stitch. A picot is a small decorative loop in tatting. Before you make your first picot, you will need to create a double stitch. Remember to complete two stitches for the double stitch. The first stitch goes through and then over the ring. The second stitch goes over and then through the ring.[4]
-
2Make a loop and don’t pull it through. After your double stitch, go through and over like you are going to make a new double stitch, but do not pull the thread into a tight knot. Instead, form a loop and pinch it with your thumb and index finger. Then, slowly pull the thread enough to tighten the stitch at the base of the loop, but not enough to pull the loop through.
-
3Follow with an over and through stitch. Each picot should be secured between two double stitches. The stitch you used to secure the loop counts as your first stitch in the double stitch, but you will need to follow with another one to complete the double stitch.
- Complete the double stitch by doing an over and through stitch. Pull this stitch to secure it and then follow with another picot or a double stitch.
- When you are finished with one picot, you should have a small loop secured between two double stitches.
-
4Connect rings with picots. Picots are decorative, but you can also use them to connect rings. Use a small crochet hook or the hook on your shuttle (if it has one) to pull a length of thread through two picots and connect those rings together. You can also use a picot to connect a ring to a chain.
- To connect a picot using a crochet hook or shuttle hook, insert the hook through the picot you want to connect, and then loosen it slightly so that your shuttle will fit through it. Push the shuttle through the loop, then tighten the loop again. Follow this with a double stitch.


Adding Chains
-
1Tie free ends of two shuttle threads together. Take the ends of the thread on two shuttles and tie them together. One piece of thread will be your base for the chain and the other will be your free end, which you will use to create double stitches and picots on the chain.[5]
- You can also use chains to connect rings of double stitches and picots. To do this, you would need to tie your second piece of string to the ring next to the last double stitch instead of tying two pieces of string together.
-
2Pinch the knot between your thumb and index finger. You will need to secure the bases of the two thread lengths to get started. The easiest way to do this is to pinch the knot you created between your thumb and index finger.
- If you are adding a chain to a ring, then you will need to pinch the string where you tied it to the ring.
-
3Wrap the free end of one shuttle around your pinky. It is important to secure the end of the base thread so that it will stay taut while you are working. Wrap the free end of one end of the thread lengths around your pinky finger.
- Make sure that you leave a few inches to extend between the knot you are pinching and your pinky.
- If you are adding a chain to a ring, then you will still need to do this. Wrap the string extending from the ring around your pinky finger. The ring thread will be your base for the chain and the new thread will be your working thread.
-
4Create double stitches on the length of string. Once you have secured the end of one length of thread, you can begin to create double stitched and picots on this thread. Hold the shuttle of your working thread and begin to create double stitches and picots as desired or according to your tatting pattern.
- Keep adding double stitches and picots to your chain until you complete your project.


Community Q&A
-
QuestionHow do I connect rings?
 Holly PacierCommunity AnswerRings are usually connected by their picots, the little loops of thread formed during the tatting process. See the article discussing tatting rings and picots for more information.
Things You'll Need
- Tatting shuttles
- Crochet hook (optional)
- Thread
- Scissors or snippers


References
About This Article