This article was co-authored by wikiHow Staff. Our trained team of editors and researchers validate articles for accuracy and comprehensiveness. wikiHow's Content Management Team carefully monitors the work from our editorial staff to ensure that each article is backed by trusted research and meets our high quality standards.
There are 19 references cited in this article, which can be found at the bottom of the page.
This article has been viewed 27,630 times.
Learn more...
Maybe your old yarn is missing a label, or you have a sneaking suspicion that yarn you've just purchased isn't what it claims to be. How can you uncover the truth, once and for all? We're here to help. Read on to learn 4 unique strategies that'll help you narrow down your yarn's material.
Things You Should Know
- Hold a small piece of yarn over a lighter with a pair of tweezers. If it burns quickly and starts to shrink, it's likely acrylic.
- Take two frayed sections of yarn and roll them together to combine them. If the frayed ends combine and stick together, the yarn might be wool or an animal-based material.
- Place a piece of yarn in bleach and see what happens. Animal-based fibers will eventually dissolve, while synthetic- and plant-based fibers won't.
Steps
Burn Test
-
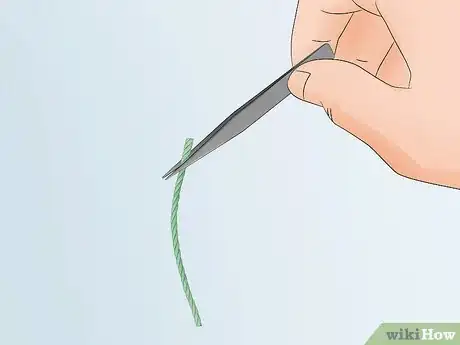
1Cut a small sample of yarn at least 4 in (10 cm) long. Before you do a burn test, snip off a small piece of yarn with scissors. Make sure it's long enough that you'll be able to hold the strand securely without getting too close to the end you’re going to light.[1]
- If you're not sure 4 in (10 cm) will be long enough, it's fine to cut it a little longer.
-
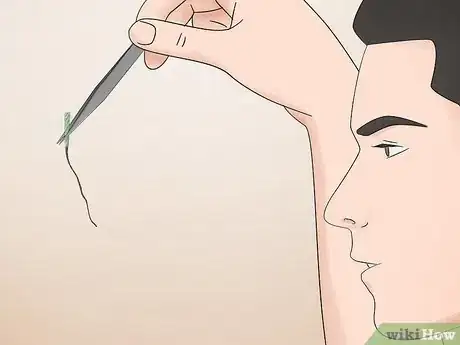
2Hold the yarn at one end with a pair of tweezers. It’s best to use something fireproof so you don’t have to risk getting close to the flames. Pick up the yarn with tweezers, then rotate it so the free end is face down. Lift the yarn up in the air so you are able to light the free end.[2]
- You can hold the yarn in your fingers, but be extra careful to avoid the flames.
Advertisement -
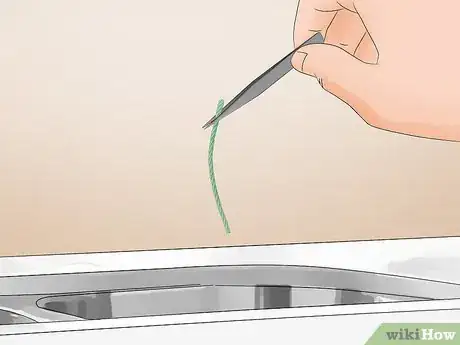
3Move the yarn over your sink for safety. Do the test over the sink. It will give you an easy way to put out the fire, especially if you have to do it in a hurry. If you’re unable to do the test over a sink, you could also do it over a bowl of water.[3]
- Make sure you’re working over a non-combustible surface. Stay away from anything that could potentially catch fire. You can do the test over any non-combustible surface, but have water nearby just in case.
- For additional safety, make sure you won’t be disturbed while you’re burning the yarn. Keep pets and children out of the room temporarily.
-
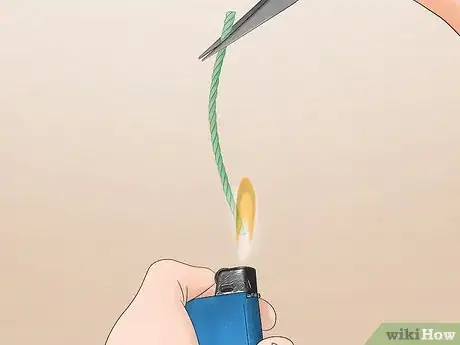
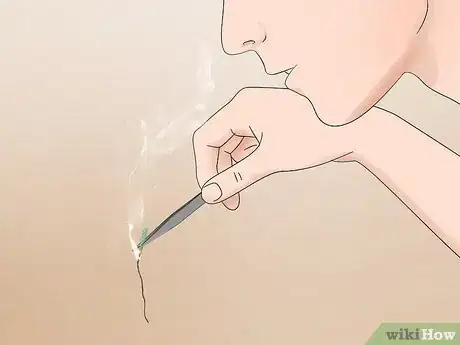
4Light the yarn at one end with a candle or lighter. While holding the yarn up in the air, move the flame toward it. Touch the tip of the flame to the bottom edge of the sample until it catches fire. Move the flame away afterward to prevent the yarn from burning too quickly.[4]
- Light only the end of the yarn. You don't have to burn the entire sample to finish the burn test.
-
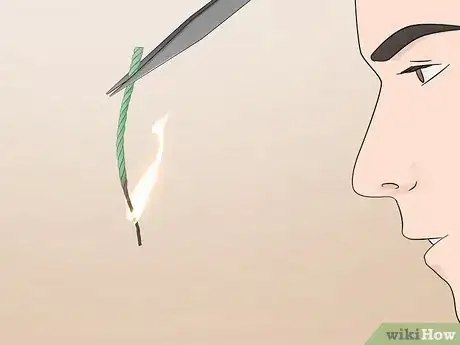
5Watch how quickly the yarn burns to see if it’s organic. Yarns made from plant fibers tend to burn the quickest. If you see smoke, a white light, or light-colored ash, then you have a plant-based fiber. Synthetic fibers also burn quickly, but they have a strong, black smoke and don’t stop burning once you put the fire out. Anything made from animal fibers will burn up at a slower rate while also curling away from the flame.[5]
- Cotton burns right away and has a yellow-colored flame. Linen is similar, but it burns more slowly.
- Hemp and jute burn similarly to cotton, but both have a very bright flame.
- Silk and other animal threads burn slowly without melting. They all shrink like synthetic yarn does. Silk chars, but animal fibers like wool burn orange.
- Acrylic yarn and most other synthetics burn at a quick rate and shrink from the heat. Nylon and polyester burn more slowly than acetate and acrylic. Spandex doesn’t shrink.
-
6Smell the yarn as it burns to see if it smells like wood or hair. Move the yarn very cautiously toward you if you have to in order to get a good whiff of it. Plant-based yarn smells like burning wood, while animal-based yarn smells like burning hair. Synthetic yarns are the easiest to distinguish, since most types smell particularly nasty.[6]
- Cotton, linen, hemp, jute, and rayon are all similar. Cotton and rayon smell like wood, but the others tend to smell more like rope.
- Silk smells sort of similar to charred meat or burning hair.
- Wool and other animal fibers always smell like hair or feathers.
- Acetate smells kind of like paper and vinegar.
- Acrylic yarn smells strong, unpleasant, and fishy.
- Nylon and polyester smell much milder than acrylic yarn. Nylon has a slight celery scent, but polyester smells pretty neutral overall.
-
7Blow out the fire to check the ash left on the yarn. The color and quality of the ash can help if you’re still feeling a little unsure about what kind of yarn you’re holding. After the flames are gone, touch the ash with tweezers. Make sure you can’t feel any heat coming off of the yarn before trying to touch it with your fingers. Note the ash’s color and how easily it crumbles.[7]
- Cotton yarn looks brown on the end with a fine, feathery gray ash. The yarn won’t look melted.
- Linen, hemp, and jute will all look similar to cotton, but the ash stays in the shape of the yarn.
- You won’t see much residue left on burned rayon. It melts slightly, leaving fluffy, black ash.
- Animal-based yarns don’t melt, but they leave a black bead behind that can be crushed into a gritty, black powder. They also burn out on their own.
- Synthetic yarn leaves a solid, black bead. Be careful, since it always continues burning for a little while even after you put out the fire. Polyester leaves more of a tan or cream-colored residue, while spandex has a soft, sticky black ash.
Felting Test
-
1Cut a pair of 4 in (10 cm) pieces of yarn. The samples have to come from the same ball of yarn in order for the test to work. You could measure out a single strand, then cut it in half with scissors. The pieces don’t have to be exactly the same size, but they should be big enough for you to easily work with by hand.[8]
- Felting is when you fuse pieces of yarn together by hand. It can’t be done with most types of yarn, so it’s useful for recognizing wool and other animal products.
- Another way to do this is to dampen a strand of yard, roll it into a ball, and see if it sticks together.[9]
-
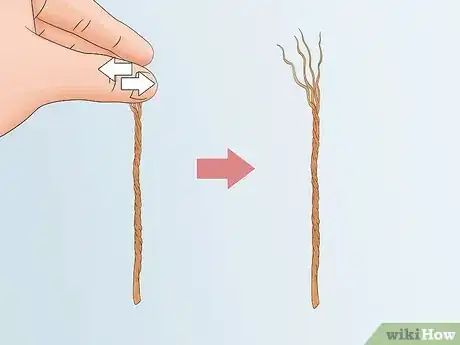
2Fray the ends of the yarn by wetting and rubbing them. Dampen the yarn lightly in lukewarm water in your sink. To separate the individual strands, roll the wet ends back and forth between your fingers. As the threads start to loosen, pull them apart. Divide them up into two even groups.
- For example, if the yarn is made up of 6 individual fibers, separate them into groups of 3.
- You only have to fray the ends you plan on sticking together for the test.
-
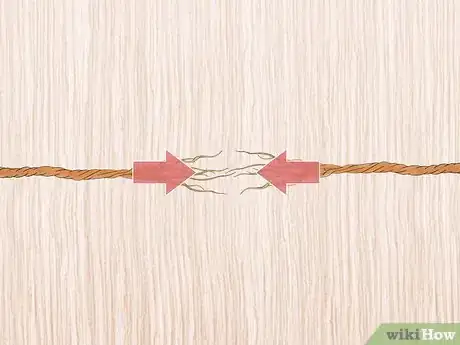
3Push the frayed ends together to combine them. Place the yarn on a table while holding a piece in each hand. Point the frayed ends toward one another. As you combine them, make sure the loose threads overlap.[10]
- Keep the yarn on a flat surface. The pieces will be easier to combine that way. If you try doing it while holding the strands up, they will come apart before you have a chance to finish the test.
-
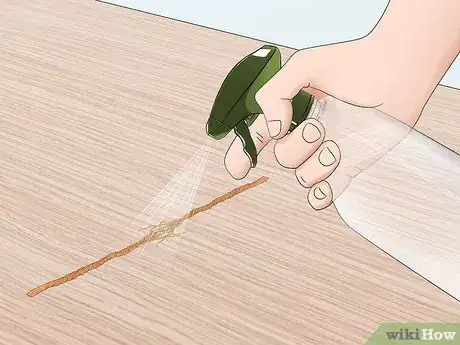
4Spray the yarn with lukewarm water to dampen it. The individual threads will probably be a little dry, so they won’t stick together. Take a spray bottle and lightly mist the frayed strands. Make sure they are damp all over so they stay stuck together.[11]
- You could also dip the yarn into water, but be careful not to pull the threads back apart. It’s easier to wet your fingers and then rub the water into the strands.
-
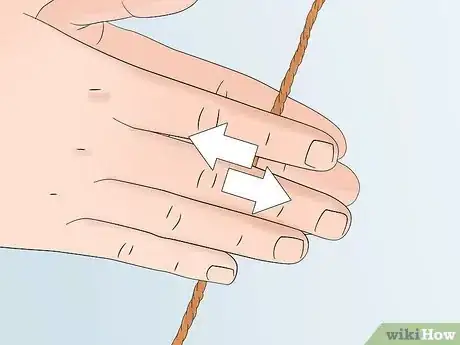
5Roll the frayed yarn between your hands to combine the strands. Rub the frayed part quickly between your hands. Doing this will roll the strands together while also drying them out. Keep rubbing until the yarn feels completely dry.[12]
-
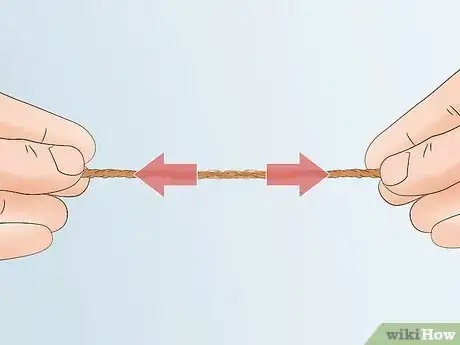
6Pull the yarn samples apart to see if they stick together like wool. Hold onto both of the combined samples and tug them in opposite directions. If the yarn sticks together, then it could be wool or another animal-based material. If it doesn’t stick, you won’t have to pull very hard to break it apart.[13]
- Wool is very common in felting, but other material, like angora, alpaca, and llama fur also stick together. Even silk is good for felting.
- If you’re still unsure about what kind of yarn you have, do some other tests. Burning or bleaching a sample could help you get more information.
Chemical Test
-
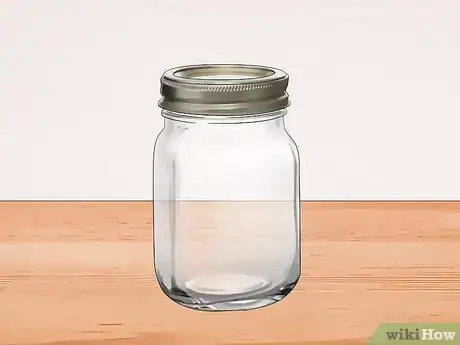
1Select a clear, glass container with a lid. If you have a spare Mason jar, it’s the best thing to use for the test. You can put the bleach in, submerge the yarn, then seal it back up. Keep in mind that bleach is harsh and stains a lot of surfaces. If you’re able to, use a spare container that you won’t be too upset about losing.[14]
- Bleach is unlikely to damage a glass, and you can easily wash out the container afterward if you plan on reusing it.
- Plastic containers are also safe to use in most cases. You could try reusing a jelly jar, for instance.
- A lidded container is better since you can seal the bleach in. Bleach fumes are very strong and harmful to breathe in, so keep the jar covered.
-
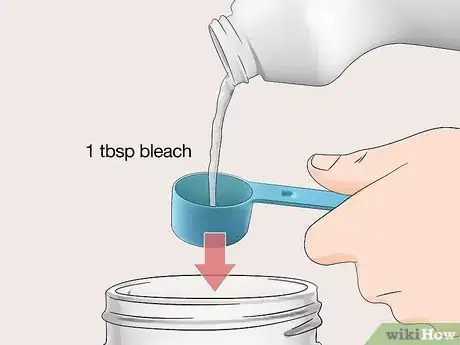
2Fill the jar with about 1 tablespoon (15 mL) of household bleach. Choose regular chlorine bleach rather than a color-safe alternative. Measure out the bleach and pour it directly into the jar. The exact amount of bleach you use doesn’t really matter as long as you have enough to cover the piece of yarn you’re testing.[15]
- Color-safe bleach is made with hydrogen peroxide. It’s not as strong as regular bleach, so it could throw off the test.
- Once you have the bleach out, make sure no one else can mess with it. Keep children and pets away from it for their own safety.
-
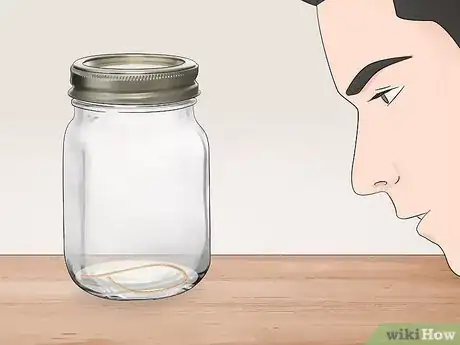
3Cut a 6 in (15 cm) piece of yarn to put in the bleach. Trim the sample from the roll with scissors, then drop it into the bleach. It will float on the surface instead of sinking to the bottom of the jar, but that is fine. Push it down with something like chopsticks until it’s saturated. Seal up the container to begin the test.[16]
- The yarn doesn’t have to stay submerged in order for the test to work. As long as you get bleach all over it in the beginning, the organic material will dissolve.
-
4Check back at least every 12 hours to see how the yarn changes. Bleach is strong, so you will see the yarn gradually dissolve over time. It doesn’t take long, although some types of material hold out much longer. If you’re uncertain about what kind of yarn you have, just keep waiting and watching as the yarn dissolves.[17]
- If you have ever spilled bleach on a shirt, you know how quickly it works. You may start to see results as soon as 5 minutes after starting the test!
- Keep the jar sealed and stored in a safe place where it won’t be opened or knocked over.
-
5Determine if there are any plant or synthetic fibers left in the bleach. Plant and synthetic fibers don’t dissolve at all. To tell them apart, check the yarn’s color. Plant-based materials like cotton lose their color completely. Animal-based yarn, such as wool, dissolves over time. When you’re done with the test, pour the bleach into your sink, then throw away the leftover yarn.[18]
- Wool and other animal products fizz not long after you drop them into the bleach. They dissolve within a day. Silk yarn is a little slower to disappear, but it will still dissolve within 2 days.
- Bleaching is a great way to distinguish blended yarn. If you notice that the yarn bubbles, then partially dissolves, it’s blended. It is usually something like 50% wool or silk and 50% acrylic.
- The bleach test is great for telling you what kind of yarn you have, but not what specific type. For example, you won’t be able to tell apart wool and alpaca hair without inspecting them on your own.
-
6Place yarn in nail polish remover if you think it’s acetate. For an alternative test, fill a small bowl or jar with nail polish remover, then drop the yarn into it. Acetate, a type of synthetic yarn, dissolves almost immediately in acetate. Other types of yarn won’t dissolve at all.[19]
- The acetone in nail polish remover is what dissolves acetate yarn. On other types of yarn, such as those made with color-safe wool, acetone removes stains.
- Acetone can discolor some types of yarn, so make sure the yarn is actually dissolving instead of changing color.
Appearance and Texture
-
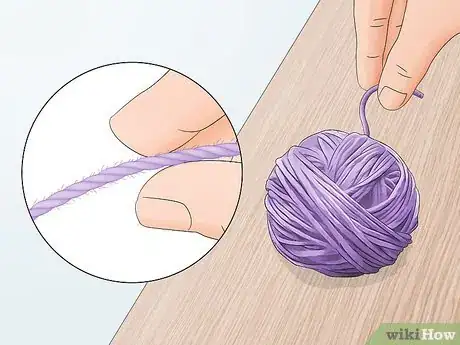
1Touch the yarn to feel if it’s scratchy like cotton. Run your fingers along the loose piece of the yarn. If you see any frayed strands, roll them between your fingers too. Cotton feels much softer and smoother than something like wool, for instance. Other plant-based yarn, such as those made from hemp or jute, feel rough and somewhat rigid.[20]
- Silk is some of the smoothest material out there, so it’s very easy to distinguish. Silk thread is very fine, even thinner than cotton or synthetic material.
- Hemp and jute have a unique brown coloring you can use to help distinguish them. Ramie, made from nettles, is also thick, stiff, and not very pliable. It’s usually mixed with cotton.
- Animal products like wool are soft, but can make you feel a little itchy. The strands in these types of yarn are different sizes and are not very pliable.
- Synthetic materials are very difficult to tell apart outside of a lab. It tends to be soft with a consistent thickness. Try burning a sample to determine what kind of synthetic thread you have.
-
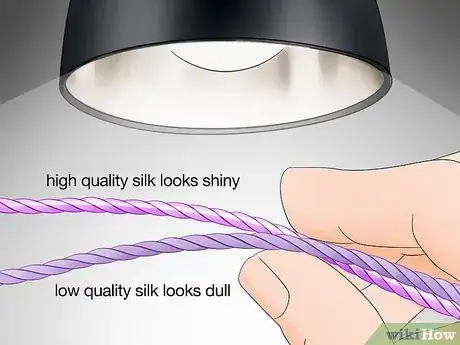
2Shine a light on the yarn to see if it is reflective. Take the yarn to a well-lit area and hold it under a lamp. Most animal fibers look pretty dull under light. Silk is the exception, and high-quality silk can even look like it’s glowing. Many synthetic fibers also shine, but less consistently.[21]
- Most animal products, including lower-quality silk, look dull and dark. It absorbs light.
- Acrylic yarn sparkles from the material inside of it. It looks like it is made up of small grains of sand.
- Cotton and other plant products are mostly dull. Specialized ones like bamboo and mercerized cotton shine like a reflective mirror.
-
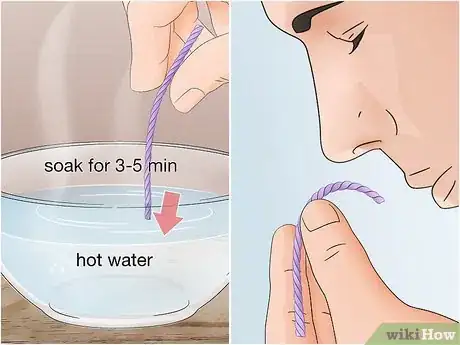
3Soak the yarn in hot water to see if it has an animal smell. Cut off a small sample, such as a piece about 4 in (10 cm) long, then soak it in hot water. You could boil some water or fill your sink, for instance. Drop the yarn into the water and wait 3 to 5 minutes for it to saturate. Afterward, pull it out and smell it.[22]
- Animal-based wool smells like animal hair. It usually smells similar to a wet dog or sheep. Cotton, alpaca, and other types of wool always smell a little when wet.
- Synthetic fibers don’t really have a strong scent, even when wet. You might be able to detect an oily, artificial smell sometimes. Synthetics also can absorb odors from nearby things.
- Many plant-based yarns, such as cotton, don’t have much of a smell, but burning them can help you identify them.
-
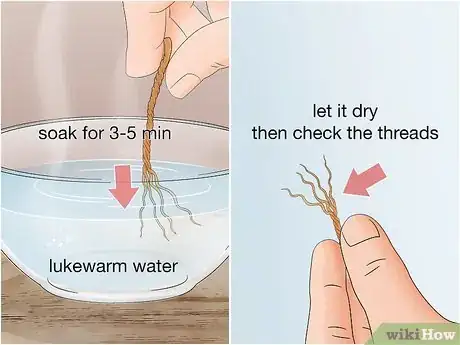
4Unravel wet yarn to check if it is made up of straight plant fibers. Pull apart the individual fibers on the end of a yarn sample, then soak them in lukewarm water. After about 3 to 5 minutes, pull them out to air dry. Each type of yarn has a distinct appearance when you look at them up close. Check how straight and consistent the various threads appear to be.[23]
- If you have a microscope available, you have a much better chance of determining exactly what kind of yarn you have. Synthetic yarns, in particular, are difficult to tell apart outside of a lab.
- In general, animal fibers twist and curl a lot. The exception is some types of alpaca hair that normally grow straight.
- Plant-based fibers look straight, like they have been pressed with an iron. Cotton and bamboo are a couple of examples. Silk is technically an animal-based fiber, but it also looks straight.
- Most synthetic fibers also look straight, although they don’t always look as perfect as plant fibers. Acrylic ones tend to be thin and consistently wavy, so they are often easy to distinguish from animal fibers.
Warnings
- Chlorine bleach is very strong, so be careful not to spill or breathe it in.⧼thumbs_response⧽
- When burning a piece of yarn, keep the flame away from flammable surfaces as well as your fingers. Work over a sink or a bowl of water in case you have to put out the flame.⧼thumbs_response⧽
Things You’ll Need
Inspecting Yarn Visually
- Lamp light
- Scissors
Performing a Felting Test
- Scissors
- Bowl or spray bottle
Burning a Yarn Sample
- Tweezers
- Sink or bowl
- Scissors
- Lighter or candle
Dissolving Yarn in Chemicals
- Resealable glass container
- Scissors
- Household bleach
References
- ↑ https://www.youtube.com/watch?v=kb4tCcnA6jo&feature=youtu.be&t=7
- ↑ https://www.canada.ca/en/conservation-institute/services/conservation-preservation-publications/canadian-conservation-institute-notes/identification-natural-fibres.html
- ↑ https://www.youtube.com/watch?v=BO5alWu2MiU&feature=youtu.be&t=39
- ↑ https://www.canada.ca/en/conservation-institute/services/conservation-preservation-publications/canadian-conservation-institute-notes/identification-natural-fibres.html
- ↑ https://sewguide.com/fabric-testing-identification/
- ↑ https://images.taunton.com/downloads/th/T168_Burn_Test_Chart.pdf
- ↑ https://images.taunton.com/downloads/th/T168_Burn_Test_Chart.pdf
- ↑ https://www.youtube.com/watch?v=dwBPeqBsXkA&feature=youtu.be&t=9
- ↑ https://oconto.extension.wisc.edu/files/2013/09/The-Science-of-Felting.pdf
- ↑ https://yarnsub.com/articles/techniques/joining-yarn/
- ↑ https://yarnsub.com/articles/techniques/joining-yarn/
- ↑ https://www.youtube.com/watch?v=dwBPeqBsXkA&feature=youtu.be&t=80
- ↑ https://www.youtube.com/watch?v=zUgFuNqLoLA&feature=youtu.be&t=17
- ↑ https://www.youtube.com/watch?v=ifdHH0fvyBY&feature=youtu.be&t=66
- ↑ https://www.youtube.com/watch?v=8V46m_nDcOw&feature=youtu.be&t=22
- ↑ https://www.youtube.com/watch?v=8V46m_nDcOw&feature=youtu.be&t=43
- ↑ http://co4h.colostate.edu/statefair/score-sheets/Textile-Experiments.pdf
- ↑ https://www.fcs.uga.edu/extension/textile-basics-understand-your-fibers
- ↑ https://www.fcs.uga.edu/extension/textile-basics-understand-your-fibers
- ↑ https://content.primecp.com/master_images/files/Types-of-Yarn-Chart-AFC.pdf
- ↑ https://www.chem.fsu.edu/chemlab/chm1020c/Lecture%2011/03.php
- ↑ https://www.chem.fsu.edu/chemlab/chm1020c/Lecture%2011/03.php
- ↑ https://www.youtube.com/watch?v=Rj82EPee0VA&feature=youtu.be&t=7
- ↑ http://scienceline.ucsb.edu/getkey.php?key=765

