This article was co-authored by wikiHow staff writer, Jessica Gibson. Jessica Gibson is a Writer and Editor who's been with wikiHow since 2014. After completing a year of art studies at the Emily Carr University in Vancouver, she graduated from Columbia College with a BA in History. Jessica also completed an MA in History from The University of Oregon in 2013.
There are 7 references cited in this article, which can be found at the bottom of the page.
The wikiHow Video Team also followed the article's instructions and verified that they work.
This article has been viewed 16,389 times.
Learn more...
Wool is an incredibly versatile material to work with. This natural fiber is known for its durability and absorbency, which makes it great for outerwear. It can also be thick and fuzzy so it's perfect for appliqué projects where you want to add a little texture. Before you begin, learn a few tips and techniques to make hand-stitching wool easier and more enjoyable.
Steps
Pre-washing and Pressing Wool
-
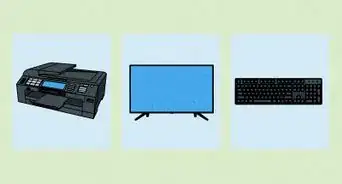
1Choose woolen fabrics or worsted woolen fabrics for your project. Wool comes in a tremendous variety of weights, textures, and styles so it's important to find the right one for your project. Woolen fabrics are inexpensive, fuzzy, and easy to felt so they're great for felt appliqué, blankets, or outerwear. For stronger, more durable clothing or upholstery, look for worsted woolen fabrics which have longer wool fibers.[1]
- For example, if you're making a dress or suit, pick gabardine or twill material. For a medium-weight skirt or rug, use flannel or tweed.
-
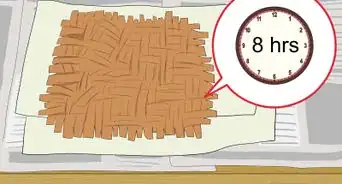
2Prewash your wool fabric or felt and air dry it completely. Wool does have a tendency to shrink so it's best to wash and dry it before you cut it for your project. If you're using wool fabric, read the care instructions to see if you can machine wash it on a gentle cycle. If you're unsure or you're working with felt, wash it by hand. Squeeze your fabric gently to remove most of the water and then lay it flat to air dry.[2]
- Don't twist or wring the fabric or felt because this can damage the fibers.
Tip: To hand wash the fabric or felt, fill a clean sink with lukewarm water and a few drops of gentle laundry detergent. Submerge the material and swish it with your hands before you rinse it with lukewarm water. Then, squeeze the material and lay it flat to dry.
Advertisement -
3Use sharp scissors or a rotary cutter to cut the wool. If you're working with woolen fabric, lay it flat and use scissors to cut it according to your pattern. To cut small pieces or woolen felt, lay the material on a cutting mat and use a rotary cutter to create the pieces.[3]
- If you're cutting really small pieces of felt, use short scissors so they're easy to handle.
-
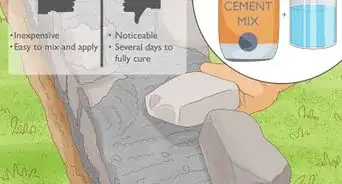
4Lay a press cloth over the dry wool before you iron it smooth. It's easy to accidentally damage the wool with an iron that's too hot. If you need to smooth your woolen fabric, lay a dry cloth over the material and use your iron on the wool setting. This setting uses steam so the fibers don't dry out and shrink.[4]
- If you're using dark wool or lightweight worsted wool, lay the wrong side of the fabric on your ironing board before putting the press cloth on it. This prevents the fabric from becoming shiny.
- To prevent color transfer, use a white press cloth if you're ironing light-colored wool.
Sewing Wool Edges
-
1Pick a sharp hand needle that matches the weight of your fabric. Sharp needles are key for stitching through bulky wool fabric or felt. If you're hand-sewing fabric, choose a needle size that matches the fabric weight. For example, if you're sewing a medium-weight woolen, use size 70/10 to 80/12 needles. Heavy-weight fabric needs 90/14 size needles.[5]
- If you're using embroidery floss for an appliqué project, you can use a sharp hand needle or an embroidery needle depending on which is easier for you to thread.
-
2Use a medium-weight thread or embroidery floss. Since wool is a heftier fabric than most lightweight blends, choose medium-weight cotton, silk, or wool thread. If you'll be hand stitching wool felt, select embroidery floss so it will show up easily on the felt.[6]
- Embroidery floss comes in different materials, so you could use cotton floss if you want a thinner design or wool floss, which comes in double strands for a thicker look.
-
3Make the whip stitch to create an angled edge for the wool. To quickly sew the edges of wool pieces together, stack them so they line up. Bring a threaded needle through the middle of the pieces and up through the top layer near the edge. Then, draw the needle from the bottom up through both layers so the needle comes out about 1⁄8 inch (0.32 cm) to the side of where you started.[7]
- As you work the whip stitch, you'll see it form a slight angle along the edge of the wool fabric.
-
4Work a blanket stitch for a straighter edge. To create a crisp edge that holds your layers of wool together, do the blanket stitch. Stack the edges of your wool and insert a threaded needle between the layers and up through the top layer. Insert your needle from the bottom layer up through the spot you just pulled through. Before you pull the loop tightly, insert your needle through it and pull it from left to right.[8]
- Starting the blanket stitch in the middle of your wool layers hides the knot.
Variation: To give your blanket edge a different look, make the stitch lengths get larger and smaller as you work across the edge. This makes a graded or scalloped appearance.
-
5Trim the edges to reduce bulk from the seams. Wool is notoriously bulky, so you might find that the seams of a garment bulge out. To make your seams more flexible, take a pair of scissors and cut the excess fabric to about 1⁄4 inch (0.64 cm) from your seam allowance.[9]
- If you're working with a collar or neckline, your patten might direct you to grade the edge. This means you need to trim just the top layer of the seam allowance so you have enough fabric on the bottom to enclose the seam allowance.


Things You'll Need
- Sewing needles
- Embroidery floss or thread
- Scissors
- Wool or felt fabric
- Gentle laundry soap


References
- ↑ http://www.sewing.org/files/guidelines/4_225_wool.pdf
- ↑ https://youtu.be/rNreP6sA0JE?t=117
- ↑ https://youtu.be/XsNhfzRwMxA?t=51
- ↑ http://www.sewing.org/files/guidelines/4_225_wool.pdf
- ↑ https://www.joann.com/on/demandware.static/Sites-JoAnn-Site/Sites-joann-project-catalog/-/images/hi-res/project/pdf/PA00220.pdf
- ↑ https://youtu.be/Nhvr44hJaws?t=145
- ↑ https://youtu.be/kTDKY_iTn3g?t=69
- ↑ https://sewguide.com/blanket-stitch/
- ↑ http://www.sewing.org/files/guidelines/4_225_wool.pdf
About This Article