This article was co-authored by Lois Wade. Lois Wade was a high school librarian for four years. She is experienced in repairing books, resewing bindings, and protecting books, along with general book care and organization.
wikiHow marks an article as reader-approved once it receives enough positive feedback. This article received 11 testimonials and 100% of readers who voted found it helpful, earning it our reader-approved status.
This article has been viewed 494,514 times.
Do you have a trade paperback that has fallen on hard times? If you've got loose or torn pages, a detached cover, broken binding, or dirty smudges all over your book, don't fret. It's fairly simple to resurrect the book for a few more years of good reading. Depending on what you're looking to fix, you can get your book up and running again with some glue or tape, an eraser, patience, and a steady hand.
Steps
Inserting Loose Pages
-
1Open the book where the loose pages belong. If a few pages in your book have come loose, not to worry. Open your book to the spot where you'd like to insert the loose page.
- If the book doesn't stay open on its own, make sure to weigh down the pages with a paperweight. This way the book won't start closing before you're done inserting the loose page.[1]
-
2Apply a thin line of glue along the binding of the page in the book. Place a thin line of archival glue along the vertical edge of the page to which you'd like to adhere your loose page. The glue should be as close to the binding as you can get it. Make sure you're using an archival glue, which should be acid free.
- Do not glue multiple loose pages onto one another as this will not be stable over time.
- You can purchase archival glues from craft stores or an archival supplier.
Advertisement -
3Insert the page back into place. Carefully place the page back into place, taking care to align the edges of your loose page with the edges of adjacent pages.
- To prevent any glue from oozing out, you can put a piece of wax paper along the page to soak up any escaping glue. This way your pages won't glue together.[2]
-
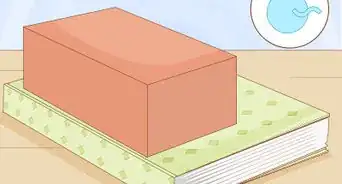
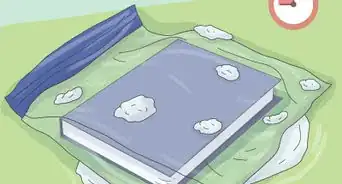
4Close the book and place it under weights. To ensure the page lays flat within the book while it's drying, weigh down the book with another heavier book.[3]
-
5Leave the book to dry for 24-48 hours. While archival glue will dry within a few hours, it's best practice to leave the book for at least 24 hours to set.[4]

Repairing Torn Pages
-
1Identify the direction of the tear. On the torn page, identify if the tear has a single direction. If it doesn't, you'll want to repair only one direction of the tear at a time.[5]
-
2Cut a strip of tape a 1⁄4 inch (0.6 cm) longer than the tear. Cut your archival tape a 1⁄4 inch (0.6 cm) longer than the tear so the repair will be more stable.
- You should be selective with what kind of tape you use. An archival document repair tape will be safest for your book.[6]
-
3Place the tape along the tear. Center the tape over the tear so the tape will extend beyond the tear in both directions. Then place the tape along the tear and smooth it down with your hands or a stiff folder.[7]
- If using a stiff folder, use the folder's edge to smooth the tape down.
Mending a Detached Cover
-
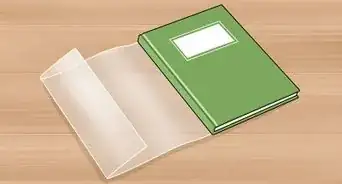
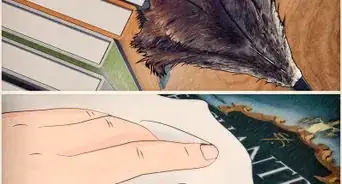
1Open the cover on a flat surface. Place the cover open on a flat surface in front of you.
- If the cover of your book is extremely loose, but not fully detached, you can gently peel it away from the textblock, the part of the book that's contained within the cover.[8]
-
2Brush archival glue onto the spine of the textblock. Using a small paintbrush, evenly apply archival glue along the spine of the textblock and let it dry for ten minutes.
-
3Apply a thin coat of archival glue along the spine of the cover. Using your paintbrush, evenly apply glue along the spine of the cover's inside.[9]
-
4Place the textblock back into the cover. Aligning the textblock spine and cover spine with one another, place the textblock back into the cover of the book.
- You can place wax paper between the cover and the first and last pages of the book to prevent any oozing of glue.[10]
-
5Close the book and place weights on top of it. Securely close the book, making sure everything is aligned correctly. Then place a heavier book on top to weigh it down while it dries.
-
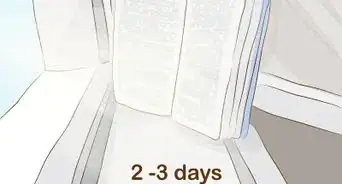
6Leave the book to dry for 24-48 hours. While archival glue will dry within a few hours, it's best practice to leave the book for at least 24 hours to set.[11]

Fixing a Break in the Binding
-
1Open the book where the binding is broken. Open your book to where the glue binding has broken. You'll know this has happened because your book will fall easily open to the break, and you'll be able to see the binding glue. Repairing this will ensure that pages or segments of pages don't fall out of your binding.[12]
- The glue binding of thick paperbacks, in particular, are notorious for partially breaking while you're reading.
-
2Apply a thin line of archival glue along the seam. Carefully apply archival glue along the interior seam of the book where the old glue is exposed.
- You can use a small brush if you'd like to more evenly apply the glue.
-
3Close the book and use rubber bands to secure it. Close the book securely and put two rubber bands around it to keep it stable. Place one rubber band towards the top of the book and another towards the bottom.[13]
-
4Leave the book to dry for 24-48 hours. While archival glue will dry within a few hours, it's best practice to leave the book for at least 24 hours to set.[14]

Cleaning the Book
-
1Use a dry cleaning sponge to remove surface dirt. Use a dry cleaning sponge, which is a block of vulcanized rubber found at archival stores, to gently rub away dirt. Brush away any residue with a soft brush or soft brush attachment on your vacuum.
- Do not ever use water with your sponge. This will cause permanent damage to your book.
-
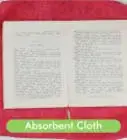
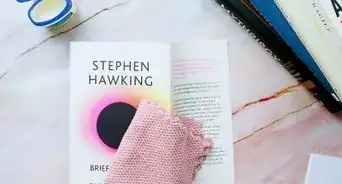
2Absorb grease stains with paper towels. If you've got a pesky grease stain, you can place paper towels along the stain and close the book. This should absorb the grease from a freshly made stain.[15]
-
3Erase away pencil marks. Using a plastic eraser you can remove pencil marks by erasing in a forward motion. Brush away the eraser dust with a soft brush or vacuum.[16]
- Ink marks cannot be removed.
Community Q&A
-
QuestionHow do I fix a crease on the cover of a book?
 Community AnswerPlace heavy things on top of the book for a while; the crease should come out or lessen in severity.
 -
QuestionWill this work with hardcover books too?Community AnswerRepairing loose or torn pages will be the same for hardcover books. You should also be able repair a loose hardback cover in the same way. However, hardback books present other issues that need repairing, such as spine replacements, that are not common with paperback books.
-
QuestionIs rubber cement or Elmer's glue better to use for conserving a book?
 Community AnswerYou should not ever use rubber cement, so Elmer's glue will be a better choice. However, if you're working with particularly brittle pages use an archival glue for best results.
Warnings
- If your paperback book is of monetary or sentimental value, you should take your book to a professional book conservator to ensure the best results.⧼thumbs_response⧽
Things You Will Need
- Archival glue
- Dry sponge
- Eraser
- Brushes
- Wax paper
- Heavy books
- Rubber bands


References
- ↑ https://letterpile.com/books/Repair-a-Book-with-Glue
- ↑ http://penandthepad.com/repair-paperback-books-6073088.html
- ↑ http://library.stmarytx.edu/acadlib/acq/bkrpr.pdf
- ↑ https://letterpile.com/books/Repair-a-Book-with-Glue
- ↑ http://www.dartmouth.edu/~library/preservation/repair/tornpages.html
- ↑ http://library.stmarytx.edu/acadlib/acq/bkrpr.pdf
- ↑ http://library.stmarytx.edu/acadlib/acq/bkrpr.pdf
- ↑ http://library.stmarytx.edu/acadlib/acq/bkrpr.pdf
- ↑ http://library.stmarytx.edu/acadlib/acq/bkrpr.pdf
- ↑ http://library.stmarytx.edu/acadlib/acq/bkrpr.pdf
- ↑ https://letterpile.com/books/Repair-a-Book-with-Glue
- ↑ https://letterpile.com/books/Repair-a-Book-with-Glue
- ↑ https://letterpile.com/books/Repair-a-Book-with-Glue
- ↑ https://letterpile.com/books/Repair-a-Book-with-Glue
- ↑ http://www.dartmouth.edu/~library/preservation/repair/cleaning.html
- ↑ http://www.dartmouth.edu/~library/preservation/repair/cleaning.html
About This Article

To repair a loose page in a paperback book, apply a line of archival glue along the binder and stick the page in place. Then, weigh the book down with a heavy object so the page stays flat, and leave it to dry for 24-48 hours. If you’re repairing a torn page, cut a piece of archival tape that’s slightly longer than the tear, then flatten it out over the tear with your fingers so it reaches past the ends of the tear in both directions. For a detached cover, apply glue to the spine of the cover and the pages, stick them together, and weigh the book down while it dries for 24 hours. For tips on how to fix a break in a binding, read on!