This article was co-authored by Alterations Express. Alterations Express is a salon-style alteration and tailoring house with walk-in service, spacious dressing rooms, fitting specialists, and an extraordinary team of tailors and seamstresses at 13 storefront locations. With over 70 years of experience, they specialize in guiding individuals through a professional fitting, evaluating an alteration project on the spot, express alterations, and immediately providing pricing for any alteration. Alterations Express has been featured on multiple websites such as TheKnot.com.
There are 12 references cited in this article, which can be found at the bottom of the page.
This article has been viewed 204,699 times.
If you ever see tiny holes in your clothing, it could be from pesky moths in your closet. Luckily, moth holes may be easier to repair than you think. If the holes are particularly small, about 5 millimetres (0.20 in) wide or less, you can use fusible bonding web to close the hole. If the moth holes are larger, you can darn it, which means to mend a fabric hole by interweaving with a needle and thread. If you follow these steps to cover your moth holes, no one will ever be able to tell they were there!
Steps
Using Bonding Webs on Tiny Moth Holes
-
1Turn the garment inside-out and place it on an ironing board lined with parchment paper. Before you repair the moth hole, you’ll need to turn the garment inside out. Bonding paper will be placed on the hole, and you want to put it on the inside of the material so it doesn’t show when you wear it. Then, place your fabric on an ironing board. You’ll need to place a sheet of parchment paper between your fabric and the ironing board, so the bonding web doesn’t stick to the ironing board cover.[1]
- If you don’t have an ironing board, place your garment and parchment paper on another iron-safe surface, such as a table or floor lined with cloth. Never iron directly on a wood or stone surface, as the high heat can ruin their surfaces.
-
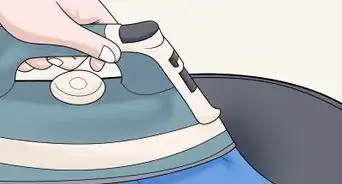
2Heat up the iron and press it on the hole for a few seconds. Turn on your iron and set the temperature to a setting that best matches your fabric, then place it on the hole. For example, if you’re using a t-shirt, put the iron on the cotton setting. Don’t move it back and forth, just set it on the fabric for a few seconds. This allows the garment to heat up and prepare for the bonding fabric.[2]
- Do not leave the iron on the fabric for more than a few seconds. If you do, you may end up scorching the fabric, which can leave a burn mark that is very difficult to remove.
Advertisement -
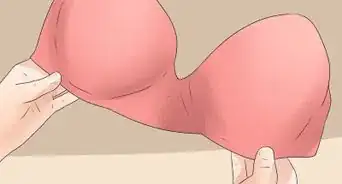
3Use your fingers to press the hole together as much as you can. While the fabric is slightly warm from the iron, but not too hot, use your index fingers to gently push the hole closed. This makes the hole a little bit smaller, which will help when you make your repair.[3]
- Be gentle when closing the hole. Don’t stretch the fabric too much or create a fold.
-
4Cut a small square of fusible bonding web and place it on top of the hole. Fusible bonding web is a manmade fiber that melts when heated. It is used to bond two fabrics together when placed between them. This material can be found at most craft stores. Cut a square about 1⁄2 inch (1.3 cm) wide, and place it over the hole.[4]
- Bonding paper is available in various weights. Choose one that matches the fabric you’re repairing. For example, use a lightweight fusible bonding web for lightweight fabrics such as a cotton blouse. If you’re using heavier fabrics, such as denim or canvas, use heavyweight bonding web.
- Make sure that your clothing is still on top of the parchment paper. You do not want the bonding web to fuse with the ironing board cover after you complete this repair.
-
5Place a piece of lightweight fabric sew-in stabilizer over the bonding web. Fabric stabilizer is used to stabilize the fabric of your garment to prevent it from stretching or sagging. Cut a square piece of the stabilizer that is slightly larger than the bonding web, about 1 inch (2.5 cm), and place it on top of the hole.[5]
- You can purchase fabric sew-in stabilizer at most fabric stores.
-
6Place a pressing cloth on top of the fabric and dampen it with water. The pressing cloth is used as a barrier to protect the iron from the bonding web and stabilizer. Place it on top of your garment, then use a spray bottle to spray some water on the cloth where the hole is located underneath. Do not drench the fabric with the spray bottle, instead, make sure it is just slightly damp. The dampness will improve the fusing of the bonding web.[6]
- If you have an old cotton bed sheet you can use that as your pressing cloth, or you can buy some from your local fabric store.
- When you place the cloth on the fabric, be careful not to shift the bonding web or stabilizer underneath. If they move, the hole will not be closed when you complete the repair.
-
7Set your iron on the wool setting and place it on the damp cloth for 10 seconds. Make sure your iron is on the wool setting so your garment will properly attach to the bonding web. When you place it on the cloth, don’t move the iron at all to avoid shifting everything underneath. Leave the hot iron on the fabric for no more than 10 seconds, then remove it and put it to the side.[7]
-
8Flip the garment over and push the hole together with your fingers. You might still see a tiny hole in your garment when you turn it over to the front. If you do, once again use your index fingers to shape and close the hole. It should start to bond together while you do this, thanks to the bonding web and stabilizer. Continue to use your fingers to shape the hole until it is completely closed.[8]
- Make sure to work quickly during this step. Shaping and closing the hole works best when the fabric is still warm.
-
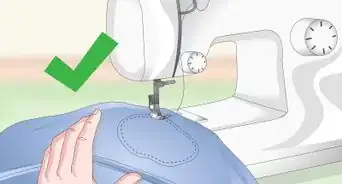
9Press the garment with the iron to completely close the hole. Staying on the right side of the clothing item, use the iron to press the hole one last time. Since you are on the other side of the garment, you do not need to iron on top of the pressing cloth. You can just iron directly on top of the hole. Your hole should be completed closed up at this point.[9]
- Only put the hot iron on the fabric 5-10 seconds to avoid scorching.


Darning Woven and Knitted Fabrics
-
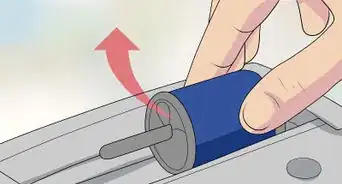
1Turn your fabric inside out and place a darning mushroom under the hole. Make sure your fabric is turned inside out before you start sewing, so you don’t see the stitches on the outside when you’re finished. Then, place a darning mushroom under the hole. A darning mushroom is a wooden mushroom-shaped sewing tool used to hold the fabric in place while darning. The curvature of the mushroom allows the fabric to retain its natural shape and stretch.[10]
- If you don’t have a darning mushroom, you can use another curved object, such as a light bulb or small bowl.
-
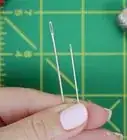
2Thread your needle. Before you get started with your sewing, you’ll need to thread your needle. To do this, cut a piece of thread long enough to cover your moth hole. To stay on the safe side, cut a piece at least 24 inches (61 cm) in length. Moisten the thread and squeeze the tip so you can fit it through the hole at the top of the needle.[11]
- Make sure you use thread that is close to the color of your affected fabric.
-
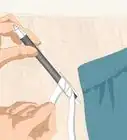
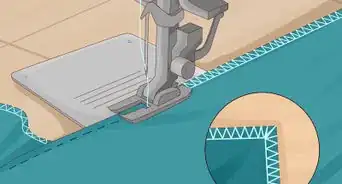
3Sew a circle around the hole about 1⁄2 centimetre (0.20 in) away from the edge. Sew a running stitch around the hole. If you need to, use a fabric pen to draw a circle around the hole so you know where to sew. Make sure you are 1⁄2 inch (1.3 cm) away from the edge of the hole to ensure the hole is well covered. This running stitch will prevent the hole from stretching and getting worse while you are mending it.[12]
-
4Sew horizontal stitches across the hole. Make sure the stitches are evenly spaced, and start and end close to your circle of running stitches.[13] If you do this correctly, your hole will be completely covered in horizontal lines about 1⁄2 inch (1.3 cm) beyond the hole on both sides.
- Do not pull the thread to tighten the stitches, as this can cause puckering. The goal is to use your darning mushroom or another curved object as a guide to ensure that the darning will blend with the rest of the fabric.
-
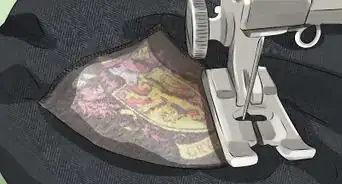
5Weave stitches perpendicular to the horizontal stitches across the hole. After you have covered the entire hole, you will need to weave stitches perpendicular to the horizontal stitches. To do this, use your needle to work the thread over and under the previous stitches. This will create a net over the moth hole.[14]
- Try to create the same weave tightness as the garment you are darning. For example, if you are darning a loose-knit, then the stitches will need to be somewhat spaced out. If you are darning a tight-knit, then the stitches will need to be tight.
-
6Weave the thread a few times to secure the stitching. When you’re finished with your horizontal and perpendicular weaving, leave a long end on the thread. Then, weave through the clothing item a few more times to ensure that the thread stays in place when you’re finished. When you turn your fabric around, the moth hole should be completely closed. Make sure the thread is secure so the stitching stays in place when you wear your item.[15]
- You can also tie a knot in the last stitch to secure the thread.
- Even if you match the knit, you may still notice the blemish on the garment when you're finished.[16]


Community Q&A
-
QuestionHow do you repair moth holes in a cashmere sweater?
 wikiHow Staff EditorThis answer was written by one of our trained team of researchers who validated it for accuracy and comprehensiveness.
Staff AnswerwikiHow Staff EditorStaff AnswerFirst, check to see if your sweater came with extra threads for repair. If not, or if you’ve lost them, you can use embroidery thread in a matching color. Turn the sweater inside-out and place a small, firm object, such as a champagne cork, under the hole. Thread an embroidery needle with the thread, but don’t knot the end. Pull the needle through one of the loops of the sweater next to the hole, and pull the thread almost all the way through, so that just a small amount (about an inch) is left behind. Then, pull the thread through an adjacent loop. Continue sewing in an octagon pattern around the hole, then gently pull the 2 ends of the thread to close the hole after you sew your eight stitch. If the fabric looks smooth on the front side, tie a double knot in the ends of the thread to secure them. -
QuestionDo dry cleaners repair moth holes?wikiHow Staff EditorThis answer was written by one of our trained team of researchers who validated it for accuracy and comprehensiveness.
Staff AnswerwikiHow Staff EditorStaff AnswerYes, many dry cleaners are willing to repair moth holes. The dry-cleaning process can also help kill any remaining moths, eggs, or larvae in your clothing. If you want the holes repaired, make sure to mark them or point them out so your dry cleaner doesn’t miss any. -
QuestionHow do you fix a hole in a sweater without sewing?wikiHow Staff EditorThis answer was written by one of our trained team of researchers who validated it for accuracy and comprehensiveness.
Staff AnswerwikiHow Staff EditorStaff AnswerIf you don’t want to use a needle and thread, you can try closing small holes with fusing powder. You can buy fusing powder online or from your local fabric store. Follow the directions on the package to seal up the hole(s).
Things You’ll Need
Repairing Moth Holes in T-Shirts
- Iron
- Ironing board
- Parchment paper
- Fusible bonding web (ultra lightweight)
- Sew in stabilizer (lightweight)
- Pressed cloth
- Spray bottle
Sewing Large Moth Holes on Woven and Knitted Fabrics
- Darning needle
- Thread or yarn to match your item
- A darning mushroom or another round object
- Scissors
- Embroidery hoop (optional)


References
- ↑ https://youtu.be/vvDdzD5pF3M?t=55
- ↑ https://youtu.be/vvDdzD5pF3M?t=58
- ↑ https://youtu.be/vvDdzD5pF3M?t=64
- ↑ https://youtu.be/vvDdzD5pF3M?t=80
- ↑ https://youtu.be/vvDdzD5pF3M?t=100
- ↑ https://youtu.be/vvDdzD5pF3M?t=139
- ↑ https://youtu.be/vvDdzD5pF3M?t=151
- ↑ https://youtu.be/vvDdzD5pF3M?t=165
- ↑ https://youtu.be/vvDdzD5pF3M?t=173
- ↑ https://www.theguardian.com/lifeandstyle/2014/sep/22/how-to-mend-moth-holes
- ↑ https://www.realsimple.com/beauty-fashion/clothing-care/how-hand-sew-0
- ↑ https://www.theguardian.com/lifeandstyle/2014/sep/22/how-to-mend-moth-holes
- ↑ Alterations Express. Alteration, Tailoring, and Dry Cleaning Specialists. Expert Interview. 15 September 2021.
- ↑ https://www.theguardian.com/lifeandstyle/2014/sep/22/how-to-mend-moth-holes
- ↑ https://www.theguardian.com/lifeandstyle/2014/sep/22/how-to-mend-moth-holes
- ↑ Alterations Express. Alteration, Tailoring, and Dry Cleaning Specialists. Expert Interview. 15 September 2021.
About This Article