This article was co-authored by David Pew. David Pew is a Professional Tailor and the Owner of Sew Generously based in Seattle, Washington. With over a decade of experience, David specializes in bespoke tailoring and alterations. He uses his experiences, skills, and eye for detail to produce the highest quality of products.
This article has been viewed 163,256 times.
Shortening the sleeves on a jacket can take it from ill-fitting and sloppy to tailored and chic. It is fairly easy to change the length of your sleeves, but you will need some basic sewing skills and a sewing machine. You will need to measure to find the new length, mark your fabric, cut it at the desired length, and then hem the sleeves to finish them.
Steps
Measuring the Sleeves
-
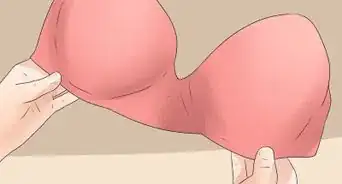
1Try on the jacket to determine the new sleeve length. To get the best possible fit, put the jacket on and identify where you would like the sleeves to fall. It is a good idea to bend your arms and hold them straight at your sides to see where you are most comfortable with the sleeves ending in these positions. You may want to choose a midpoint measurement between these 2 spots.
- For example, if you want the sleeves to end right at your wrist, but they are too short at this length when you bend your elbows, then you might need to shorten them so that they end about 0.5 cm (0.20 in) below your wrists instead.
-
2Mark the sleeves where you want them to end. Mark the position in a few spots around the sleeve with a piece of chalk. Then, remove the jacket and connect the marks into a solid line going around the sleeve.[1]
- You may want to use a ruler to help you get a straight line and to ensure that all of the marks are the same distance from the end of the sleeve.
Advertisement -
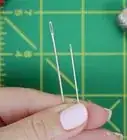
3Measure 2 in (5.1 cm) from the marks you made. The spot you identified is not where you will need to cut your jacket sleeves. You will need to leave room for the seam allowance, so measure 2 in (5.1 cm) from the first line going towards the end of the sleeve. Mark this spot in a few places around the sleeve using a piece of chalk. Then, connect the marks in 1 solid line.[2]
- This will leave a little extra room in case you need to lengthen the sleeves again in the future.

Cutting the Sleeves
-
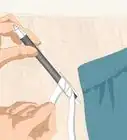
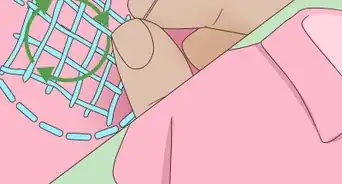
1Use a seam ripper to pull out the stitches along the hem and seam. Rip the stitches by running the hook section of the seam ripper through the stitches on the hem and seam of the jacket. You will need to remove the stitches before you start cutting.[3] This will detach the sleeve lining from the sleeve fabric, which is necessary for hemming the sleeve properly.[4]
- Be careful not to rip the fabric as you do this!
- If the shirt has mitered corners around the buttons, you'll need to open that up, as well.[5]
-
2Slide the lining fabric up and out of the way. To avoid cutting through the lining fabric, move it up into the sleeve so it will be out of your way. Cutting the lining along with the jacket's exterior fabric may affect the fit of your jacket.[6]
- You may want to pin the lining up inside of the sleeve to ensure that it will not get in the way when you cut the outer fabric.
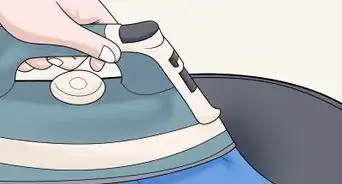
- It's a good idea to press the pieces of the sleeves to ensure you have nice clean edges to work with.[7]
-
3Cut the outer fabric along the second line you created. Cut straight along the line all the way around the sleeve using a pair of sharp scissors. Make sure to cut the outer sleeve fabric only.[8]
- Repeat the same process for both sleeves.
Hemming the Sleeves
-
1Pull the lining fabric back down. Pull down the lining so that it extends past the new end of the sleeve fabric. If you used pins to hold the fabric back, then take out the pins first.[9]
-
2Cut the lining just a little longer than the finished sleeve. Trim the jacket lining so it's just a little longer than the finished sleeve will be. This will be just a little shorter you cut the sleeve fabric to, since it was cut to account for the seam allowance.[10]
- If you cut the lining to the exact same length as the finished sleeve, it will pull and make the sleeve look puckered.
-
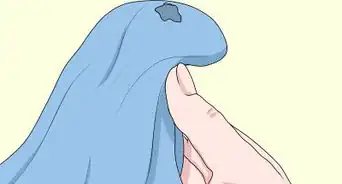
3Fold the fabric under by 5 centimetres (2.0 in) so it covers the lining. Ensure that the jacket lining and outer material are lined up. Then, fold the outer material at the end of the sleeve over the lining fabric towards the inside of the sleeve. This will hide the raw edges of the lining and outer material.[11]
-
4Place a few pins around the folded sleeve to keep it in place. Insert the pins going perpendicular to the end of the sleeve so they will be easier to remove as you sew. Place a pin about every 5 cm (2.0 in).
-
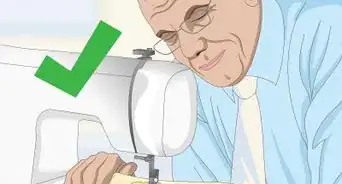
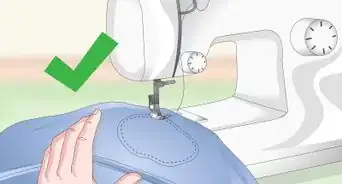
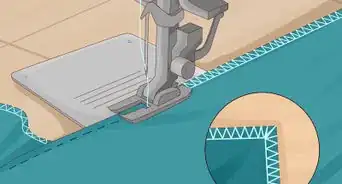
5Secure the folded fabric with a straight stitch. Set your sewing machine to the straight stitch setting and sew all the way around the edges of the sleeve. Make sure to use a thread that matches the color of the jacket, such as black thread for a black jacket. Position the stitch about 3 cm (1.2 in) from the folded edge.[12]
- Remove the pins before you sew over each area to avoid damaging your machine.
- You can also sew the sleeve by hand, if you prefer.[13]
-
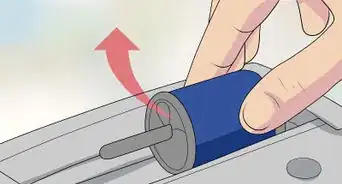
6Backstitch by 5 cm (2.0 in) when you reach the end. To secure the final stitches, press down on the lever on the side of your sewing machine and hold it while still applying gentle pressure to the pedal. This will reverse the direction of your sewing machine. Sew for 5 cm (2.0 in) and then release the lever and sew back to where you started. Trim off the excess threads and you are done with the sleeve!
- After you finish sewing the first sleeve, repeat the process for the second sleeve.
Expert Q&A
Did you know you can get premium answers for this article?
Unlock premium answers by supporting wikiHow
-
QuestionHow much seam allowance should you leave?
 David PewDavid Pew is a Professional Tailor and the Owner of Sew Generously based in Seattle, Washington. With over a decade of experience, David specializes in bespoke tailoring and alterations. He uses his experiences, skills, and eye for detail to produce the highest quality of products.
Professional TailorWhen I'm shortening sleeves, I typically leave about 2 inches of seam allowance inside the sleeve and the lining. That way, the sleeves can be lengthened again later if they need to be, which is especially helpful if the alteration is for someone young.
Support wikiHow by unlocking this expert answer.
-
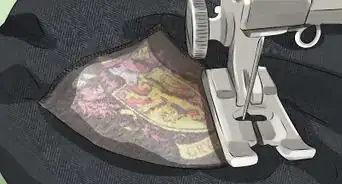
QuestionDo I need to add interfacing?David PewDavid Pew is a Professional Tailor and the Owner of Sew Generously based in Seattle, Washington. With over a decade of experience, David specializes in bespoke tailoring and alterations. He uses his experiences, skills, and eye for detail to produce the highest quality of products.
Professional TailorIf you shorten the sleeve past the point where the interfacing is, you'll need to add interfacing. If the edge of a sleeve isn't interfaced, it will look floppy, rather than crisp.Support wikiHow by unlocking this expert answer.
-
QuestionWhy do you cut the lining longer?David PewDavid Pew is a Professional Tailor and the Owner of Sew Generously based in Seattle, Washington. With over a decade of experience, David specializes in bespoke tailoring and alterations. He uses his experiences, skills, and eye for detail to produce the highest quality of products.
Professional TailorThe lining of a sleeve should always be about an inch longer than it needs to be. Otherwise, when you move around, your sleeve will crumple up, because the lining will pull on the sleeve.Support wikiHow by unlocking this expert answer.
Things You'll Need
- Chalk
- Ruler
- Scissors
- Pins
- Sewing machine
- Thread


References
- ↑ David Pew. Professional Tailor. Expert Interview. 5 January 2021.
- ↑ David Pew. Professional Tailor. Expert Interview. 5 January 2021.
- ↑ David Pew. Professional Tailor. Expert Interview. 5 January 2021.
- ↑ https://www.youtube.com/watch?v=i_yQ-mMHb8M&feature=youtu.be&t=1m54s
- ↑ David Pew. Professional Tailor. Expert Interview. 5 January 2021.
- ↑ https://www.loveyourclothes.org.uk/sites/default/files/articles/Fast%20Fixes%207%20-%20Shortening%20Sleeves%20%28low%20res%29.pdf
- ↑ David Pew. Professional Tailor. Expert Interview. 5 January 2021.
- ↑ https://www.loveyourclothes.org.uk/sites/default/files/articles/Fast%20Fixes%207%20-%20Shortening%20Sleeves%20%28low%20res%29.pdf
- ↑ https://www.loveyourclothes.org.uk/sites/default/files/articles/Fast%20Fixes%207%20-%20Shortening%20Sleeves%20%28low%20res%29.pdf
- ↑ David Pew. Professional Tailor. Expert Interview. 5 January 2021.
- ↑ https://www.thesprucecrafts.com/sewing-machine-needles-4122019
About This Article

If you have some basic sewing skills and a sewing machine, you can shorten your jacket sleeves relatively easily. First, you'll need to put your jacket on and mark where you want your new sleeve to end. Make another mark 2 inches below that for the hem. Remove the old seams and hem with a seam ripper, cut the outer fabric along the second mark you made, and fold the fabric under the lining 2 inches. Then, you’ll need to pin your sleeves and use a straight stitch to sew them together. Make sure you use a thread that matches the color of your jacket so it looks natural. For more tips, including how to sew thicker fabrics, like denim or leather, read on!