wikiHow is a “wiki,” similar to Wikipedia, which means that many of our articles are co-written by multiple authors. To create this article, 116 people, some anonymous, worked to edit and improve it over time.
wikiHow marks an article as reader-approved once it receives enough positive feedback. In this case, 100% of readers who voted found the article helpful, earning it our reader-approved status.
This article has been viewed 1,207,077 times.
Learn more...
Piercing the cartilage in your ear can be a painful process, and requires preparation and care in execution. While professionals can do it for a fee, it is still cheaper to do at home and if you have a high pain tolerance fairly simple and stress-free. Professionals often lack credentials or proper medical training for what is essentially a medical procedure. [1] [2] While your experience may be no better, it is not necessarily advantageous to seek a professional. Maintaining the piercing after requires basic hygiene at the wound site, and avoiding any irritants or corrosive substances at the ear.
Steps
Preparing for Piercing
-
1Acquire materials and choose your piercing site carefully. There are significant health risks involved in cartilaginous piercings and minor complications are frequently reported. There are often no minimum qualifications for one to practice body piercing, which represents a serious health concern. [3] The health risks associated with cartilaginous piercing are not significantly higher than with a lower piercing of the fatty lobe tissue.
-
2Sterilize your ear and equipment. Purchasing sterilized, sealed piercing needles is key. Your jewelry should not be made of nickel or any metal you may have an allergic reaction to and should be a gauge smaller than the hollow piercing needle.Advertisement
-
3Use an autoclave to ensure absolutely sterile materials. You can use a pressure cooker on objects to achieve a similar effect, by setting a high pressure and temperature with water in the cooker so as to steam disinfect the items to be used. Soaking in a disinfectant like alcohol or dilute bleach will sterilize the materials, though not as effectively.
-
4Set up a sterile area to work in. Have gloves, topical disinfectant to prep the site (iodine is preferred), a marker to designate the piercing site, a stopper to help prevent the needle from poking your scalp. Set up a sterile workbench for the materials to rest on, as well as a separate site for handled materials to be placed on. Do not handle non-sterile items and sterile ones interchangeably.
-
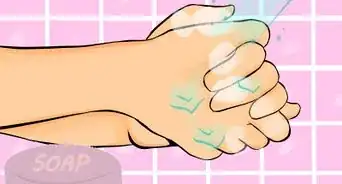
5Clean your ear using an antibacterial soap. The location is difficult to clean, so consider just taking a shower. Hot steamy water also helps to loosen your skin, making the piercing a bit less painful. Clean the area thoroughly, and make sure that the site is marked with an indelible marker or pen.


Piercing the Site
-
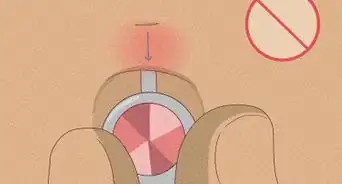
1Avoid topical anaesthetics or numbing agents. These will not reduce the overall pain significantly as these topical solutions do not affect the avascular cartilage. Ice is not recommended. It causes the skin to contract. Contact with the ice pack or ice itself can cause dermal tissue damage and make it more difficult to target the site or maintain sterility.
- This will hurt. If you wish to avoid pain, do not put a large hollow needle through any part of your body, and do not pay anyone to do this for you or to you if you truly wish to avoid a wound in your ear.
-
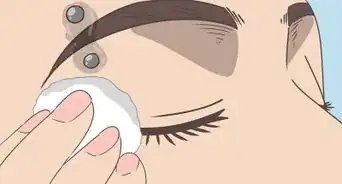
2Apply a topical antiseptic like iodine to the ear. Apply liberally and cover the back of the ear as well. Avoiding infection is key as intervention for infections resulting from piercing often requires draining, surgery, and the removal of the piercing, and symptoms include severe pain and fever.
-
3Place a stopper such as a sterile cotton ball behind the ear so that way the needle does not poke the scalp. Avoiding discomfort or contact of the needle with any unsterilized or unintended surfaces is critical to avoiding infection. A friend can be extremely useful with this part, as placing and holding the stopper and performing the piercing can require some dexterity.
-
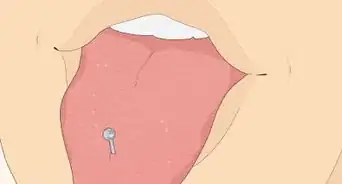
4Push the needle through the ear. After breaking the first layer of skin, make sure the needle is angled correctly to push through as you like it. There will be resistance, and a total of 3 distinct pops as you pierce the skin, cartilage, and then skin again.
-
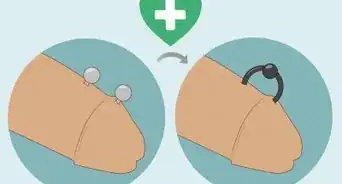
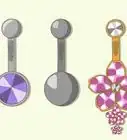
5Have the jewelry ready and sterilized, and put it in the back of the hollow needle. Make sure your needle is one size bigger than the jewelry, so you can easily do so. Again, avoid the use of any metal you have an allergy or sensitivity to, as simple contact dermatitis from metal exposure can morph into an infection with repeated contact of the wound site.
-
6Pull the needle out of your ear. This should leave the jewelry in your ear. Screw the ball or holder into place to hold the jewelry there and maintain the piercing. Do this quickly, as the process is painful and will require repeating at a different site if you make a mistake and wish to avoid mangling your cartilage or inviting infection with a larger wound on your ear.


Maintaining the Piercing
-
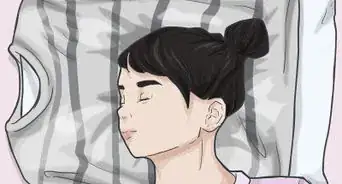
1Wash with a sterile saline solution twice a day. Don't pick at any crust or scabs that will form. It can take up to a year for the wound to heal completely. Poor blood flow in the area of the upper cartilage of the ear keeps the risk of infection high and the rate of healing low during the entire process.
-
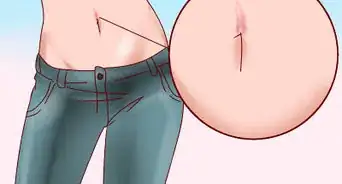
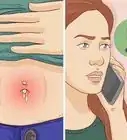
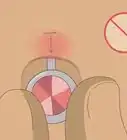
2Keep an eye on the piercing site. While keloids, deposits of skin, and some malformation from the pierced cartilage are expected, redness, swelling, heat, or oozing from the wound that persists for days is not. See a doctor if symptoms last as long as a week, as courses of antibiotics and surgical intervention may be required, and average hospital stays are over two days.[4]
-
3Avoid using sterilizing or antimicrobial solutions like rubbing alcohol or hydrogen peroxide to continue cleaning the wound site. These solutions kill living cells and can damage the capillaries and healing tissue in the ear. Keeping the site clear of foreign debris and clean will help significantly reduce the risk of infection.
-
4Anticipate cartilage fracture, whether a piercing gun is used or a piercing needle is administered by hand. However, for a number of piercings of specific structures of the ear a piercing gun cannot find adequate purchase, as they are designed around use on the earlobe. [5] Seek immediate medical attention if ear deformities begin appearing.


Community Q&A
-
QuestionDoes using a hollow needle put you at less of a risk for infection?
 Jeff GabrielCommunity AnswerYes, it does because it is sterilized and designed for the piercing.
 -
QuestionIs it normal to feel popping when the needle is going through the cartilage?
 Community AnswerYes, that is the cartilage popping.
 -
QuestionCan using a regular sewing needle shatter the cartilage if the earring that will be used is larger than the needle?
 Community AnswerIt's not likely to, but it all depends. You might not want to use a sewing needle as its not the right size and a hollow one has a place to put the piercing to get it safely in your ear unlike a normal needle. You can purchase a hollow needle online or at your local piercing shop depending where you live.
Warnings
- Do not soak your piercing needle in bleach of any kind. Bleach is harmful to human skin.⧼thumbs_response⧽
- You may get infected if you do not use a sterile, sharp needle, have interruptions in your sterile technique, or are simply unlucky. Be prepared to see a doctor early if there are any signs of infection.⧼thumbs_response⧽
- Make sure you are not allergic to any jewelry grade metals or have a risk of contact dermatitis.⧼thumbs_response⧽
Things You'll Need
- Disposable gloves
- Iodine (disinfecting the ear)
- Indelible marker or pen
- Hollow piercing needle
- Cotton ball or another stopper
- Intended jewelry
- Autoclave or steam sterilizer
- Saline solution (for post-piercing hygiene)
- Rubbing alcohol (for surface sterilization)


References
- ↑ http://www.ncbi.nlm.nih.gov/pubmed/24909453
- ↑ http://journals.lww.com/pec-online/Abstract/1999/06000/Ear_piercing_techniques_as_a_cause_of_auricular.7.aspx
- ↑ http://www.sciencedirect.com/science/article/pii/S0196070998900035
- ↑ http://link.springer.com/article/10.1007%2Fs00405-014-3346-2
- ↑ http://www.jprasurg.com/article/S1748-6815%2807%2900334-8/abstract
About This Article
While it’s always safer to have a professional pierce your ear cartilage, you can do it at home with the right tools. You’ll need a sterilized piercing needle that’s the right gauge size for your jewelry, as well as sterile piercing jewelry made of a safe material, like surgical steel or titanium. Wash your ear and hands with antibacterial soap, then put on sterile gloves. Wipe down your ear with an antiseptic, such as iodine. Next, put a sterile cotton ball or cork behind your ear so you don’t accidentally poke your scalp with the needle. Push the needle through your ear cartilage and into the cotton ball or cork in one smooth, quick movement. Put the post of the jewelry into the back of the hollow needle, then pull the needle out through the back of your ear. Attach the back of the jewelry to keep it in place. Wash your new piercing with saline solution twice a day. See a doctor if you notice signs of infection, such as worsening pain, redness, swelling, or discharge. To learn how to maintain your piercing, keep reading!


Medical Disclaimer
The content of this article is not intended to be a substitute for professional medical advice, examination, diagnosis, or treatment. You should always contact your doctor or other qualified healthcare professional before starting, changing, or stopping any kind of health treatment.
Read More...