wikiHow is a “wiki,” similar to Wikipedia, which means that many of our articles are co-written by multiple authors. To create this article, 37 people, some anonymous, worked to edit and improve it over time.
This article has been viewed 872,367 times.
Learn more...
A traditional plains teepee (also spelled tipi) is a roomy and durable structure that is big enough to house a fire and several people comfortably.[1] It's livable in hot or cold weather and, when you've assembled the necessary materials to build it, it is relatively easy to set up, take down, and move elsewhere, making the teepee ideal for a nomadic lifestyle. If you want to build a teepee for recreation, novelty, or because you want to live in an alternative structure, read on to find out where to start.
Steps
Gathering Necessary Materials
-
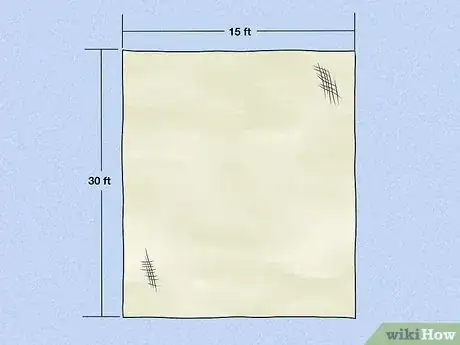
1Get some canvas. Traditionally, teepees were made from tanned buffalo or deer hides, which were water resistant and pliable. Since buffalo skin is relatively difficult to acquire nowadays, most modern teepees are made using canvas. Smaller teepees are difficult to manage fires in, so if you're going to build one, you might as well build one of significant size.
- For a comfortably-sized teepee, you'll want a piece of canvas roughly 15 x 30 feet.
-
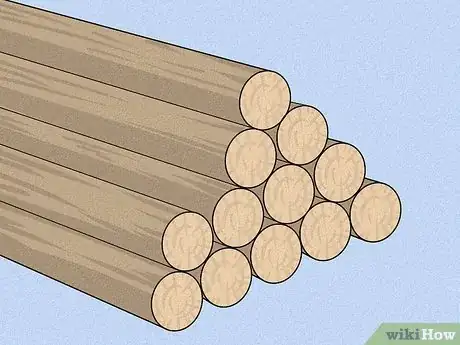
2Prepare some lodge poles. The two basic requirements for the teepee are some kind of covering (the canvas) and poles, about three feet longer than the width of the covering canvas.[2] You'll need about twelve of them for a really solid teepee. The smoother the better, they're ideally several inches thick and made from lodge pole pine.
- The easiest way to acquire these poles is to buy them commercially. Felling wood is also an option, but you need to make sure that you're harvesting legal wood, which can be a tricky proposition. To be safe, buy them from a dealer to ensure that they're sturdy and legal.
- To prepare the poles for use, smooth out any rough patches with a pocketknife and sandpaper, and treat it with a coat of a 50/50 mixture of linseed oil and turpentine. This will ensure that your poles will be protected against the elements and will last for many years.
Advertisement -
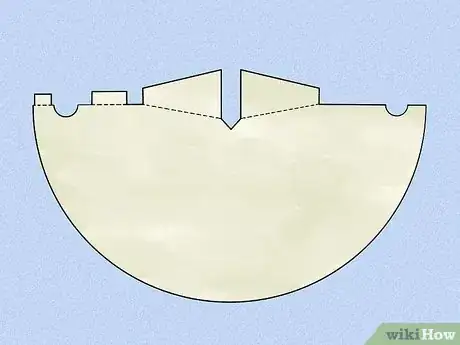
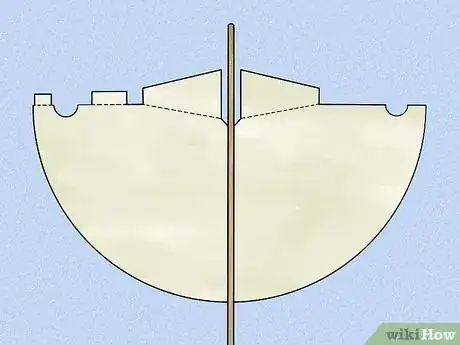
3Cut the teepee pattern from the canvas. If you don't have a pre-cut canvas made for a teepee, you'll need to cut your own from the canvas. Tracing a pattern onto the canvas first is the best idea, but the basic cut is a semi-circle half as wide as it is long, with notches cut toward each end on the flat side of the semi-circle, and with flaps cut from the middle of the flat side, for use as "smoke flaps," and a hole for the door.[3] You'll also need to save enough canvas for covering up the door hole when you're inside.
-
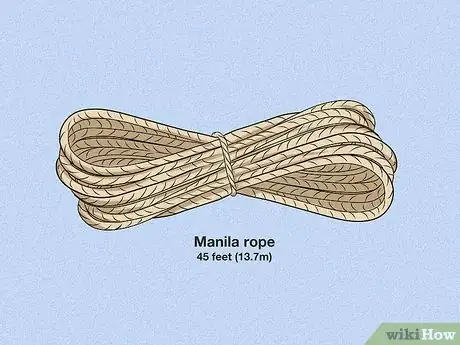
4Get 45 feet (13.7 m) of manila or straw rope. Synthetic rope is not a good idea for building teepees, because it has trouble gripping the poles like natural ropes, causing slippage.
- It's also good to have about 12-15 stakes for staking the bottom of the canvas to the ground, as well as the materials to make a fire. If you want an authentic teepee, get some porcupine quills or other long pins to fix the open part of the canvas covering when you assemble it.
Erecting the Frame
-
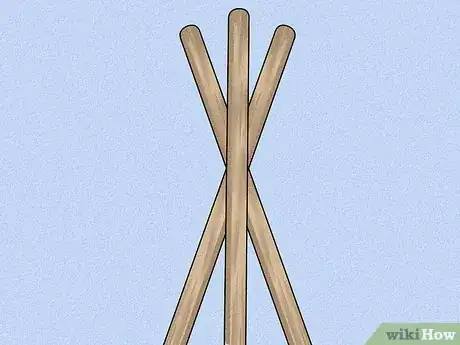
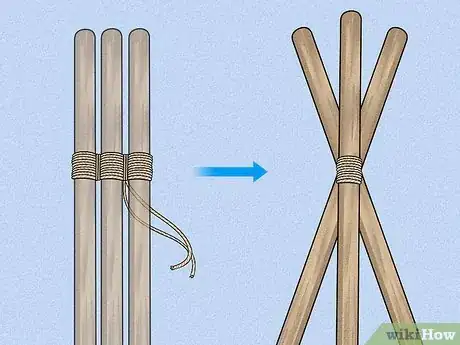
1Lay out the tripod. The teepee starts by fashioning a simple tripod with three of your poles. Lay two both flat on the ground, right next to each other and lay another across them, creating an acute angle at the top of about 30 degrees. The two poles next to each other will be your corner poles, while the crossing pole will act as the "door pole."
- For an accurate measurement, lay out the canvas and assemble the poles on top. With the tops of the two base poles in the center of the canvas, pointing toward the center of the flat side, lay the other pole on top of it so the end on the curved side of the semicircle is about a 1/3 of the way down from the edge. That should be roughly a 30 degree angle.
-
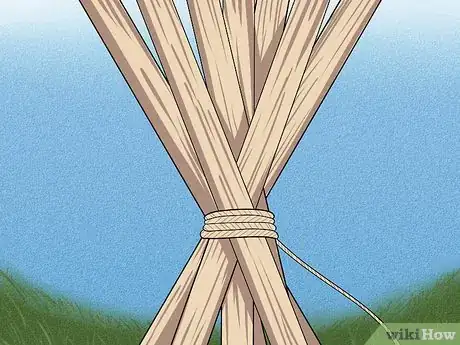
2Tie the tripod poles with a clove hitch. Use about six feet of your rope to tie the poles together using a clove hitch knot. You should have about five feet left on the short side and 40 feet (12.2 m) or so on the long side. Do not cut the rope. With the short end, wrap around the poles several times and then tie another clove hitch with the remaining rope. The rest of the rope will come in handy later. Keep it coiled and out of the way.
-
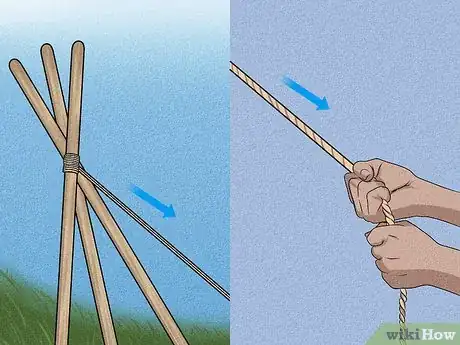
3Raise the teepee. In the location you'd like to set up your teepee, raise the poles from the jointed end by pulling the rope. Have helpers stand with their feet on the bottom end of the poles to keep them from dragging the tripod.[4]
- At this point, it should look more like a bipod. When it reaches its apex, separate the two base poles that were next to each other roughly 9 feet (2.7 m) from one another. They will be the "back" corners of the teepee, while the crossing pole will be the "door pole." It should not be, strictly speaking, symmetrical, but more of an isosceles triangle. The back corner poles should act as a cradle for the door pole, with about a foot more space from each corner pole to the door pole than between each corner pole.
- Make sure all the corners of the tripod are sturdy by pulling down on the rope while standing in the center of the tripod, directly under the joining point.
-
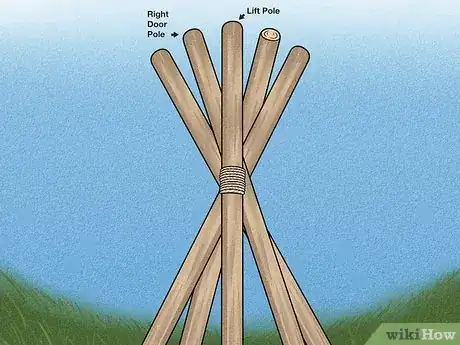
4Lay in the poles. Set aside your sturdiest pole to act as your "lift" pole. You'll add poles by moving in a counterclockwise circle around the tripod, starting directly to the right of the door pole. The sides of the tripod between the door pole and each corner pole should have five poles each. The "back" side, between the two corner poles, should have four poles, plus your lift pole.
- Leave space for the lift pole in the center of the back side of the teepee. There should be four poles on that side, with a gap in the middle for the lift pole. This will be used later to put the cover on the teepee.
- Steadying each pole at the base with your foot in an arcing line with the corner poles and door pole, gently let the top of the pole come to rest in the V created by both of the corner poles.
- The distance between all the poles, evenly spaced, should be about 3 feet (0.9 m).
-
5Wrap the poles. Using the long end of the rope, walk the rope around the crossing joint of all the poles about 4 times. Let the remainder of the rope hang at one of the corner poles.
Putting on the Cover
-
1Lay the lift pole down the center of the cover. With the canvas on the ground, lay the pole down the center of the covering, with the tip pointed toward the center of the flat side of the semicircle. If you've bought your canvas pre-cut, there should be a small "life pole flap" in the center of the canvas with which you'll affix the canvas to the pole.
- It's important to tie the canvas very tightly to the lift pole. If the life pole flap slips even a couple of inches, the canvas will wrinkle and cause the teepee to be uneven and loose, losing some of its valuable heat benefits. To be sure it doesn't slip, hammer an inch-long tack through the knot and the lift pole flap.
-
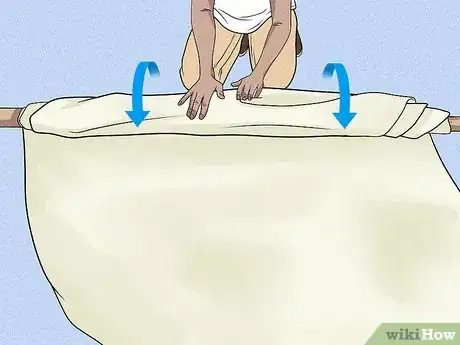
2Roll up the canvas. While the canvas is still on the ground and now that your lift pole is affixed, roll up the edges toward the pole. Roll up a little at a time, as if you were folding a flag, so that the canvas will be able to unroll easily and evenly when you raise the lift pole.
- Raise the entire bundle in the air and place it into the gap you've left on the back wall of the teepee for the lift pole.
-
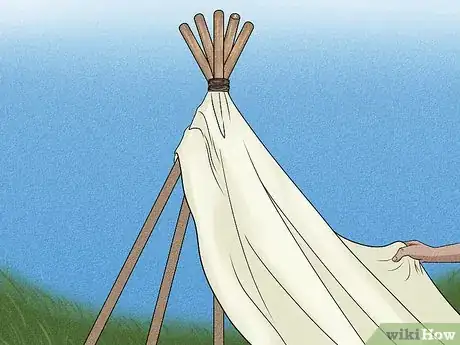
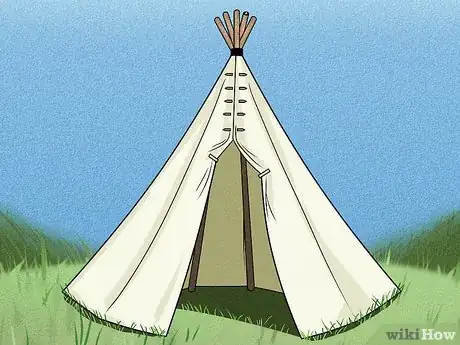
3Unroll the canvas. When the pole is placed, unroll the canvas around the frame of poles from the back wall to the initial door pole. Make sure the smoke flaps on the canvas are unrolled outward, as well, and bind them together. The teepee should look mostly completed at this point.[5]
-
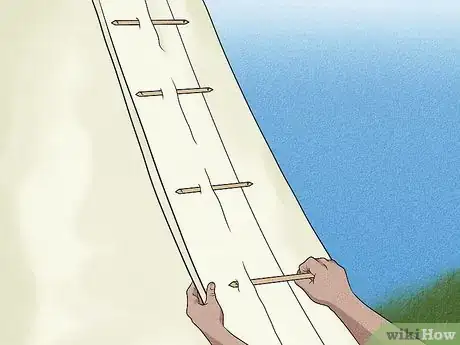
4Pin the flaps together. Most commercial teepees will have holes built into the opening flaps, but if you've cut your canvas yourself you'll need to use the pins you've gathered to auger holes into the cover and pin the open side of the canvas together.
- Porcupine quills can work, and were used traditionally, but small wooden pins are a more durable and available choice. They're available anywhere that also retails lodge pole pine poles. You don't need to use quills if you prefer not to.
-
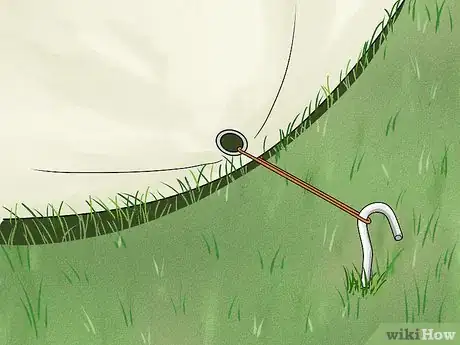
1Stake the canvas. It's smart to secure the canvas to the ground using traditional metal tent stakes, so strong winds won't turn your teepee into a parachute. When you're ready to go inside, fix the door to the outside and you're ready to camp plains-style.
- If you want to have a fire in your teepee, you'll need to open the smoke flaps or you'll hotbox the teepee and risk a fire. Plant stakes on the door-side of the teepee to fix the ropes to when you've opened them, to keep them from flapping back closed while your fire is lit.
- Be very careful if you want to start a fire during cold weather. It'll be a great source of heat, and your tent will be toasty in no time, but make sure it's centrally placed, under the smoke flaps, and keep active watch on it at all times.
-
2Finished. Nice job!
Community Q&A
-
QuestionHow long should the lodge poles be?
 Community AnswerFrom what I have read, the lodge poles should be three feet longer than the height of the canvas. For example, if the canvas is 12 feet tall, then the poles should be 15 feet long.
 -
QuestionWhat's with the using porcupine quills to fix the tipi in front? That's ridiculous. I live on a reservation where tipis are an ancient traditional dwelling and I am writing a book on tipis.
 Community AnswerThe tipi design varies from tribe to tribe. It's possible that porcupine quills were used by another tribe than the one you're from. Any generalization suffers from not being applicable to individual circumstances, so perhaps you could do deeper research into the tipi variants and inform this article some more; everyone is free to edit this site, to enhance the knowledge.
 -
QuestionHow much will the materials cost?
 Community AnswerIt depends on the type of materials you want to use and where you purchase them, but I would expect to spend at least a few hundred dollars for a large, high-quality teepee. You could likely make a cheaper version for under $100 if you shopped smart.
Things You'll Need
- 12-15 lodge pole pine poles
- 15 x 13 sheet of canvas, or pre-cut teepee pattern covering
- Wooden or other pins to keep the canvas fixed
- 45 feet (13.7 m) of natural manila or straw rope
- Sharp knife or hatchet
- Tape measure
References
About This Article
If you want to make a teepee, gather a piece of canvas that's about 15 x 30 feet and 12 lodge poles that are at least 3 feet longer than the width of the canvas. Make sure you have at least 45 feet of natural-fiber rope on hand for securing the poles, and cut the canvas into a teepee pattern. To make the frame, lay three poles on the ground in the shape of a tripod, with 2 poles next to each other and one crossing them. Tie the poles together with a clove hitch, and raise the teepee so you can add more poles. Once all of your poles are in place, wrap the rope around the top and put the cover on the structure. For tips on fitting the cover and securing it in place, read on!
