This article was co-authored by wikiHow Staff. Our trained team of editors and researchers validate articles for accuracy and comprehensiveness. wikiHow's Content Management Team carefully monitors the work from our editorial staff to ensure that each article is backed by trusted research and meets our high quality standards.
The wikiHow Video Team also followed the article's instructions and verified that they work.
This article has been viewed 618,212 times.
Learn more...
Whether you're headed to a masquerade party, making a costume for a play, or preparing for trick-or-treating, a plaster mask is a fun and inexpensive costume option. With the right supplies, a willing face model, and some patience, you can create a plaster mask in no time. You can also decorate your finished plaster mask with paint, feathers, glitter, and sequins to really make it your own.
Steps
Preparing to Make the Mask
-
1Create a work area with newspapers and a drop cloth. Choose a room where you have a lot of space to spread out, such as your living room, a craft room, or your kitchen counter. Lay newspapers or a drop cloth on the floor to protect it. Have paper towels handy in case a stray drip lands outside the covered area.
-
2Find a face model. You will need someone to act as a face model so you can mold the mask properly. Pick someone who does not mind being still for at least 30 minutes to one hour. Ask them to lay on the ground on their back or sit in a straight-backed chair with their face tilted upward.
- You can use your own face as a model for the mask, though this may be a little tricky to maneuver if you’re making a plaster mask for the first time. You may want to work in front of a mirror to make it easier to apply the strips to your face.
Advertisement -
3Put an old shirt and a headband on the person. You can also use pins to pull the person’s hair away from their face. Wrap a towel around their neck and shoulders to keep plaster off of these areas.
-
4Cut the bandage plaster into strips with scissors. The strips should be about 2 to 4 inches (5.1 to 10.2 cm) wide by 3 inches (7.6 cm) long. Make some of the strips shorter than others so you have a variety of strips to use. Cut about 10-15 strips so you have enough to cover the person’s face in two layers of plaster.[1]
- When you are finishing cutting the plaster strips, place them in a bowl.
-
5Rub petroleum jelly on the person’s face. This will make removing the dried mask easier. Rub the jelly in well at their hairline, on their eyebrows, and around the sides of their nose. Cover their eyelids and their lips as well as their jawline and under their chin.[2]


Constructing the Mask
-
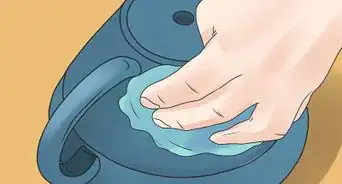
1Dip the strips into a bowl of warm water, one at a time. Take a strip with clean fingers and place it in the bowl of water. Use your finger to run excess water off the strip. You want the strip to be wet, but not soaking.[3]
-
2Cover the person’s forehead. Use your fingers to smooth out any creases so the strip lies flat.
-
3Apply strips to their cheeks and chin. Work down from the person’s forehead, around their cheeks, and then their chin. Make sure the strips touch each other on the person’s face. Smooth the strips with your fingers as you apply them so they dry flat.
-
4Use smaller strips for their nose and upper lip. Save the inner areas of their face for last. Be careful when applying the strips to the person’s nose and upper lip, as these can be sensitive areas.
- Make sure you do not cover the person’s nostrils with plaster, so they can breathe. Leave a 1⁄2 inch (1.3 cm) gap around the nostrils.
-
5Cover their eyes and mouth with plaster if desired. Let your model know that you are going to be covering these areas so they are prepared. Ask them to close their eyes and then use smaller strips to cover them entirely, pressing the strip into the contours of their eyes. Then, ask them to close their mouth and use a strip to cover their mouth.
- Covering the eyes and mouth is optional, based on the person’s preference.
- You may keep the mouth uncovered if you want the person to be able to speak clearly to others while wearing the mask.
- You may keep the eyeholes uncovered so the person can see while wearing the mask.
-
6Do at least two layers of plaster. After you have covered the person’s face once with plaster strips, repeat the same process one more time. Make sure the strips touch each other and lay flat. Doing two layers of plaster will make the mask more sturdy.[4]
-
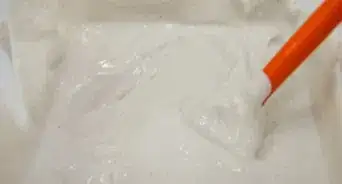
7Smooth any gaps with wet fingers. Once you have finished the second layer, stand back and look over the mask. Dip your fingers in the water, which should now be a bit sticky with plaster. Then, gently smooth any gaps or creases on the plaster with your wet fingers.

Drying and Removing the Mask
-
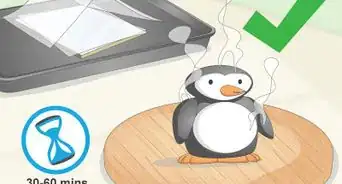
1Wait 12 to 15 minutes. Ask the person to remain still so the mask can air dry. As it starts to set, it may feel hard or a bit itchy. This is to be expected.
- Do not apply a hairdryer or a fan to the mask to speed up drying, as this can cause it to crack. It can also put your model’s skin at risk.
-
2Have the person move their mouth and jaw to help loosen the mask. Touch the mask to confirm it is dry to the touch. Then, ask the person to wiggle their mouth and jaw. They can also lift their eyebrows and crinkle their nose. This will help to loosen the mask.[5]
-
3Pull the mask slowly from their face. Once the mask has been loosened, hold your two hands out in front of the person’s face. Grip the sides of the mask and slowly lift it away. Move your fingers toward the center of the mask as you lift it off.[6]
- Do not pull or yank the mask off, as this can lead to injury. The mask should come off easily, partly due to the petroleum jelly on the person’s face.

Decorating the Mask
-
1Put ties on the mask. Use a hole punch to make one hole on either side of the mask, just below the eyes. Then, tie a thick ribbon or string to either hole. You can then secure the mask to your face, or someone else’s face, by tying the two ribbons or strings together at the back of the head.
-
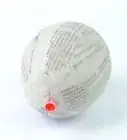
2Add a beak, horns, or bumps to the mask. Use any remaining plaster strips, or cut new ones, to make a beak on the nose of the mask. This is a good option if you want to decorate the mask like a bird’s head.
- You can also add horns to the top of the mask for a devil costume.
- Put large bumps and raised spots on the mask for a scary look.
-
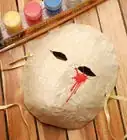
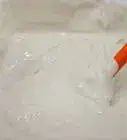
3Paint the mask. Apply a coat of gesso on the mask to smooth it out. Then, decorate it with acrylic paints or water-based paints. Add a design around the eyes and mouth. Put a pattern all over the mask.
- If you have plastered over the eyes and mouth on the mask, you may paint eyes and a mouth on the mask to give it a distinct look.
- You can then use a sealer over the mask once it has been painted to protect it and give it a glossy finish.
-
4Add feathers, glitter, or sequins to the mask. Use craft glue to attach different colored feathers to the mask for a festive look. You can also put glue on the mask and dip it in glitter for a sparkly look. Sequins are also a fun option.
-
5Let the decorated mask dry overnight. Once you have decorated the mask creatively, let it dry on a flat surface overnight. Then, wear it to a party, to an event, or just for fun.

Community Q&A
-
QuestionCan I get plaster masks wet?
 Community AnswerYou can get it wet if you put a waterproof sealer on top or use waterproof plaster.
 -
QuestionWhich ingredients will I need to make this mask?
 Community AnswerPlaster, petroleum jelly, hot water and patience is all you should really need, unless you want to decorate it.
 -
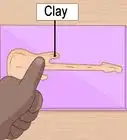
QuestionWhat type of clay should I use for a plaster mask, and where can I get it?
 Community AnswerDon't use clay because it will make the mask heavier. Use papier mâché -- it is light and airy and it is easy to bend.
Things You'll Need
- Bandage plaster
- Water
- Two bowls
- Newspaper or drop cloth
- Vaseline or petroleum jelly
- String or ribbon
- Gesso, if painting the mask
- Paints, feathers, glitter, sequins


References
- ↑ https://kinderart.com/art-lessons/multic/plaster-masks/
- ↑ http://janestreetclayworks.com/2011/02/05/make-a-plaster-mold-of-your-face-for-mask-making/
- ↑ http://janestreetclayworks.com/2011/02/05/make-a-plaster-mold-of-your-face-for-mask-making/
- ↑ http://janestreetclayworks.com/2011/02/05/make-a-plaster-mold-of-your-face-for-mask-making/
- ↑ http://janestreetclayworks.com/2011/02/05/make-a-plaster-mold-of-your-face-for-mask-making/
- ↑ http://janestreetclayworks.com/2011/02/05/make-a-plaster-mold-of-your-face-for-mask-making/
About This Article

If you want to make a plaster mask, rub petroleum jelly all over your model’s face so the mask will be easier to remove. When you’re ready to apply the mask, dip strips of bandage plaster in a bowl of warm water and lay the strips on the model’s face one at a time until their face is covered. It’s up to you whether to cover the person’s eyes and mouth, but you must leave breathing holes around the person’s nostrils. Wait 10-15 minutes for the mask to dry, then carefully remove the mask from the model’s face. For tips on decorating the mask, read on!